Air Fryer Chicken Breasts

The kitchen smells warm and inviting. You can hear the soft sizzle when the seasoning hits the hot air fryer basket. That sound means dinner is on its way, and the whole house perks up.
I remember the first time I used an air fryer for a weeknight chicken dinner. The kids came running for the smell. The chicken came out juicy, with a light crisp on the outside, and we had time to sit down together without rushing. That simple victory is what I want to share with you.
Why this works

Air frying is a family-friendly way to cook chicken breasts that saves time and keeps things simple. The air fryer uses hot circulating air to create a crispy outside and a tender inside. That means less oil, less mess, and faster clean up.
I test recipes in my home kitchen with my family. Over the years I have found the right temperatures and timing that give consistent results. This method keeps the centers juicy while giving a pleasant golden exterior that everyone at the table will love.
This recipe is perfect for busy nights. You can season the chicken ahead, pop it in the basket, and get side dishes ready while it cooks. It gives you more time to talk, set the table, and enjoy the meal together.
Process Overview
“This is where the magic happens—when the aroma fills the kitchen.”
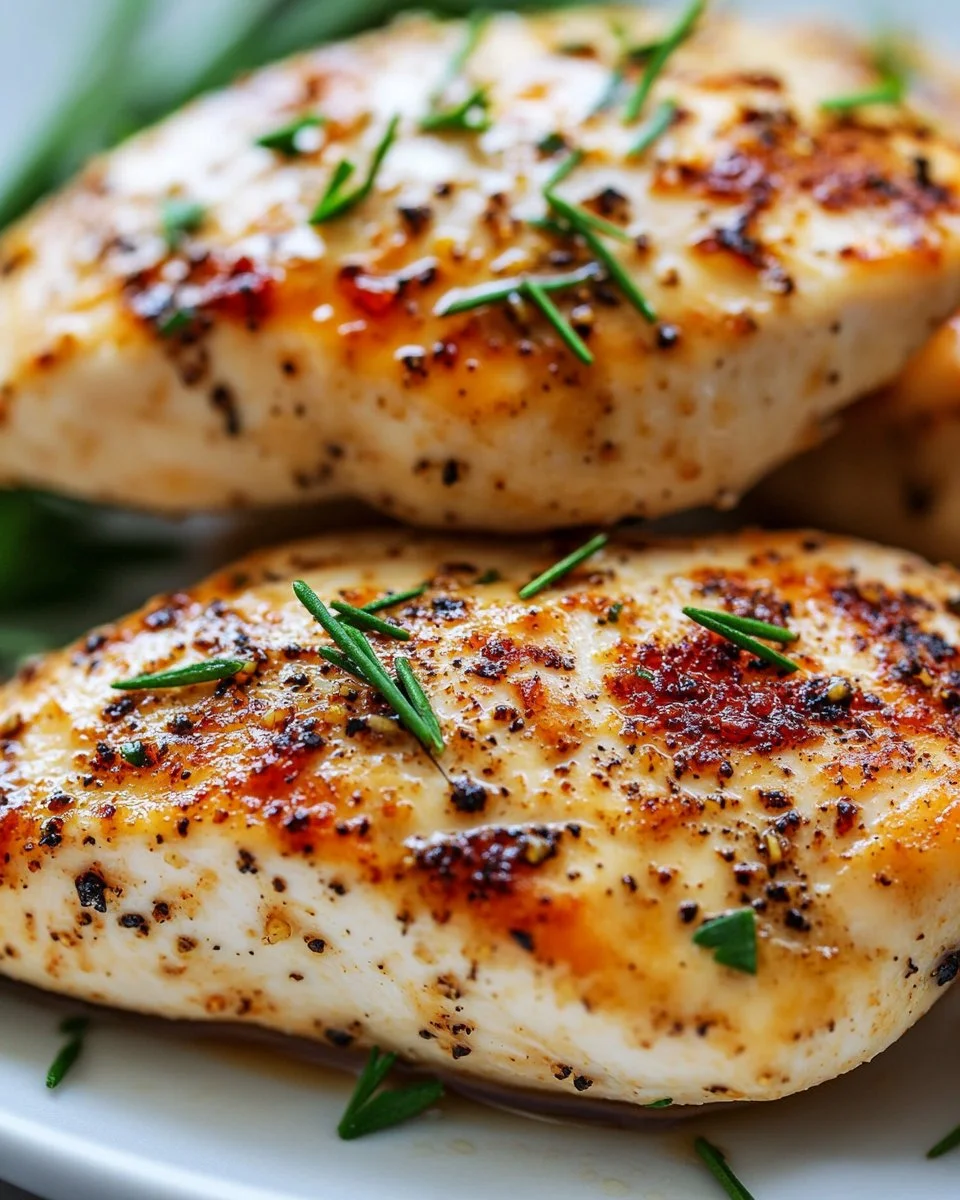
The process is straightforward. You preheat the air fryer, season the chicken, place it in a single layer, and cook until the internal temperature reaches 165°F. The cooking window is short enough to keep the meat juicy and long enough to develop a nice color.
I recommend using an instant read thermometer. It is the most reliable way to know your chicken is done. Resting the chicken for a few minutes after cooking lets the juices redistribute. That small pause makes a noticeable difference.
Quick timeline
- Prep and seasoning: 5 to 10 minutes.
- Cook time: 12 to 15 minutes depending on thickness.
- Rest: 3 to 5 minutes.
- Total time: About 25 minutes from start to table.
Ingredients
- 4 chicken breasts
- Tip: Use even-sized breasts for even cooking. If one is much thicker, pound it gently to match the others.
- 2 tablespoons olive oil
- Tip: Olive oil helps the seasoning stick and promotes browning. You only need a light coating.
- 1 teaspoon garlic powder
- Tip: Garlic powder gives a steady savory base. For fresh garlic, use one small clove minced, but remember it browns faster.
- 1 teaspoon onion powder
- Tip: Onion powder adds depth without adding moisture. It blends well with the garlic and paprika.
- 1 teaspoon paprika
- Tip: Paprika gives color and a mild smoky flavor. Use smoked paprika for a deeper taste, or sweet paprika if you prefer mildness.
- Salt and pepper to taste
- Tip: I use about 3/4 teaspoon kosher salt and 1/4 teaspoon black pepper for four breasts, then adjust to personal taste. Season both sides.
Personal note: I often double the seasoning when I make extra chicken for salads or meal prep. It holds up well in leftovers and freezes nicely.
Directions
-
Preheat the air fryer to 380°F (190°C).
- Encouragement: Preheating gives you a consistent start and helps the outside crisp quickly. Take a moment to set the table or chop a quick side salad.
-
In a bowl, mix the olive oil, garlic powder, onion powder, paprika, salt, and pepper.
- Encouragement: Use your hands or a spoon to combine until it looks spreadable. Smelling the seasoning mix is one of my favorite parts.
-
Coat the chicken breasts evenly with the seasoning mixture.
- Encouragement: Rub the mixture into both sides. A little patience here means every bite will be flavorful.
-
Place the chicken breasts in the air fryer basket in a single layer.
- Encouragement: Give each breast a little room. Crowding the basket can reduce air flow and affect crisping. If needed, cook in batches.
-
Cook for 12-15 minutes, flipping halfway through, until the chicken is cooked through and reaches an internal temperature of 165°F (75°C).
- Encouragement: Check with an instant read thermometer. When it hits 165°F, you know it is safe and perfectly juicy. Thicker breasts may need the full 15 minutes.
-
Allow to rest for a few minutes before slicing and serving.
- Encouragement: Resting is not wasted time. It allows the juices to redistribute so the slices remain moist. Use those few minutes to finish a side or pour drinks.
Serving
Slice the chicken against the grain and place it on a large platter for family-style serving. This way everyone can take the number of slices they prefer. It makes dinner feel relaxed and communal.
Pairings I love:
- Steamed green beans and roasted sweet potatoes for a balanced plate.
- Mixed greens with a lemon vinaigrette for a lighter meal.
- Rice bowls with roasted vegetables and a drizzle of your favorite sauce for a kid-friendly option.
For picky eaters, keep a small bowl of ketchup or BBQ sauce on the table. For adults, offer a light chimichurri or garlic yogurt sauce on the side. Let everyone customize their plate. That way the meal is flexible and everyone gets something they enjoy.
Storage
Cool the chicken to room temperature for no more than two hours before refrigerating. Store in an airtight container.
Refrigerator: Keeps well for 3 to 4 days. Slice it before storing for quick reheating or to use in salads and sandwiches.
Freezer: Wrap each breast tightly in plastic wrap and place in a freezer bag. Freeze up to 3 months. Thaw overnight in the refrigerator before reheating.
Reheat tips:
- Air fryer: 350°F for 3 to 5 minutes. This restores some crispness while keeping the inside moist.
- Oven: 325°F for about 10 minutes covered with foil, depending on thickness.
- Microwave: Use short 20 to 30 second bursts to avoid drying. Add a splash of water and cover with a microwave-safe lid to retain moisture.
Label containers with the date so you always know what is freshest. I keep a small permanent marker and masking tape handy for quick labeling.
Kitchen Notes
- Use an instant read thermometer for consistent results.
- If breasts are uneven, fold the thin end under to even the thickness or gently pound to match.
- Lightly oil the basket or spray with a nonstick spray if your model tends to stick.
- Cook in one layer. If you must cook in batches, keep finished pieces loosely tented with foil to stay warm.
- Try to handle the chicken as little as possible after cooking to preserve juices.
Variations
- Kid-friendly mild: Reduce the paprika and add a pinch of brown sugar for a slightly sweet glaze kids enjoy.
- BBQ style: Brush with 2 tablespoons of your favorite BBQ sauce in the last 2 minutes of cooking for a sticky finish.
- Lemon herb: Add 1 teaspoon dried oregano and replace paprika with lemon zest for a bright flavor.
- Spicy: Add 1/2 teaspoon cayenne pepper or 1 teaspoon chili powder to the seasoning mix for heat.
- Keto and low carb: Serve over cauliflower rice or with roasted broccoli for a filling low-carb meal.
- Gluten-free: This recipe is naturally gluten-free. Check your seasonings and sauces to confirm they are labeled gluten-free if sensitivity is a concern.
Mix and match these tweaks to suit your family. Small changes can keep this recipe fresh and interesting over time.
FAQ
Q: Can I use frozen chicken breasts?
A: It is better to thaw before cooking for the most even result. If you must cook from frozen, increase the time and check the internal temperature often. Make sure it reaches 165°F.
Q: How do I stop chicken from drying out?
A: Use even thickness, do not overcook, and rest the chicken after cooking. An instant read thermometer is the best tool to prevent overcooking.
Q: Can I bread the chicken for a crunchy coating?
A: Yes. Lightly coat the breasts in a beaten egg and then a mixture of panko and seasonings. Spray the breading with oil and air fry at the same temperature, watching closely for browning.
Q: What if my air fryer runs hot or cool?
A: All air fryers run a little differently. Start checking at the lower end of the time range. Make notes of timing for your model so you get consistent results.
Q: Can I double the recipe for a larger family?
A: Yes, but do not crowd the basket. Cook in batches if needed. Keep finished pieces loosely covered to stay warm while the next batch cooks.
Conclusion
I hope this recipe becomes a go-to for your family weeknights. It is simple, reliable, and flexible enough to please kids and adults alike. Cooking should make you smile, not add stress, and this air fryer method gives you more time together around the table.
For another take on juicy air fryer chicken, I often reference this helpful guide from a fellow recipe tester at Air Fryer Chicken Breast Recipe (Tender & Juicy!). If you enjoy rich, family-tested variations, take a look at this popular collection from a well-known food writer at Best Air Fryer Chicken Breasts Recipe – The Pioneer Woman.
Happy cooking from my kitchen to yours. If your family loves it, come back and tell me how you served it.

Juicy Air Fryer Chicken Breasts
Ingredients
Method
- Preheat the air fryer to 380°F (190°C).
- In a bowl, mix the olive oil, garlic powder, onion powder, paprika, salt, and pepper.
- Coat the chicken breasts evenly with the seasoning mixture.
- Place the chicken breasts in the air fryer basket in a single layer.
- Cook for 12-15 minutes, flipping halfway through, until the chicken is cooked through and reaches an internal temperature of 165°F (75°C).
- Allow to rest for a few minutes before slicing and serving.
- Slice the chicken against the grain and place it on a large platter for family-style serving.