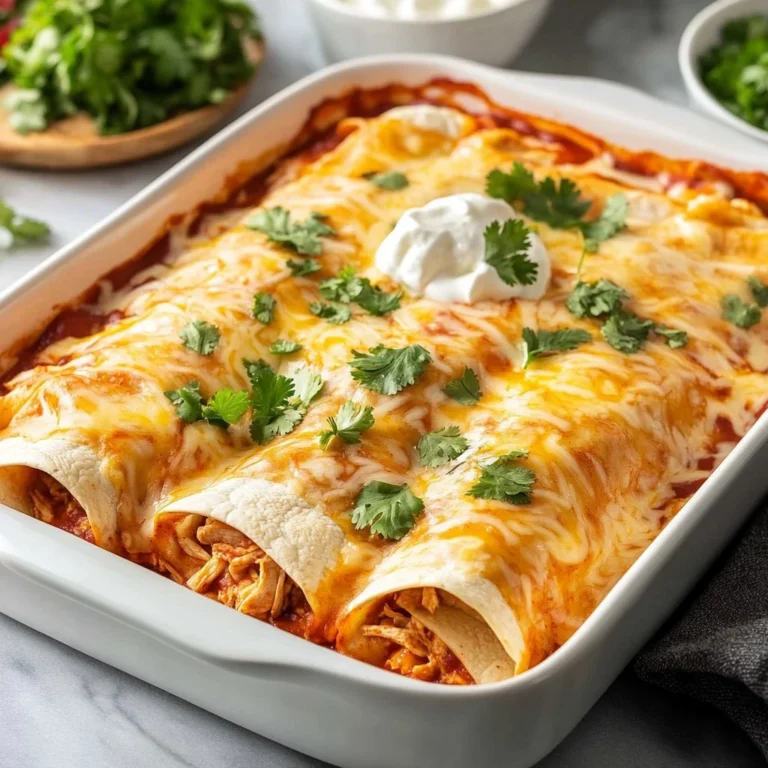
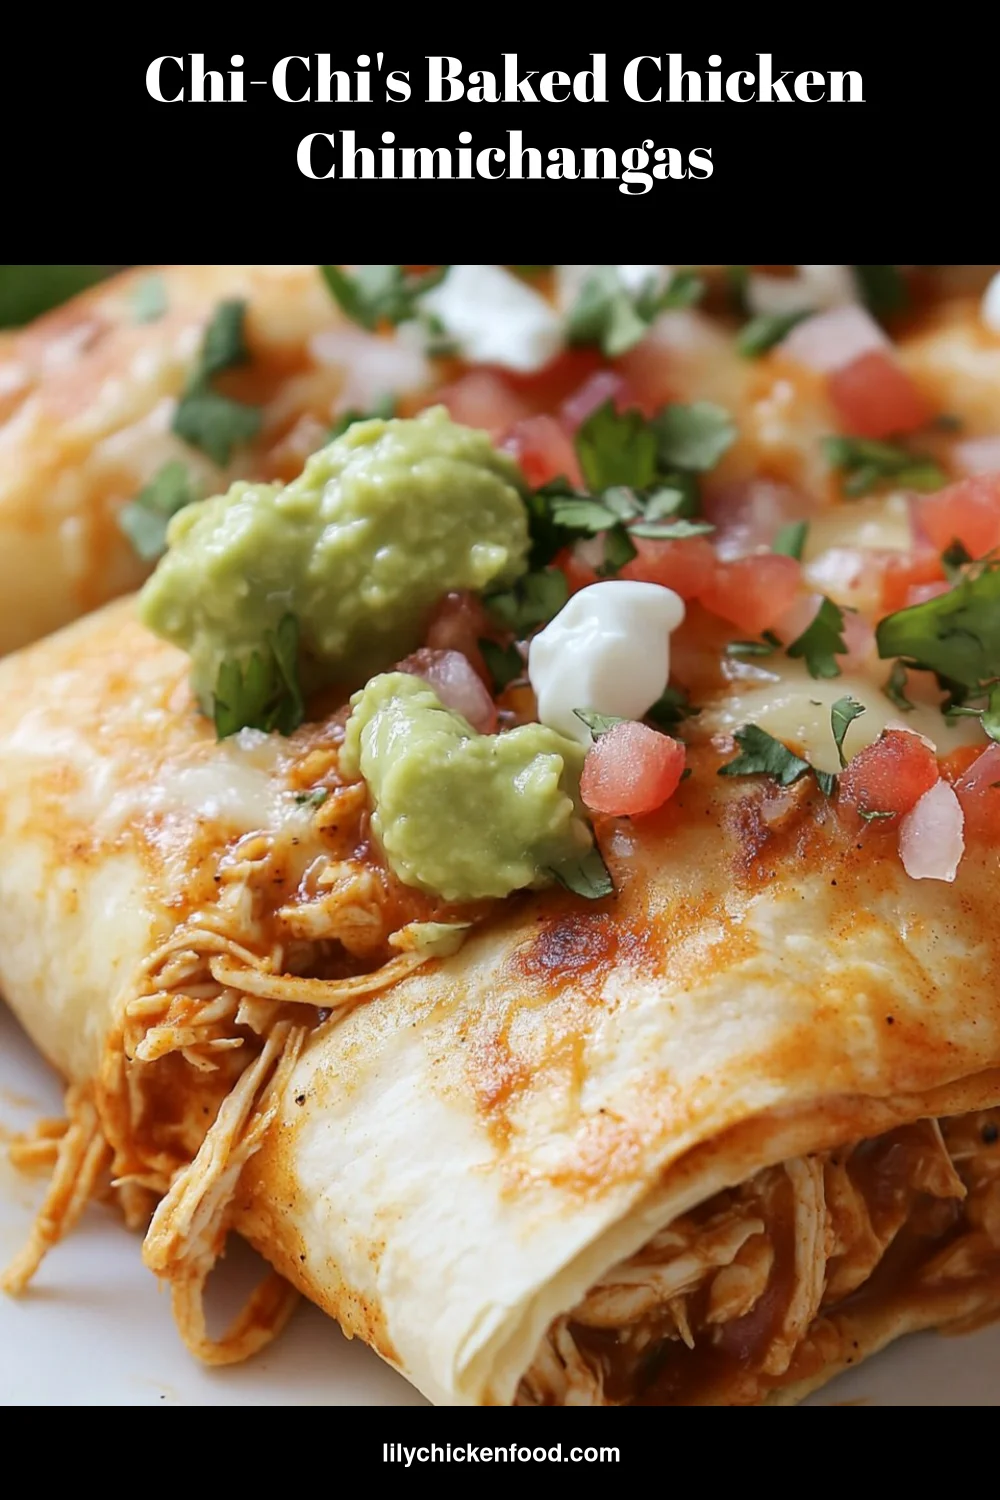
Chi-Chi’s Baked Chicken Chimichangas
The smell of warm tortillas in the oven takes me right back to a busy kitchen filled with laughter and clinking bowls. You hear the soft sizzle when the filling hits a warm skillet. You smell spices and melted cheese blending into something comforting.
These Chi-Chi’s style baked chicken chimichangas are one of those family meals that feels like a hug on a plate. They are easy to assemble, forgiving if you are short on time, and they feed a crowd without fuss. My kitchen often smells like this on Sunday afternoons. The kids help roll the tortillas, and someone always claims the crispy corner pieces.
I want to show you how to make a reliable, family-friendly version that saves time without sacrificing flavor. I have tested this recipe many times. I will share tips from my own kitchen to help you get it right the first time.
Why this works
This recipe is built for busy families. Using cooked shredded chicken and refried beans gives you instant protein with minimal prep. The filling holds together well, so rolling is simple. Baking instead of frying saves hands-on time and makes cleanup easier.
The spices are gentle and kid friendly. You can boost the heat at the table. Baking makes the chimichangas crisp and golden without standing over a pan of oil. That means you can chat with family, set the table, or get a quick salad ready.
These chimichangas reheat beautifully. They travel to potlucks and work well as leftovers. If you want a dinner that stretches across meals and keeps everyone happy, this is a reliable choice.
Process Overview
“This is where the magic happens—when the aroma fills the kitchen.”
I like to think of the process in three clear stages. First, prepare the filling. Second, assemble the chimichangas. Third, bake until golden and serve warm.
I keep a simple workflow. Lay out the tortillas, scoop the filling, fold, and place on a lined pan. A light brush of oil is all you need for a golden finish. The oven does the heavy lifting.
Now let us look at the ingredients and a few personal tips to help you personalize this dish.
Ingredients
-
2 cups cooked shredded chicken
Tip: Use rotisserie chicken for a time-saver. If you have leftover roasted chicken, shred it with two forks for quick prep. -
1 cup refried beans
Tip: Canned refried beans are fine. Warm them briefly so they mix easily with the chicken. -
1 cup shredded cheese (cheddar or Mexican blend)
Tip: Freshly shredded cheese melts better than pre-shredded. Mix cheddar and Monterey Jack for creaminess. -
1/2 cup salsa
Tip: Use a mild salsa for kids and a chunkier one for adults. If your salsa is watery, drain a little before mixing. -
1 teaspoon chili powder
Tip: This adds gentle heat and color. Taste the filling and adjust to your family’s heat tolerance. -
1/2 teaspoon cumin
Tip: Toast whole seeds briefly and grind for a brighter flavor if you have time. -
8 large flour tortillas
Tip: Warm the tortillas for 15 seconds in the microwave wrapped in a damp towel. They will roll without tearing. -
Cooking spray or oil for brushing
Tip: Brushing with a little oil helps the tortillas crisp evenly. Use an oil with a neutral flavor. -
Sour cream and guacamole for serving (optional)
Tip: Keep toppings separate so everyone can customize their plate. Add a squeeze of lime to guacamole for fresh brightness.
These ingredients form a flexible template. I often double the chicken for larger families or add a handful of corn for texture. The amounts are forgiving and easy to scale.
Directions
-
Preheat the oven to 375°F (190°C).
Take a moment to line a baking sheet with parchment paper. This keeps cleanup simple and protects the bottom from sticking. -
In a large bowl, combine the shredded chicken, refried beans, cheese, salsa, chili powder, and cumin.
Mix until the flavors blend. Taste a small spoonful and adjust the salsa or spices to your liking. You can do this while the oven heats. -
Place about 1/4 cup of the chicken mixture in the center of each tortilla.
Keep the fills even so they cook uniformly. A small scoop works well if you want neater chimichangas. -
Fold the sides of the tortilla over the filling and roll it up tightly.
Tuck the ends in as you roll to keep fillings secure. Don’t worry if they are not perfect. Practice makes faster rolls. -
Place the chimichangas seam-side down on a baking sheet lined with parchment paper.
Give them a little space so air can circulate. This helps each one crisp up evenly. -
Lightly spray the tops with cooking spray or brush with oil.
A light coat of oil promotes even browning. You will get a golden, crispy texture without deep frying. -
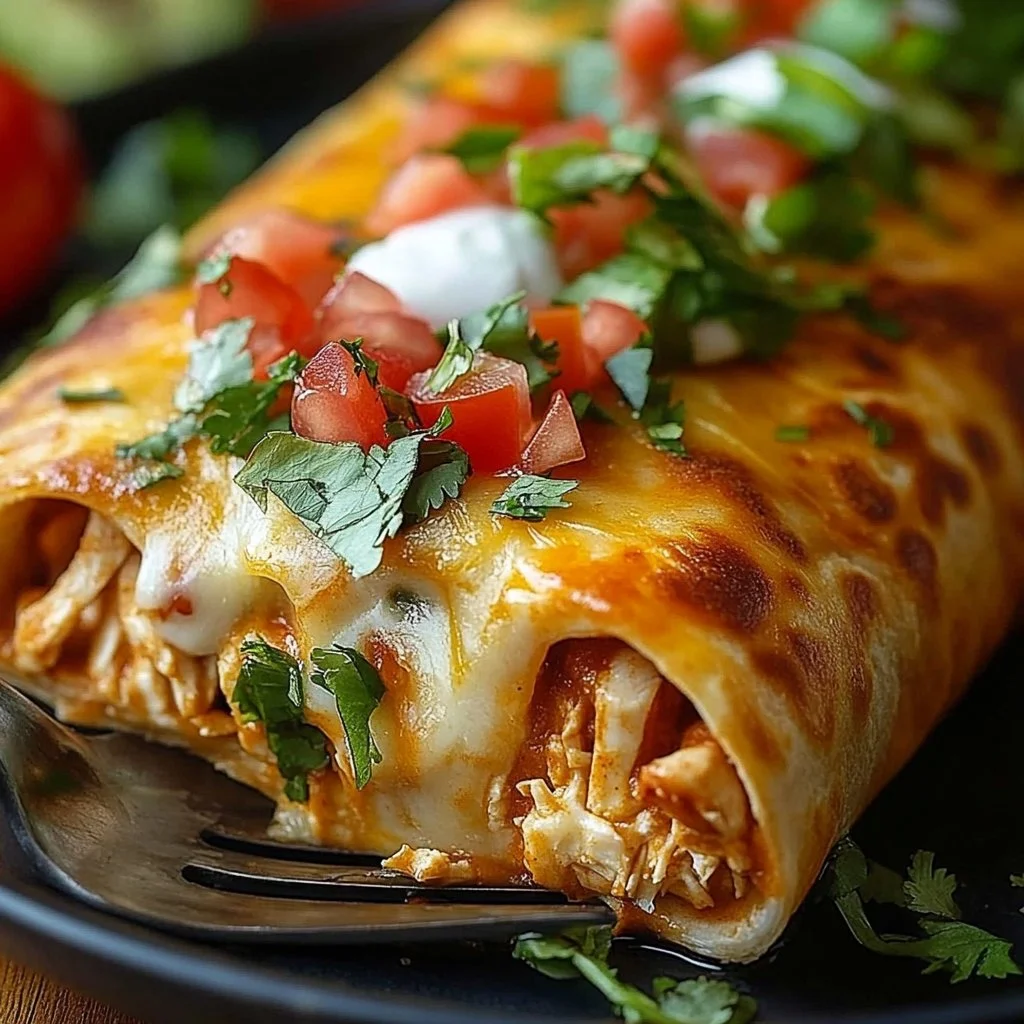
Bake in the preheated oven for 20-25 minutes, or until golden brown and crispy.
Peek in around 20 minutes and rotate the sheet if your oven has hot spots. Let the tops reach a warm, deep color. -
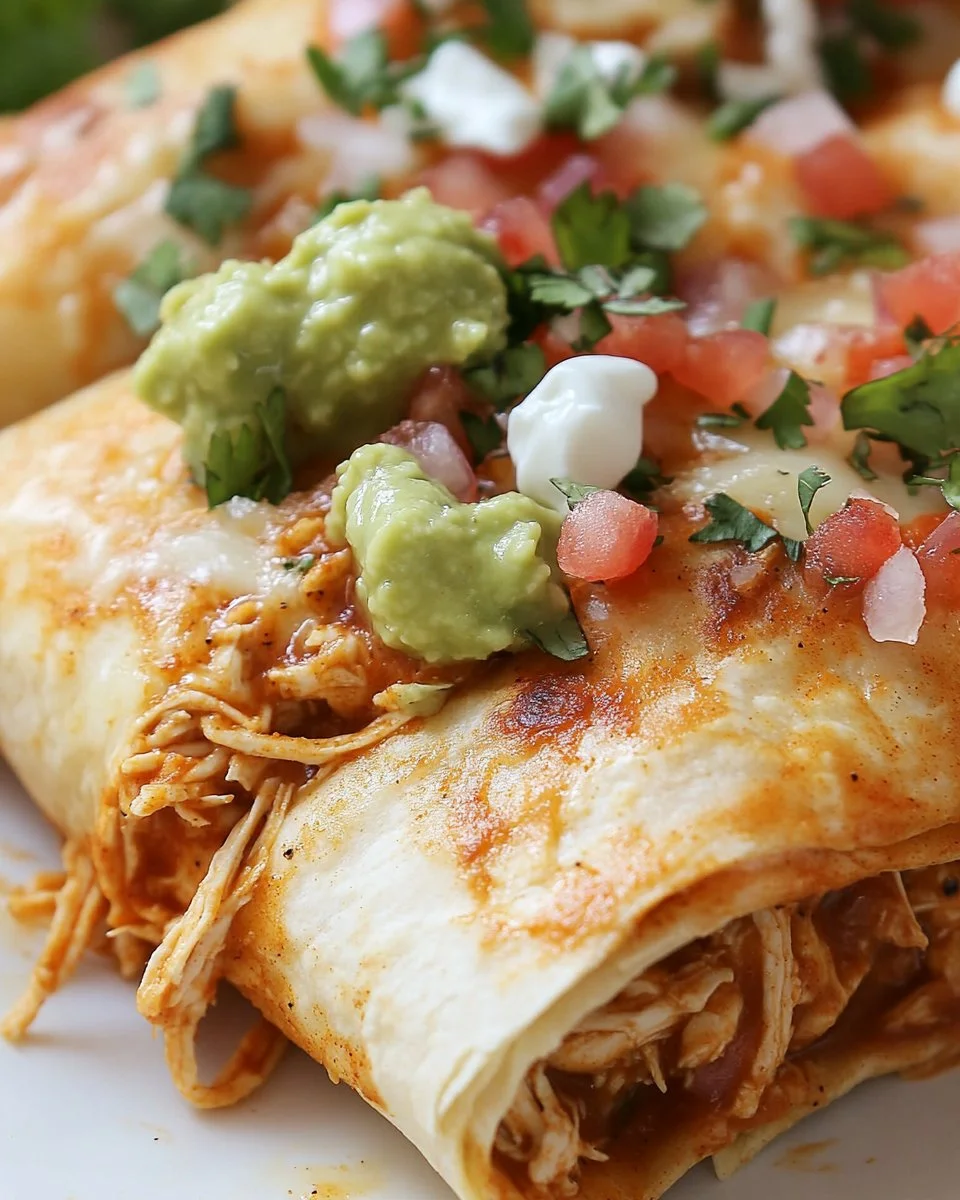
Serve with sour cream and guacamole if desired.
Place bowls of toppings at the table so everyone can pick their favorites. Enjoy the moment when the family digs in together.
Each step is designed to be calm and steady. The recipe does not demand precision on the level of baking breads, so you can relax and cook with confidence.
Serving

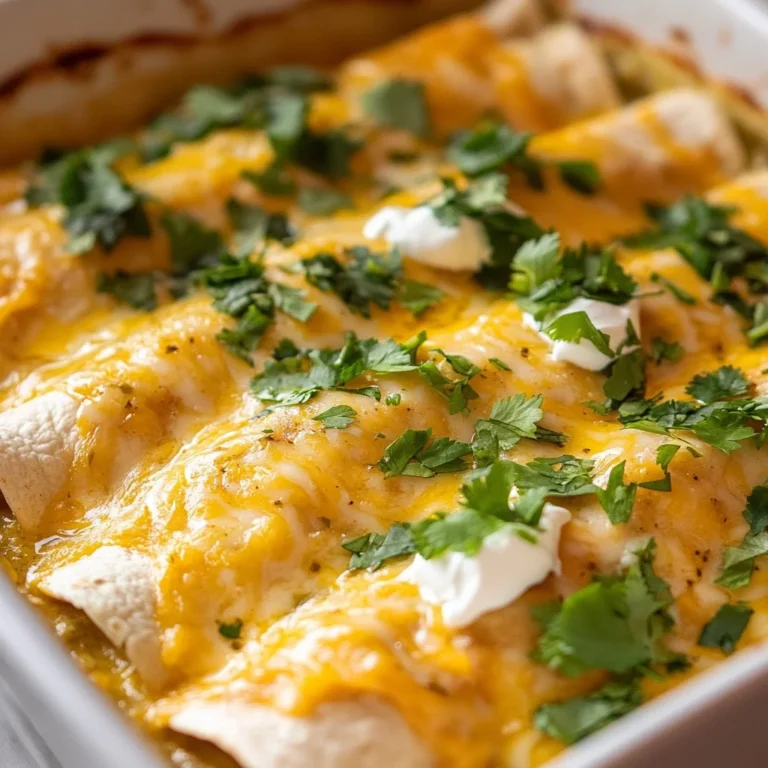
I serve these chimichangas family-style on a large platter. Arrange them so the golden sides show. Place bowls of sour cream, guacamole, extra salsa, and chopped cilantro around the platter.
A simple green salad or a quick slaw balances the meal with brightness. For kids, offer a small side of rice or tortilla chips. For adults, a wedge of lime or a drizzle of hot sauce lets them customize heat.
Let everyone assemble their plate. Kids love dipping and adding toppings. This makes dinner more interactive and helps picky eaters build a meal they will enjoy.
If you want a party display, cut chimichangas in half and fan them out. The cheese pull and colorful filling make a great presentation.
Storage
Leftovers keep well and reheat nicely.
-
Fridge: Store chimichangas in an airtight container for up to 3 days. Let them cool to room temperature before refrigerating to avoid sogginess.
-
Freezer: Wrap individually in foil or plastic wrap and place in a freezer bag for up to 2 months. Label with the date.
-
Reheat from fridge: Warm in a 350°F oven for 10 to 15 minutes until heated through and crisped. Using foil for the first few minutes prevents over-browning.
-
Reheat from frozen: Thaw overnight in the fridge if possible. Heat in a 375°F oven for 20 to 25 minutes from thawed, or 30 to 35 minutes from frozen, until hot inside and crisp outside.
Avoid microwaving if you want to keep the crisp texture. If you must use a microwave, zap briefly to warm then finish in a toaster oven or oven to regain crunch.
Kitchen Notes
- Use rotisserie chicken to cut active prep time in half. It is my go-to shortcut on busy nights.
- Warm tortillas briefly in the microwave or on a dry skillet to make rolling easy.
- Line your baking sheet with parchment paper for an easy cleanup.
- If you like extra crunch, brush with oil and sprinkle a little additional cheese before baking.
- For meal prep, make the filling ahead and keep it chilled. Assemble just before baking for best texture.
These small tips save time and add consistency to the recipe. I use them every week.
Variations
- For picky eaters: Hold back the salsa or use a mild version. Serve toppings separately so each person can add what they like.
- Vegetarian option: Replace chicken with shredded roasted sweet potato or grilled peppers and onions. Add more beans and a little corn.
- Lower-carb option: Use low-carb or whole wheat tortillas. You can also make a chimichanga bowl with all the filling over rice or greens.
- Extra spice: Add chopped jalapeno, a pinch of cayenne, or a few dashes of hot sauce to the filling. Start small and add more to taste.
- Cheesy bake: Fold in extra cheese into the filling and sprinkle on top before baking for a gooier finish.
These variations help this recipe adapt to many diets and preferences. The structure stays the same, and you can tweak flavors to suit your family.
FAQ
Q: Can I make these ahead of time?
A: Yes. Prepare the filling a day ahead and refrigerate. Roll the chimichangas and keep them covered in the fridge for up to one day. Brush with oil and bake when you are ready.
Q: Can I freeze chimichangas before baking?
A: Yes. Place rolled chimichangas on a tray to flash freeze for an hour, then transfer to a freezer bag. When ready to bake, add a few extra minutes to the baking time.
Q: How do I keep chimichangas from getting soggy?
A: Avoid overfilling and serve soon after baking. Warm tortillas before rolling and use parchment paper to promote crisping. Reheating in the oven restores crunch.
Q: Can I use corn tortillas?
A: Corn tortillas are more fragile and can crack when rolled. If you prefer corn, warm them gently and consider folding without rolling, or make a chimichanga-style casserole instead.
Q: Are these child-friendly?
A: Yes. The flavors are mild and you can control spice levels. Let kids choose toppings and help assemble to make dinner fun.
These answers reflect tests from my kitchen and common questions from family dinners. I aim to anticipate what you might wonder before you start cooking.
Conclusion
Thank you for cooking with me today. I hope this recipe becomes a weekday favorite in your home. If you love ideas for using leftovers, try this Baked Chicken Chimichangas (great leftover recipe!) for another take on a family classic. For a different perspective and more variations, I also like this trusted Baked Chicken Chimichangas Recipe – Allrecipes.
Happy baking and enjoy the laughter at your table. From my family to yours, Lily

Baked Chicken Chimichangas
Ingredients
Method
- Preheat the oven to 375°F (190°C).
- Line a baking sheet with parchment paper.
- In a large bowl, combine the shredded chicken, refried beans, cheese, salsa, chili powder, and cumin. Mix well.
- Place about 1/4 cup of the chicken mixture in the center of each tortilla.
- Fold the sides of the tortilla over the filling and roll it up tightly.
- Place the chimichangas seam-side down on the baking sheet.
- Lightly spray the tops with cooking spray or brush with oil.
- Bake for 20-25 minutes, or until golden brown and crispy.
- Serve with sour cream and guacamole if desired.