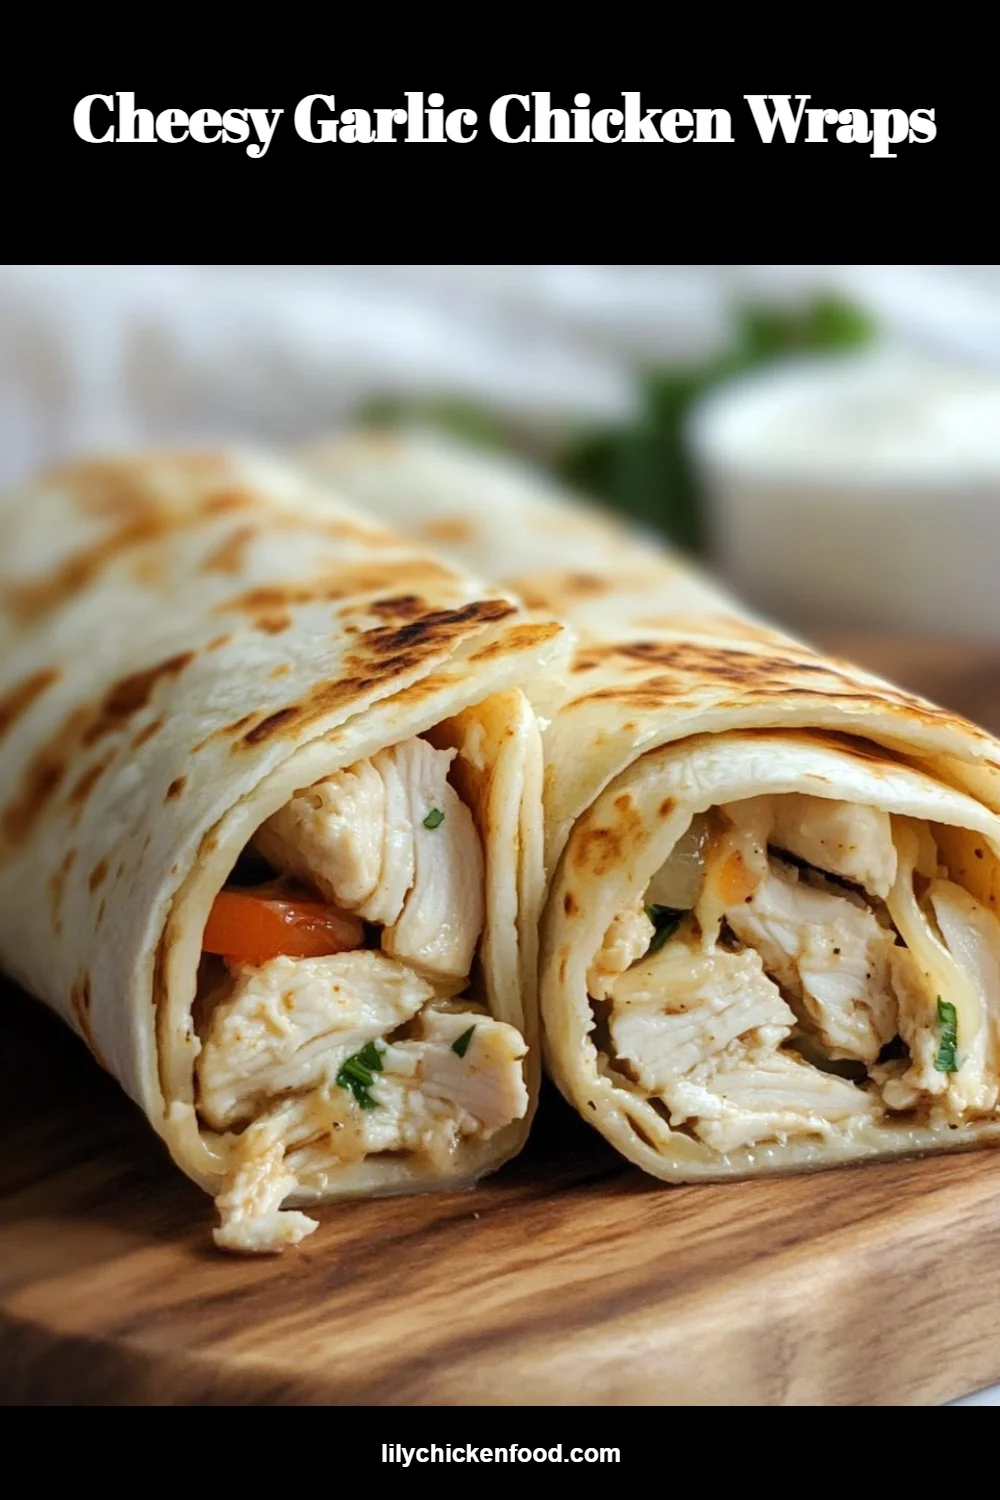
Cheesy Garlic Chicken Wraps
I remember one evening when the rain tapped on the kitchen window and my kids were folding napkins at the table, humming to a silly song they learned at school. The smell of garlic and butter filled the room and something warm bubbled in the skillet. That small, cozy chaos is where these Cheesy Garlic Chicken Wraps were born, between laughter and a quick, satisfied sigh when everyone took the first bite.
Why This Cheesy Garlic Chicken Wraps Feels Like Home
There is something about garlic and melty cheese that instantly feels like comfort on a plate. These Cheesy Garlic Chicken Wraps taste like a warm hug after a long day. They combine tender chicken, creamy cheeses, and a touch of parsley to brighten things up.
This recipe is forgiving and flexible, which is why I reach for it on busy weeknights. It uses simple pantry items, cooks fast, and the assembly is almost meditative if you let it be. Meanwhile, the golden crust from a quick sear in the pan gives texture that kids and adults both adore. 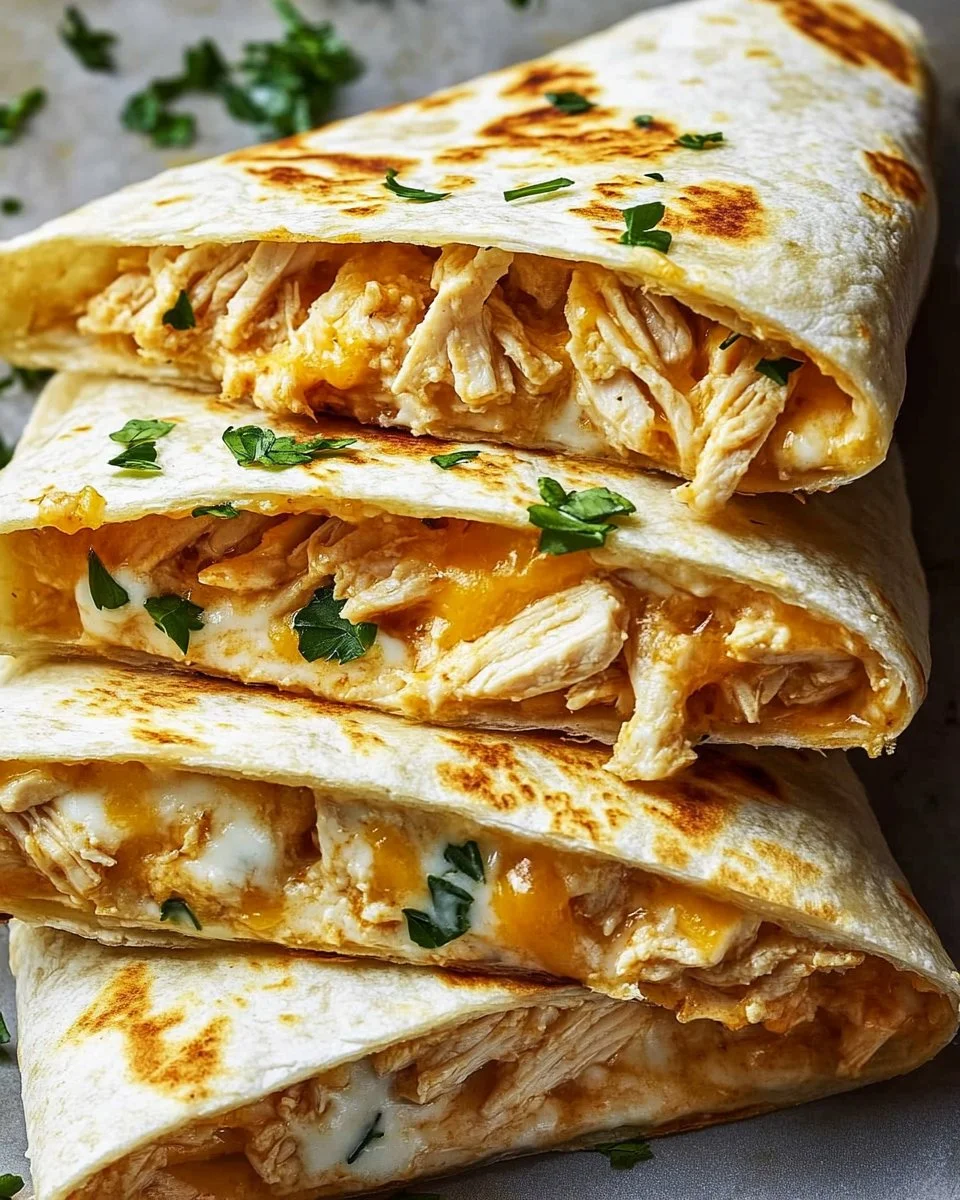
I like to think of it as the bridge between a sandwich and a cozy casserole. It feeds the family without fuss and leaves time for homework help or a quick phone call to a friend. It is the sort of meal that keeps conversation flowing at the table.
How to Make Cheesy Garlic Chicken Wraps, The Heartwarming Way
“This is where the magic happens—when the aroma fills the kitchen and my kids come running in, asking ‘Is it ready yet?’”
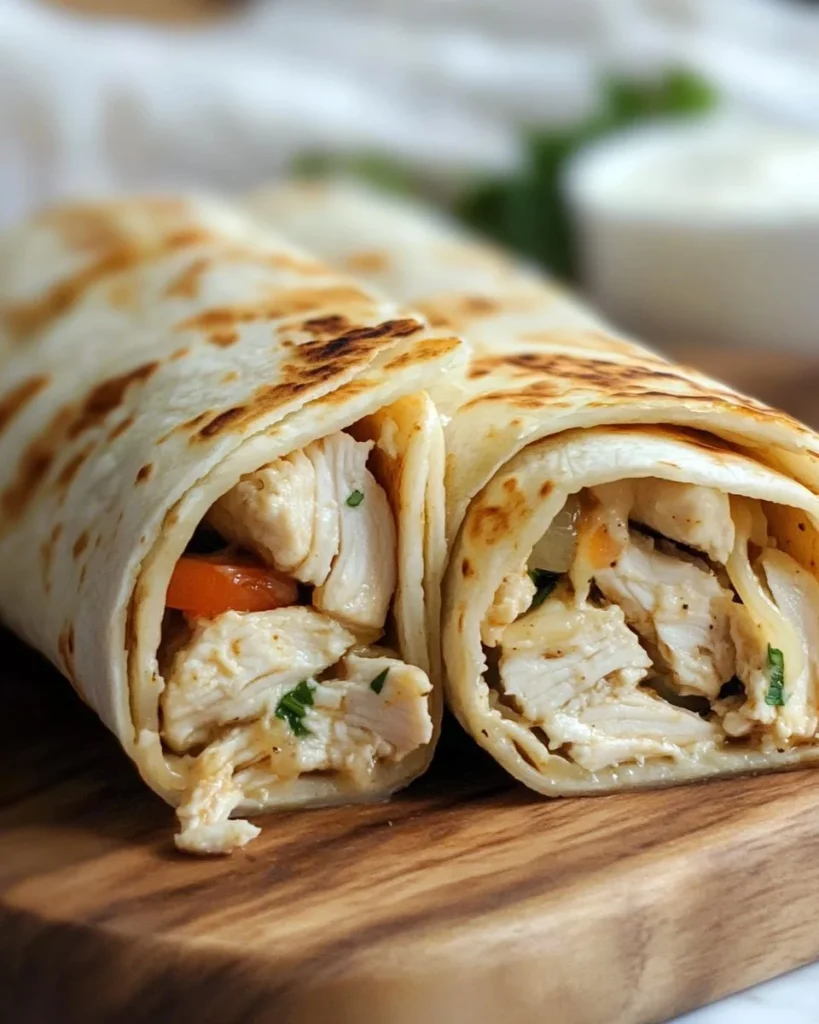
The process is simple and comforting. You mix tender cooked chicken with cheeses and gentle seasonings until the filling is creamy and cohesive. Then you wrap, brush with garlic butter, and toast until the wrap is crisp and the cheese inside is luxuriously melted.
Watch for visual cues: the filling should be creamy and slightly glossy. When toasting, look for a warm golden brown on the tortilla and tiny spots where cheese bubbles through. The aroma of garlic and melted cheese is your best sign that dinner is moments away.
Step-by-Step Overview: Keeping It Simple
-
In a mixing bowl, combine chicken, garlic powder, onion powder, salt, pepper, mozzarella, cheddar, cream cheese, mayonnaise, and parsley. Mix until creamy and cohesive.
A little stirring helps the cream cheese warm and bind everything. This is where the flavors get friendly with each other. -
Place tortillas on a flat surface. Spoon 1/4 of the filling into the center of each. Add optional vegetables if desired. Fold sides inward and roll tightly from the bottom to form wraps.
Keep the filling centered and compact so the wrap rolls neatly. It keeps the filling from escaping while toasting. -
In a small bowl, mix melted butter with minced garlic. Brush the outside of each wrap generously with the mixture.
Don’t be shy with the garlic butter. It browns beautifully and adds a buttery, savory crunch. -
Heat a skillet over medium heat. Toast each wrap seam-side down for 2–3 minutes per side until golden and crisp, and the cheese is melted inside.
A little browning builds flavor, just like my grandmother showed me. Watch the pan so they do not burn. -
Slice each wrap in half and serve warm with a dipping sauce of choice such as ranch or garlic aioli.
Let them rest for a minute so the filling settles. Then slice and share. The kids love dipping; I love the smiles.
Ingredients You’ll Need
2 cups cooked shredded or chopped chicken
1 tablespoon olive oil
1 teaspoon garlic powder
1/2 teaspoon onion powder
Salt and black pepper, to taste
1 1/2 cups shredded mozzarella cheese
1/2 cup shredded cheddar cheese
1/4 cup softened cream cheese
2 tablespoons mayonnaise
2 tablespoons chopped fresh parsley or 1 teaspoon dried
4 large flour tortillas
2 tablespoons melted butter
1 teaspoon minced garlic
Optional: Baby spinach
Optional: Shredded lettuce
Optional: Sliced tomatoes
Don’t skip the fresh herbs when you can. They lift the whole dish. But if your fridge is missing parsley, dried will do. Use what’s in your fridge; this is about creativity, not perfection. If you are feeding little ones, take out the tomatoes or leave them on the table for individual choice.
Serving Cheesy Garlic Chicken Wraps with Love
We usually set the wraps in the middle of the table on a large platter. Everyone helps themselves and the first round never lasts long. I like to offer a small bowl of ranch, a jar of store-bought garlic aioli, and a simple salsa for those who want a tangy contrast.
Sides that make this shine: a crisp green salad, a tray of carrot sticks, or a warm bowl of roasted potatoes. For a lighter weeknight, pair the wraps with a lemony arugula salad; for busy nights, a bagged coleslaw makes a perfect companion. My husband always reaches for extra parsley and a little hot sauce. It’s beautiful watching each person make the wrap their own.
Before the kids were older, we would each add our own veggies and then fold. Now they crowd the table and argue playfully over the last half. It’s part of the ritual. 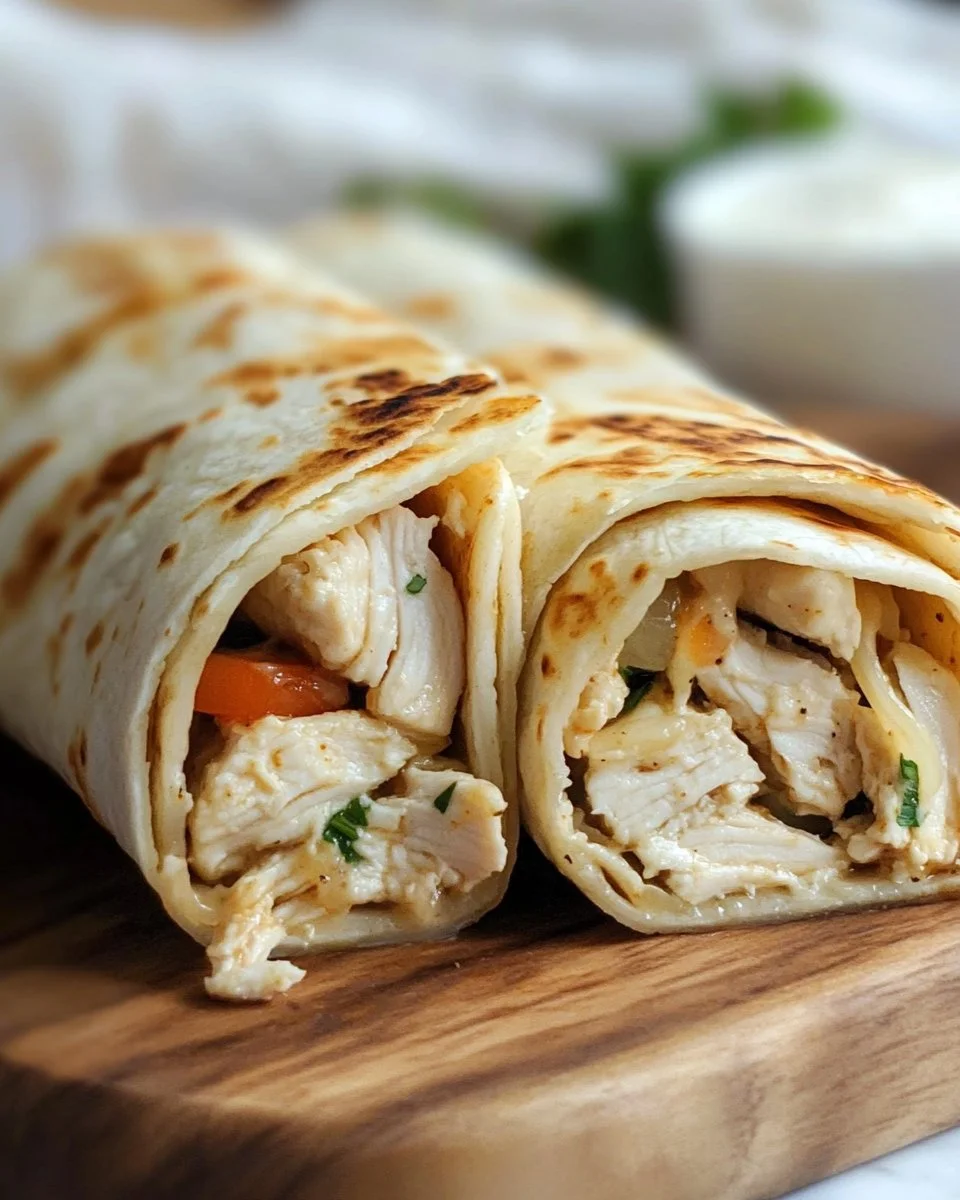
Storage & Reheat Tips (Keeping the Goodness)
Store leftover wraps in an airtight container in the refrigerator for up to 3 days. If you need to freeze them, wrap individually in foil and place in a freezer bag; they keep well for up to 2 months.
To reheat, the oven or toaster oven is best. Preheat to 350 F, unwrap any foil, and warm for 10 to 15 minutes until heated through and crisp on the outside. The oven brings back that just-made warmth and texture.
For a quicker option, the microwave works for a quick lunch. Heat on medium power for 45 to 60 seconds, then finish in a hot skillet for 1 minute per side to restore the crisp. Honest and practical advice: the microwave is fine for convenience, but the skillet or oven will give you the crunchy finish that makes my family cheer.
My Kitchen Notes & Shortcuts
- Use rotisserie chicken to save time. It adds flavor and speeds up prep without sacrificing taste.
- Mix the filling a little ahead and refrigerate for up to an hour to let flavors meld. It makes assembly faster and less frantic.
- If you want a lighter version, swap mayo for plain Greek yogurt. The texture stays creamy and it adds a subtle tang.
- Get the kids involved with folding or brushing the garlic butter. It is their favorite job and it makes dinner a shared moment.
- For extra crunch, add thinly sliced bell peppers or cucumbers after toasting.
These small hacks keep the heart of the recipe while shaving off the extra minutes that busy nights demand.
Family-Friendly Variations
Make it your own with these small changes that each tell a different story at the table.
- Lighter version: Use low-fat cheeses and Greek yogurt instead of mayonnaise. Add extra baby spinach for color.
- Spicy twist: Stir in a tablespoon of chipotle in adobo or sprinkle crushed red pepper into the filling. Serve with lime wedges.
- Kid-approved cheesy: Increase the mozzarella and leave out the parsley for picky eaters. Serve with their favorite dipping sauce.
- Mediterranean spin: Add chopped sun-dried tomatoes and a sprinkle of oregano. Swap cheddar for feta and serve with tzatziki.
- Veggie-forward: Replace half the chicken with sautéed mushrooms or roasted cauliflower for a more plant-forward meal.
Invite your family to pick a variation each week. It keeps dinner exciting and gives everyone a voice.
FAQs About Cheesy Garlic Chicken Wraps
Can I make this ahead for a busy week?
Absolutely. You can assemble the filling a day ahead and store it in the fridge. Fill and roll the wraps right before toasting for the best texture. Letting it sit for an hour lets the flavors get to know each other, just like an old family recipe.
What type of chicken is best?
Cooked, shredded rotisserie chicken is the easiest and tastiest shortcut. Leftover baked or grilled chicken also works well. Aim for tender, shredded pieces so the filling mixes evenly.
Can I freeze these?
Yes. Wrap each wrap tightly in foil and then put them into a freezer bag. They keep for up to two months. Reheat from frozen by baking at 350 F for about 20 to 25 minutes, or until heated through.
How do I keep the tortillas from getting soggy?
Brush the outside with garlic butter and toast them seam-side down first. That seals the seam and gives a protective, flavorful crust. Also, avoid watery fillings; drain any wet vegetables before adding.
Is there a low-carb version?
You can use low-carb tortillas or large collard leaves as a wrap. Toast gently in a skillet to warm and seal, though the texture will be slightly different from a flour tortilla.
One Final Thought from My Kitchen
I hope these Cheesy Garlic Chicken Wraps find their way into your weekly rotation. They are easy, forgiving, and full of the sort of flavors that invite conversation. Give the kids a job, set the timer, and let the aroma do the rest. It is easier than it looks, and the result is often better than you expect.
Conclusion
If you want a recipe to turn to when life is full and you still want dinner to feel special, try this Cheesy Garlic Chicken Wraps recipe and see how it fits in your family’s stories. For an extra reference and a slightly different take, I sometimes look at other versions like Cheesy Garlic Chicken Wraps – Cooked & Loved for inspiration, and I also enjoy comparing flavors and techniques in Cheesy Chicken Wraps | Spicedblog. Until next time, happy cooking and may your kitchen be full of warmth and laughter.
Cheesy Garlic Chicken Wraps
Ingredients
Method
- In a mixing bowl, combine chicken, garlic powder, onion powder, salt, pepper, mozzarella, cheddar, cream cheese, mayonnaise, and parsley. Mix until creamy and cohesive.
- Place tortillas on a flat surface. Spoon 1/4 of the filling into the center of each. Add optional vegetables if desired. Fold sides inward and roll tightly from the bottom to form wraps.
- In a small bowl, mix melted butter with minced garlic. Brush the outside of each wrap generously with the mixture.
- Heat a skillet over medium heat. Toast each wrap seam-side down for 2–3 minutes per side until golden and crisp, and the cheese is melted inside.
- Slice each wrap in half and serve warm with a dipping sauce of choice such as ranch or garlic aioli.