Best 23 Chicken and Macaroni Recipes for Delicious Meals
When it comes to comfort food, few combinations can rival the unbeatable duo of chicken and macaroni. As I explored the endless possibilities, I discovered that this dynamic pairing can be transformed into mouthwatering meals that are perfect for any occasion. In this comprehensive guide, I’ll share my top 23 chicken and macaroni recipes that not only promise deliciousness but also offer a variety of flavors—from smoky BBQ to sweet and spicy delights. Whether you're weeknight cooking or planning a cozy weekend feast, my curated recipes will inspire you to create satisfying dishes that your family will love. Get ready to dive into a world of culinary creativity and elevate your mealtime game!
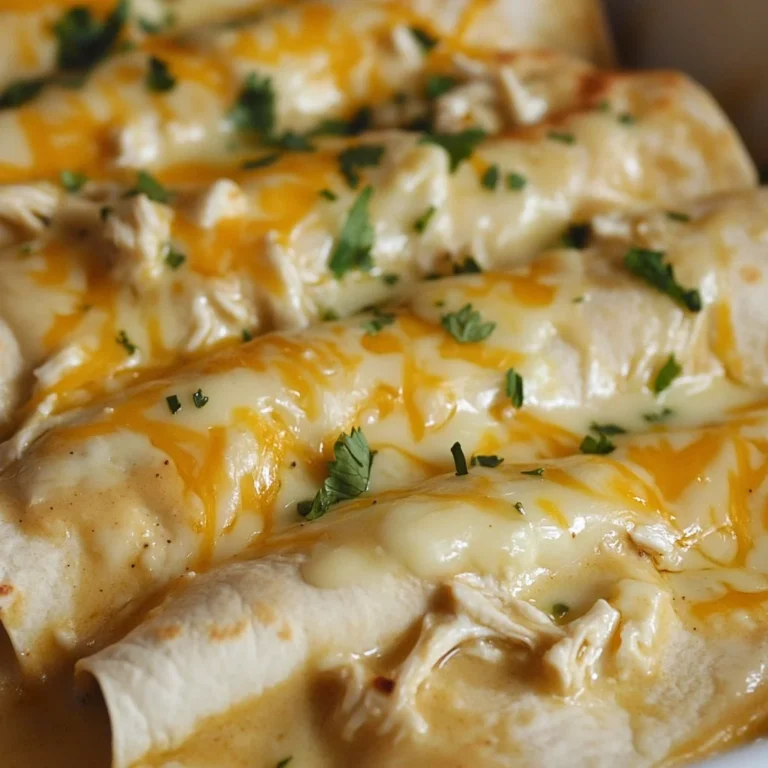
1. BBQ Chicken Mac and Cheese

As you step into your kitchen, the aroma of BBQ chicken fills the air. The warm sound of sizzling chicken beckons you closer, promising a meal that will warm hearts and satisfy appetites. This BBQ Chicken Mac and Cheese is not just comfort food; it’s a memorable family experience waiting to happen. Gather your loved ones around the table, and let’s dive into this mouthwatering dish that combines two beloved favorites—BBQ chicken and creamy mac and cheese.
Why This Works
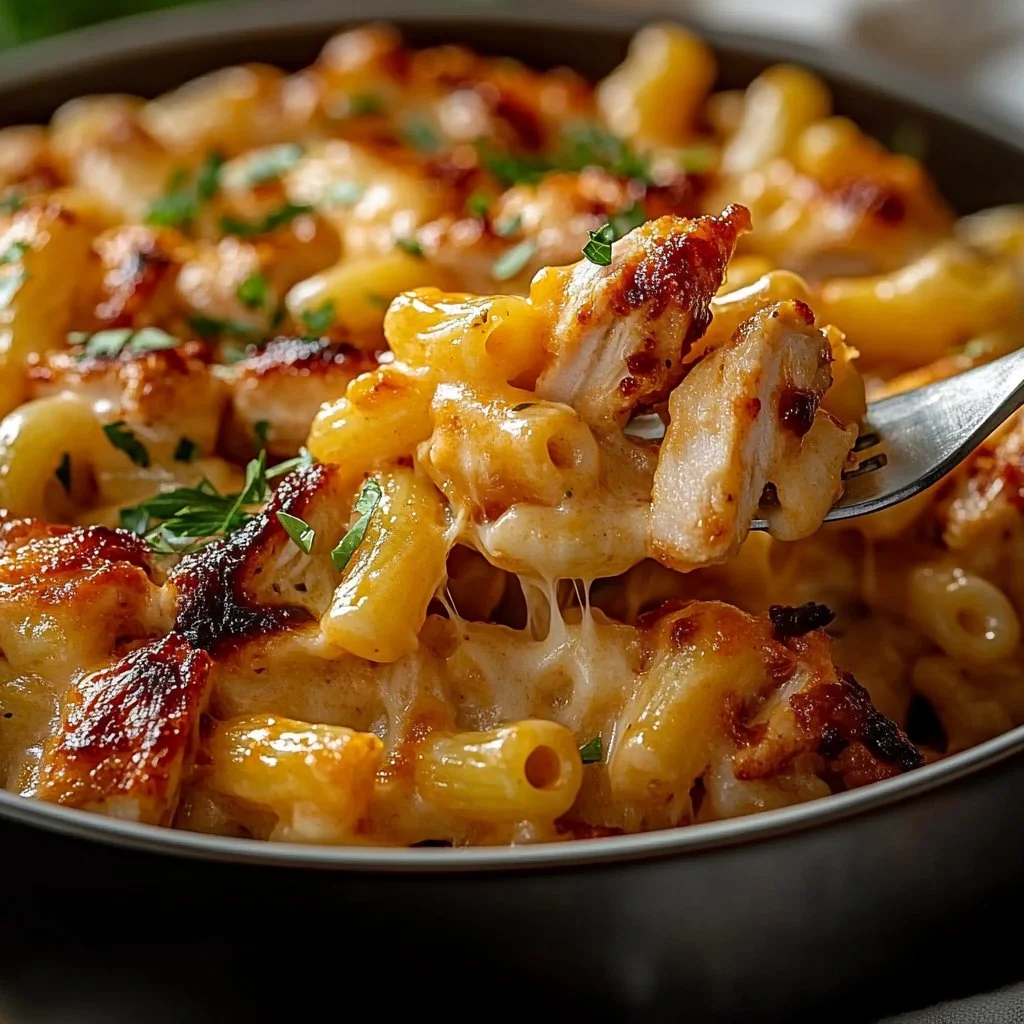
This dish is a family favorite for a reason. It’s quick, easy, and loaded with flavor. With busy schedules, it can be challenging to find time to cook. That’s where this recipe shines. It takes less than an hour from start to finish, making it perfect for weeknight dinners or weekend gatherings. You can prepare this dish together with your family, turning mealtime into a fun bonding experience. Plus, who doesn’t love a creamy, cheesy dish with a smoky BBQ kick?
Process Overview
“This is where the magic happens—when the aroma fills the kitchen.”
Cooking this BBQ Chicken Mac and Cheese is an exciting journey. You’ll start by boiling your pasta, while chicken simmers away in a skillet. Then, you’ll create a creamy cheese sauce that envelopes your pasta in goodness—bringing it all together with BBQ chicken. Each step is straightforward, filling your kitchen with that delightful aroma.
Ingredients
For this recipe, you’ll need:
-
1 lb (450g) chicken breast, cooked and shredded
Tip: Rotisserie chicken works perfectly if you want to save time. -
1 tablespoon olive oil
Tip: This gives a nice coating that helps the chicken sauté better. -
8 oz (225g) elbow macaroni or pasta of choice
Tip: Any shape will do, but elbows hold sauce especially well. -
2 cups shredded cheddar cheese
Tip: Use sharp cheddar for a bolder flavor. -
1 cup shredded mozzarella cheese
Tip: Mozzarella adds creaminess and stretch. -
1 cup milk (low-fat preferred)
Tip: You can substitute with almond or oat milk for a dairy-free option. -
½ cup BBQ sauce (your favorite brand)
Tip: Choose sweet or smoky flavors depending on your preference. -
1 teaspoon garlic powder
Tip: Fresh minced garlic can be used for a more intense flavor. -
1 teaspoon onion powder
Tip: This enhances the overall depth without overpowering the dish. -
½ teaspoon smoked paprika
Tip: This adds a lovely smoky note that pairs perfectly with BBQ. -
Salt and pepper to taste
Tip: Always taste as you go to achieve the perfect balance. -
Fresh parsley, chopped (optional, for garnish)
Tip: A lovely garnish adds a pop of color and freshness.
Directions
-
Cook the pasta according to package instructions. Drain and set aside.
Remember to stir occasionally during cooking to prevent sticking. You want it al dente for the perfect bite. -
Heat olive oil in a large skillet over medium heat. Add the shredded chicken and cook for 2-3 minutes to warm through.
Keep stirring to ensure the chicken heats evenly and absorbs that delicious oil. -
Stir in the BBQ sauce, garlic powder, onion powder, smoked paprika, salt, and pepper. Mix well to coat the chicken in the sauce.
The vibrant colors and aroma will get your family excited for what’s coming! -
In a separate saucepan, heat the milk over medium heat. Stir in the cheddar and mozzarella cheese, continuing to stir until the cheese is melted and the sauce is smooth.
Don’t rush this part. Perfectly melted cheese is the secret to a creamy sauce! -
Add the cooked pasta to the cheese sauce, stirring to combine. Then, fold in the BBQ chicken mixture and continue stirring until everything is well mixed.
This is the moment where everything comes together. The look and smell will be irresistible. -
Taste and adjust seasoning with salt and pepper if needed.
It’s your opportunity to make it just the way your family likes it! -
Serve hot, garnished with fresh parsley if desired.
Gather everyone around and enjoy the moment. Family meals are the best!
Serving
Serving this BBQ Chicken Mac and Cheese family-style is a great way to bring everyone together. Transfer it to a large serving dish and let everyone help themselves. It invites conversation and laughter. Pair it with a side salad or grilled vegetables to complete the meal.
Storage
Leftovers can be stored in an airtight container in the fridge for up to three days. To reheat, simply warm it in the microwave or on the stovetop over low heat, adding a splash of milk to help restore the creamy texture. This dish holds its flavor well, so there’s no worry about losing that delicious BBQ kick.
Kitchen Notes
- Shorten prep time: Use rotisserie chicken instead of cooking your own.
- Double the recipe: This dish is great for feeding a crowd and even better for leftovers.
- Experiment with cheese: Use any cheese you have on hand. Cream cheese can add extra creaminess.
- Add veggies: Sneak in some cooked broccoli or peas for added nutrition.
- Use one pot: Cook the pasta in the same pot you use for the cheese sauce to simplify cleanup.
Variations
While this recipe is fantastic as is, it’s easy to adapt to fit different tastes and dietary needs.
- For picky eaters: Try adding a bit of ketchup to the BBQ sauce for a sweeter flavor.
- Vegetarian option: Substitute the chicken with firm tofu or jackfruit, seasoned and sautéed just like the chicken.
- Gluten-free: Use a gluten-free pasta option to make this dish suitable for those avoiding gluten.
- Dairy-free: As mentioned, replace cheeses and milk with plant-based alternatives.
- Spicy kick: Add some chopped jalapeños or a dash of hot sauce to the BBQ chicken for those who enjoy a little heat.
FAQ
-
Can I make this recipe ahead of time?
Yes, you can prep the chicken and cheese sauce in advance. Just store them separately and combine them with pasta when you’re ready to serve. -
What type of BBQ sauce should I use?
Use your favorite brand. Sweet, tangy, or smoky BBQ sauces work best, depending on your family’s preference. -
Can I freeze the leftovers?
Yes, this dish can be frozen. Just make sure to cool it completely before transferring it to a freezer-safe container. It can be kept for up to three months. -
How do I make this dish spicier?
Incorporate some hot sauce into the BBQ sauce or add some pepper jack cheese for a spicy twist. -
What sides go well with BBQ Chicken Mac and Cheese?
A fresh garden salad, steamed vegetables, or cornbread complement this dish nicely.
Conclusion
Cooking should never feel overwhelming. This BBQ Chicken Mac and Cheese recipe is not just a meal; it’s a chance to create lasting memories in the kitchen with your loved ones. The rich, smoky flavors and creamy texture will have your family asking for seconds. So grab your ingredients, gather the family, and make something delicious together. Remember, the best memories are made around the dinner table. Happy cooking!
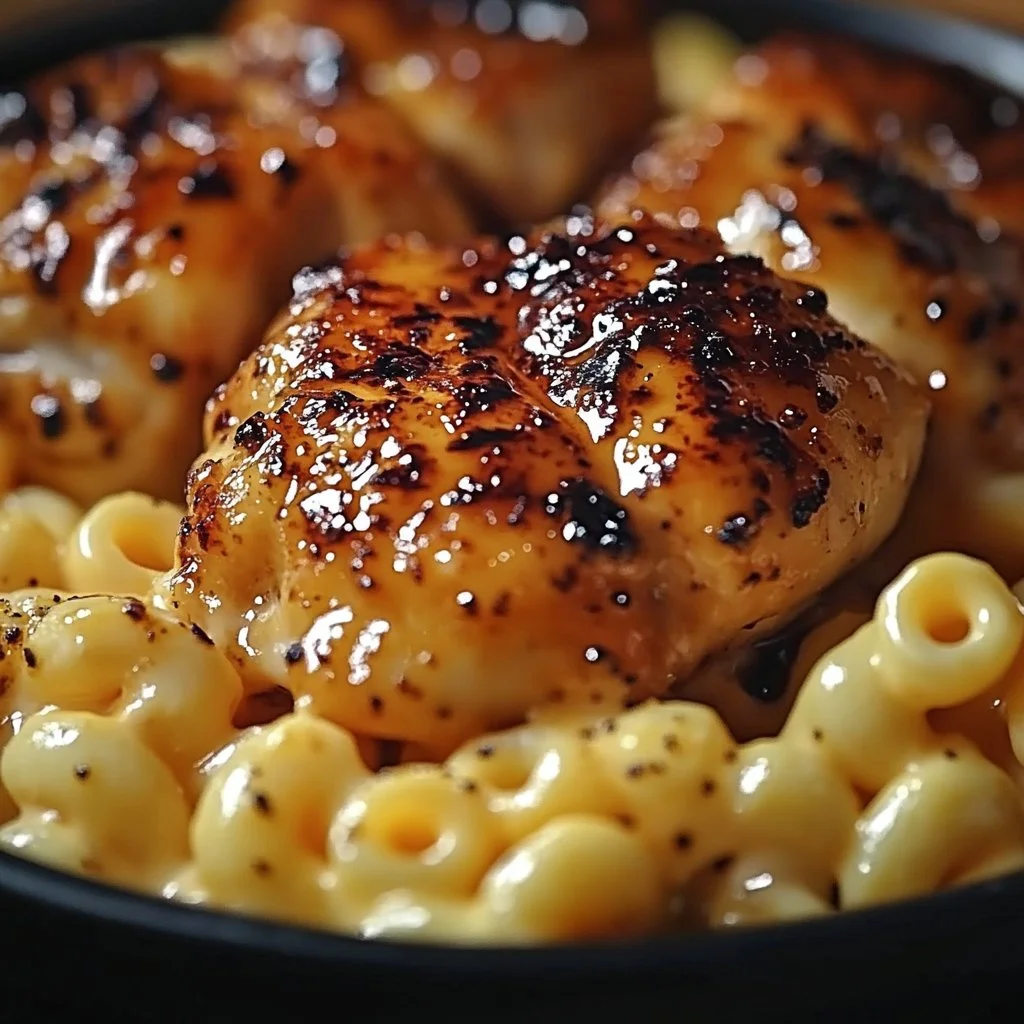
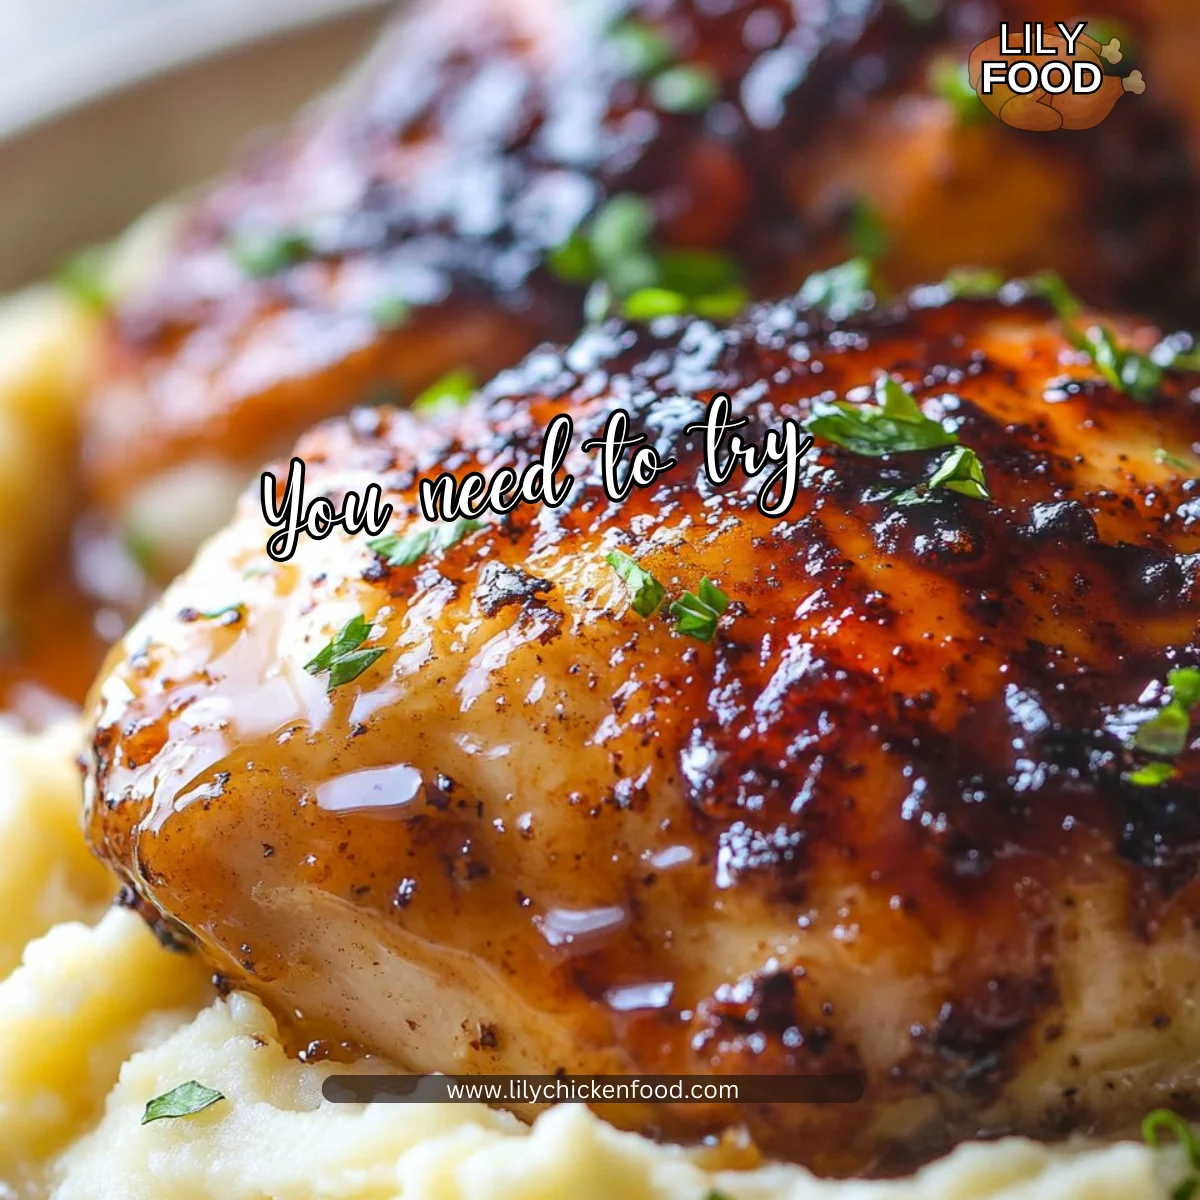
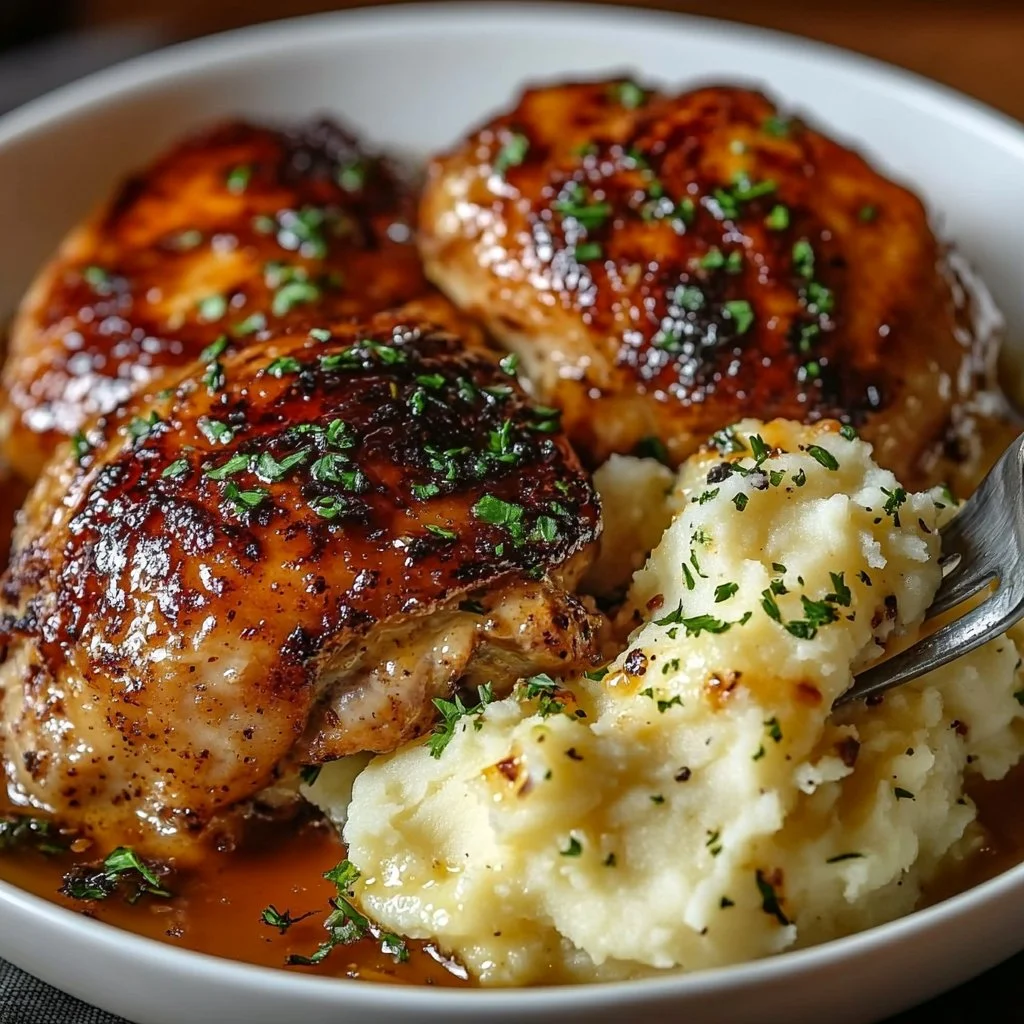
2. Sweet and Spicy Honey Pepper Chicken with Macaroni and Cheese
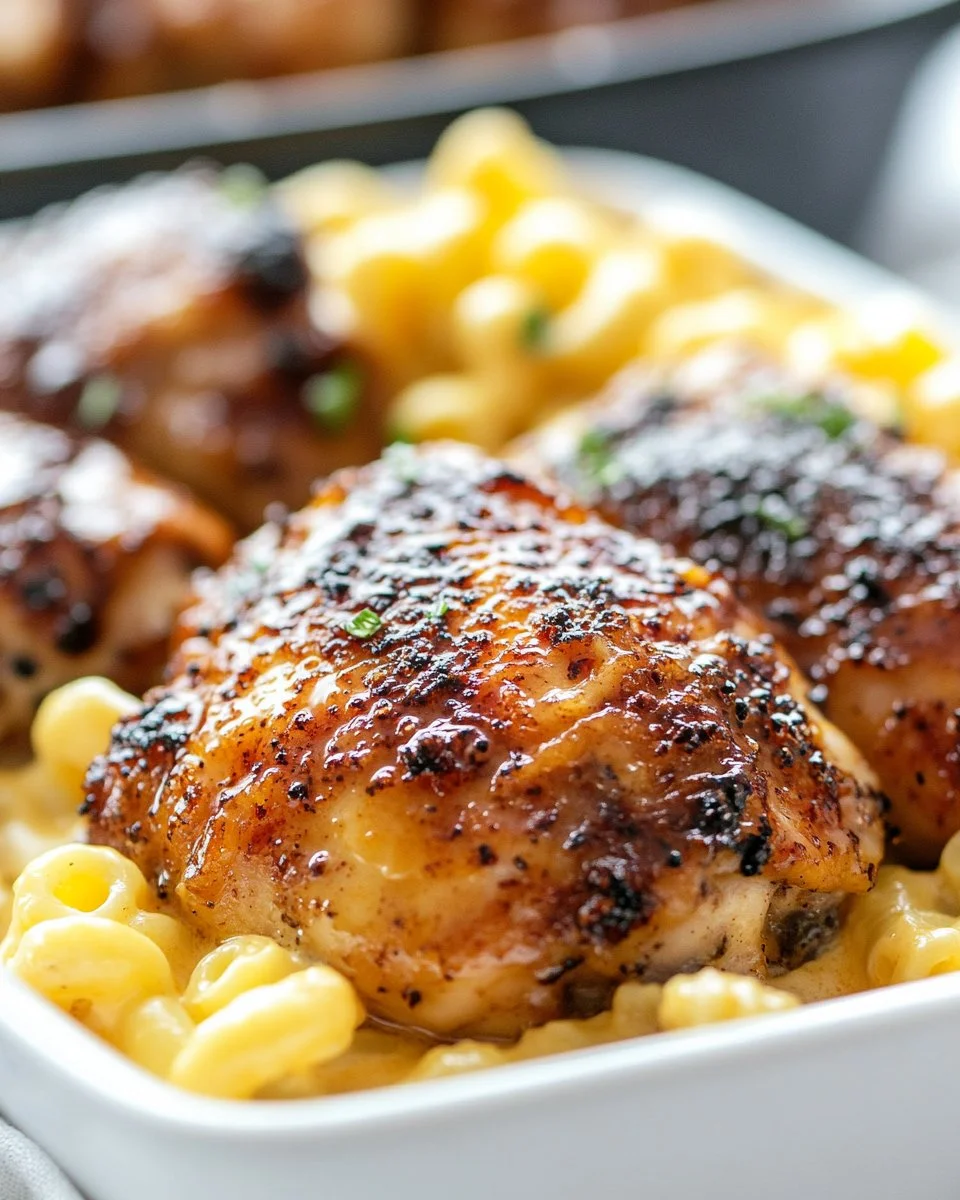

The kitchen is a warm haven when you cook Sweet and Spicy Honey Pepper Chicken with creamy macaroni and cheese. As the chicken sizzles and caramelizes in the oven, your home fills with inviting scents. You can hear the gentle bubbling of the cheese sauce, waiting to embrace the tender macaroni. It’s a symphony of flavors that delights the senses, beckoning your family to gather around the table.
Why This Works
This recipe is a family favorite for many reasons. It combines the sweetness of honey with a kick of spice, creating a dish that pleases both kids and adults. The honey pepper chicken is vibrant and flavorful, making it irresistible. On top of that, it’s an easy one-dish meal that saves you time in the kitchen.
With simple steps and ingredients, this recipe allows you to spend less time cooking and more time enjoying juicy conversations with loved ones. Whip up this delightful dish, and I guarantee your family will feel the love in every bite.
Process Overview
“This is where the magic happens—when the aroma fills the kitchen.”
Creating Sweet and Spicy Honey Pepper Chicken with Macaroni and Cheese doesn’t take a culinary degree. It’s about combining the right ingredients and letting them shine. From marinating your chicken to melting cheese over pasta, each step leads you closer to a meal that your family will crave again and again.
Ingredients
-
4 chicken thighs
Tip: Look for skin-on and bone-in thighs for more flavor and tenderness. -
1/4 cup honey
Tip: Use fresh, local honey if possible to enhance the taste and support local beekeepers. -
2 tablespoons soy sauce
Tip: Low-sodium soy sauce works well for controlling salt levels. -
1 tablespoon olive oil
Tip: Choose extra virgin olive oil for added richness in flavor. -
1 teaspoon black pepper
Tip: Freshly ground black pepper brings an extra level of spiciness. -
1 teaspoon red pepper flakes (optional)
Tip: Adjust the amount based on your family’s heat preference. -
Salt to taste
-
1 cup macaroni
Tip: Any small pasta shape works great, but elbow macaroni holds the cheese nicely. -
1 1/2 cups shredded cheddar cheese
Tip: Use a mix of sharp and mild cheddar for depth of flavor. -
1/2 cup milk
Tip: Whole milk creates a creamier texture, but you can use low-fat if you prefer. -
2 tablespoons butter
Tip: Use unsalted butter to better control the overall saltiness of the dish. -
1/4 teaspoon garlic powder
Tip: Fresh garlic can be used for an even bolder flavor. -
Salt and pepper to taste
Directions
-
In a bowl, mix honey, soy sauce, olive oil, black pepper, red pepper flakes, and salt to create a marinade.
Encouragement: Family cooking is all about ease. Take a moment to fully appreciate each ingredient as you pour it in the bowl. -
Marinate the chicken thighs for at least 30 minutes.
Encouragement: You can do this in the morning and let it marinate all day for maximum flavor. Just let that chicken soak up all those delicious flavors! -
Preheat the oven to 375°F (190°C) and place the chicken in a baking dish.
Encouragement: The sound of the oven door opening is like a gentle invitation to deliciousness. -
Bake chicken for about 25-30 minutes or until fully cooked.
Encouragement: You’ll know it’s done when the juices run clear. You got this! -
Meanwhile, cook macaroni according to package instructions. Drain and set aside.
Encouragement: Feel free to taste a few pieces of macaroni. Quality control is important! -
In a saucepan, melt butter, then add milk and bring to a simmer.
Encouragement: Listen for the gentle bubbling. That means you’re on the right track! -
Stir in cheese until melted, then add cooked macaroni, garlic powder, salt, and pepper. Mix well.
Encouragement: Take a moment to really enjoy the creamy texture as you stir it all together. -
Serve the baked chicken alongside the creamy macaroni and cheese.
Encouragement: The satisfaction of plating your dish makes all the cooking worth it!
Serving
To serve this mouthwatering dish family-style, place the chicken on a large platter and showcase the macaroni in a beautiful bowl. You can garnish with fresh parsley or sliced green onions for a pop of color. Encourage everyone to help themselves. Nothing brings a family together like gathering around a delicious home-cooked meal.
Storage
If you have leftovers, store them in an airtight container in the refrigerator for up to three days. When you’re ready to enjoy them again, simply reheat in the oven to maintain that delightful crispiness of the chicken. You can also microwave the macaroni for a quick meal. Adding a splash of milk when reheating will help keep the macaroni cheesy and creamy.
Kitchen Notes
-
Use a slow cooker: Marinate the chicken in the morning and let it cook low and slow for maximum flavor.
-
Prep the macaroni ahead: Cook macaroni earlier in the week to save time during busy nights.
-
Cheese alternatives: Swap cheddar for mozzarella or pepper jack if you’re in the mood for something different.
-
Garnishes: Consider topping your dishes with breadcrumbs or crispy onions for a delightful crunch.
-
Pair with veggies: Add a side of steamed broccoli or a simple salad for a balanced meal.
Variations
Not every family member has the same taste, so here are some tweaks you can make. For picky eaters, try using boneless chicken breasts, which will cook quickly and soak up the marinade nicely. For a lighter version, use whole wheat macaroni and low-fat cheese. If you or someone in your family follows a gluten-free diet, substitute the macaroni with gluten-free pasta. Experiment with different spices such as smoked paprika or garlic for an added flavor twist.
FAQ
1. Can I use chicken breasts instead of thighs?
Yes, chicken breasts work well, but they may require less baking time. Keep an eye on them.
2. How do I know the chicken is fully cooked?
Chicken should reach an internal temperature of 165°F (74°C) when done.
3. Can I make the macaroni and cheese with different cheeses?
Absolutely! Feel free to mix in your favorite cheeses, like Monterey Jack or Gouda.
4. Can this recipe be doubled?
Yes, you can easily double the recipe to serve more people.
5. What if I don’t have honey?
You can substitute with maple syrup or agave nectar for sweetness.
As you sit down to enjoy this Sweet and Spicy Honey Pepper Chicken with Macaroni and Cheese, take a moment to be thankful for the time spent in the kitchen. Each bite brings back memories of laughter and love shared at the table. This recipe is more than a meal; it’s a way to connect with your family and show them how much you care. Happy cooking, and enjoy this delicious journey together!
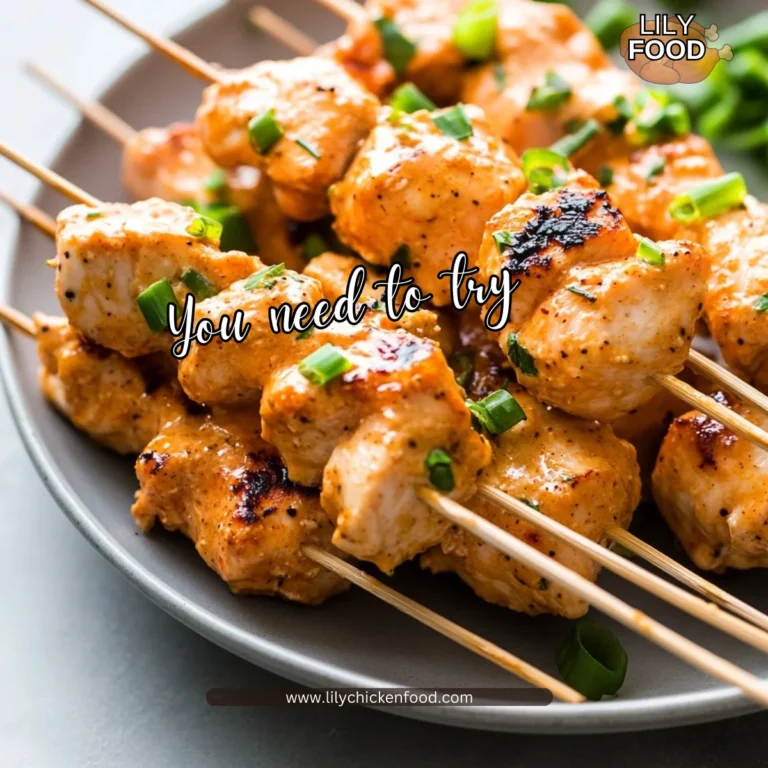
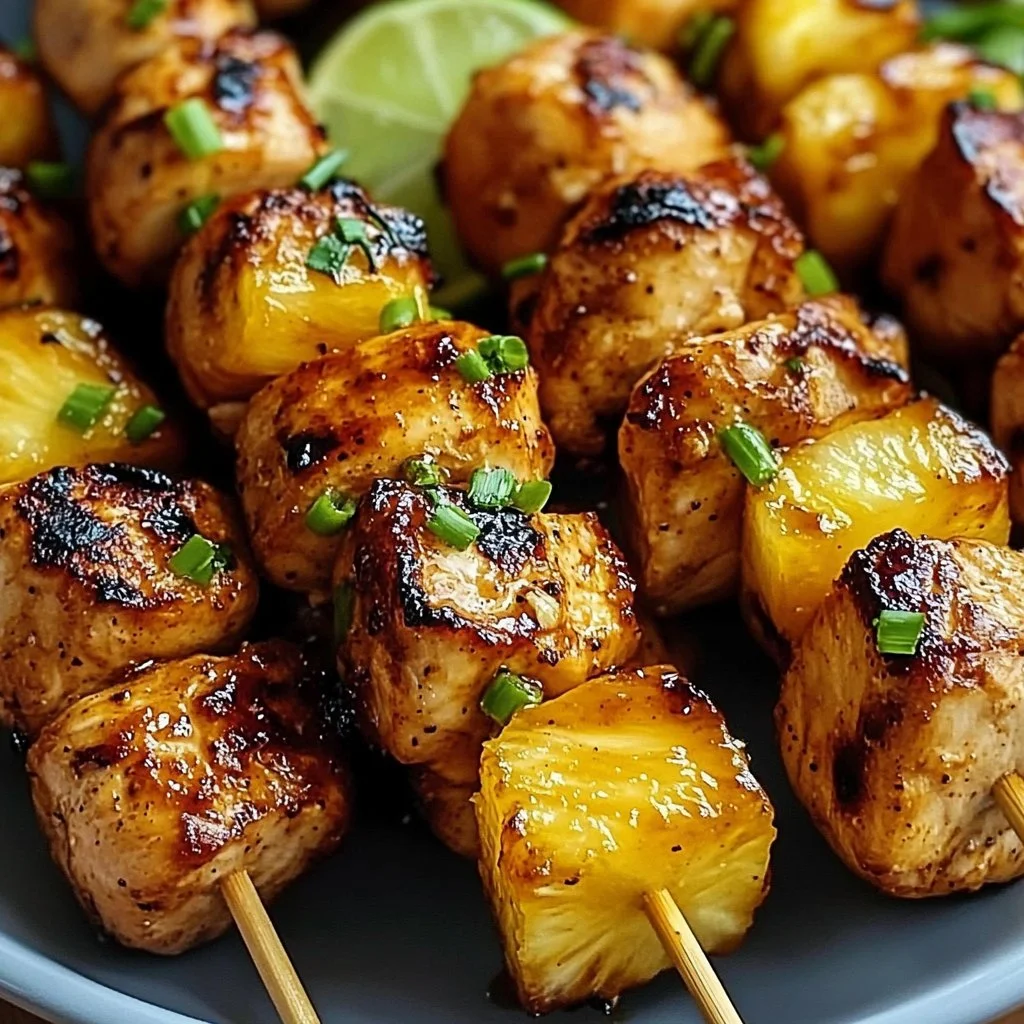
3. Pineapple Chicken Kabobs
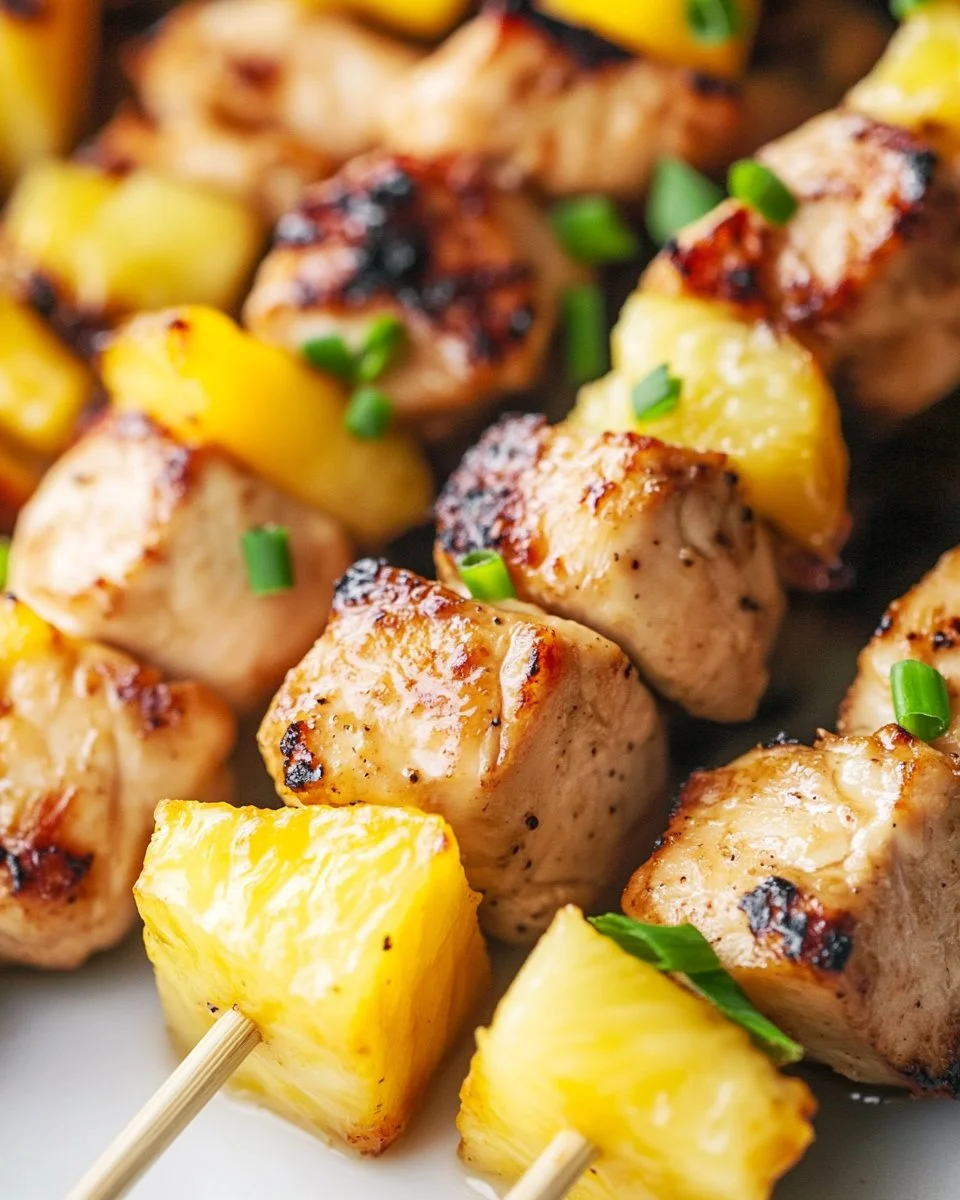
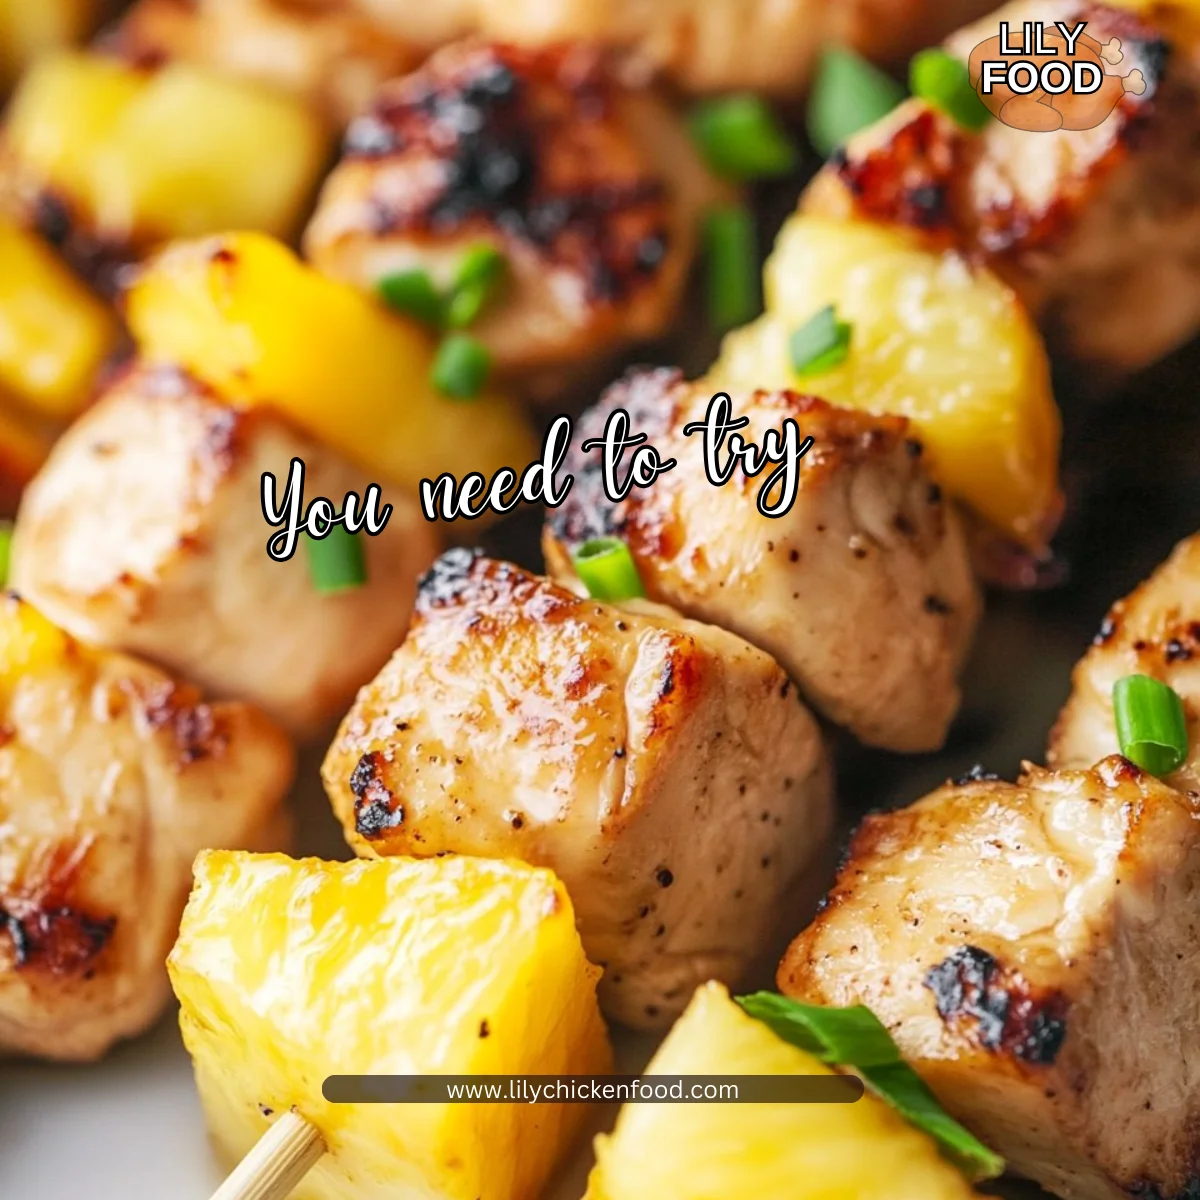
There’s something magical about cooking in the kitchen. The enticing smell of savory chicken mingling with sweet pineapple has a way of drawing everyone in. You hear the sizzling sound as the kabobs hit the grill. It’s the kind of noise that says, “Dinner is on!”
When it comes to meals that gather the family, these Pineapple Chicken Kabobs hit the mark perfectly. This recipe isn’t just about food; it’s about creating memories together in the kitchen and at the table.
Why This Works
This recipe combines juicy chicken with the vibrant flavor of pineapple. The dish is simple yet impressive, making it a fantastic option for busy families. It doesn’t take a lot of time to prep, and once you start grilling, you’ll have dinner ready in a heartbeat.
Plus, the marinade adds incredible flavor without needing hours of marinating. In about 30 minutes, you can serve up delicious kabobs that bring everyone together. It’s a meal that fosters warm conversation and laughter, reminding us of the importance of family time.
Process Overview
“This is where the magic happens—when the aroma fills the kitchen.”
As you embark on this culinary adventure, remember that the process is just as enjoyable as the final product. From making the marinade to seeing those kabobs sizzle on the grill, each step is an opportunity to bond with your loved ones.
Enjoy the sounds and smells that fill the kitchen. That’s where the real joy of cooking lies.
Ingredients
- 1 1/2 lb boneless skinless chicken breast, cut into 1 1/2-inch cubes
- 3 cups pineapple chunks
- 1/4 cup low-sodium soy sauce
- 3 tbsp honey
- 2 tbsp olive oil
- 3 cloves garlic, minced
- 1 tsp fresh grated ginger
- 1 tbsp lime juice
- 1/2 tsp kosher salt
- 1/2 tsp black pepper
- 2 tbsp chopped chives or green onion, for garnish
- 8 to 10 skewers, soaked if wooden
Lily’s Personal Tips:
- For the chicken, make sure to cut the pieces evenly sized. This ensures they cook at the same rate.
- Choose ripe, sweet pineapples as they add the best flavor.
- Soak wooden skewers in water for at least 30 minutes. This helps prevent burning on the grill.
- Feel free to adjust the marinade based on your taste. A splash of orange juice complements the pineapple beautifully.
- Garlic can be minced ahead of time to save on prep if you’re in a rush.
Directions
- Make the marinade: In a bowl, whisk together soy sauce, honey, olive oil, garlic, ginger, lime juice, salt, and pepper. The aroma alone is a treat.
- Marinate: Add the chicken cubes to the marinade, tossing to ensure they are well coated. Cover the bowl and chill it in the refrigerator for at least 30 minutes, or up to 4 hours if you have time. This allows the flavors to penetrate the chicken, making it succulent and delicious.
- Preheat grill: While the chicken is marinating, preheat your grill to medium-high. Don’t forget to oil the grates or preheat a grill pan if you’re cooking inside.
- Skewer: Thread the marinated chicken and pineapple chunks alternately onto the soaked skewers. Make sure not to pack them too tightly; give them space to cook evenly.
- Grill: Place the kabobs on the grill and cook for about 10–12 minutes. Turn them every 2–3 minutes until they are lightly charred and the chicken reaches an internal temperature of 165°F (74°C). Resist the urge to constantly flip them. Let them sit for a while to develop those beautiful grill marks!
- Rest & serve: Once off the grill, let the kabobs rest for about 3 minutes. Garnish them with chives or green onions and serve with rice, salad, or grilled veggies. Watching everyone gather around the table will warm your heart.
Serving
Serve these Pineapple Chicken Kabobs on a large platter for a family-style feast. Allow everyone to help themselves, creating a lively and inviting atmosphere. Pair it with jasmine rice or a light green salad to balance the sweet and savory flavors.
This meal brings a taste of summer into your home, making it perfect for any occasion, whether it’s a weeknight dinner or a weekend barbecue.
Storage
If you have leftovers (though I doubt that will happen), store them in an airtight container in the refrigerator for up to 3 days. Reheat gently in the microwave or on a stovetop, being cautious not to dry out the chicken.
If you’d like to save some kabobs for later, consider freezing them. Wrap the cooked kabobs tightly in plastic wrap, and then place them in a freezer-safe bag. They can be frozen for up to 2 months. To reheat, simply thaw overnight in the fridge and warm up slowly.
Kitchen Notes
- Prep ahead: Consider making the marinade a day ahead to save time.
- Leftover veggies: Use any leftover vegetables you have on hand, like bell peppers or zucchini, alongside the pineapple for extra flavor and color.
- Flavor boosts: Add chopped cilantro or mint to the kabobs for an extra fresh taste.
- For kids: Introduce them to cooking by letting them help with threading the skewers. It’s a fun bonding activity!
- Cast iron option: If you have a cast iron grill pan, use it on the stovetop to achieve those unbeatable grill marks without an outdoor grill.
Variations
Have picky eaters or different dietary needs in your family? Here are some tweaks you can make:
- For vegetable lovers: Substitute chicken with firm tofu or mushrooms.
- Spicy fans: Add red pepper flakes or drizzle some sriracha over the kabobs before grilling.
- Low-carb diets: Serve the kabobs over a bed of mixed greens instead of rice.
- Fruit variety: Swap out pineapple for peaches or mango for a fun twist.
- Gluten-free: Use coconut aminos in place of soy sauce for a gluten-free option.
FAQ
-
Can I use frozen chicken?
Yes, but be sure to thaw it fully and drain any excess moisture before marinating. -
How do I know when the chicken is cooked?
Use a meat thermometer to check for an internal temperature of 165°F (74°C). -
Can I bake these kabobs instead?
Absolutely! Preheat your oven to 400°F and place the kabobs on a lined baking sheet. Bake for about 15-20 minutes, turning halfway through. -
What should I serve with the kabobs?
They pair well with rice, quinoa, grilled vegetables, or a fresh salad. -
Can I make these kabobs in advance?
You can prepare the marinade and marinate the chicken a few hours before grilling for an easy and quick dinner.
Conclusion
Gathering the family for a meal doesn’t have to be complicated. These Pineapple Chicken Kabobs are the perfect solution for a delicious and easy dinner that everyone will love. As you grill and enjoy, remember that it’s not just a meal—it’s an experience filled with laughter, connection, and love. Happy cooking!
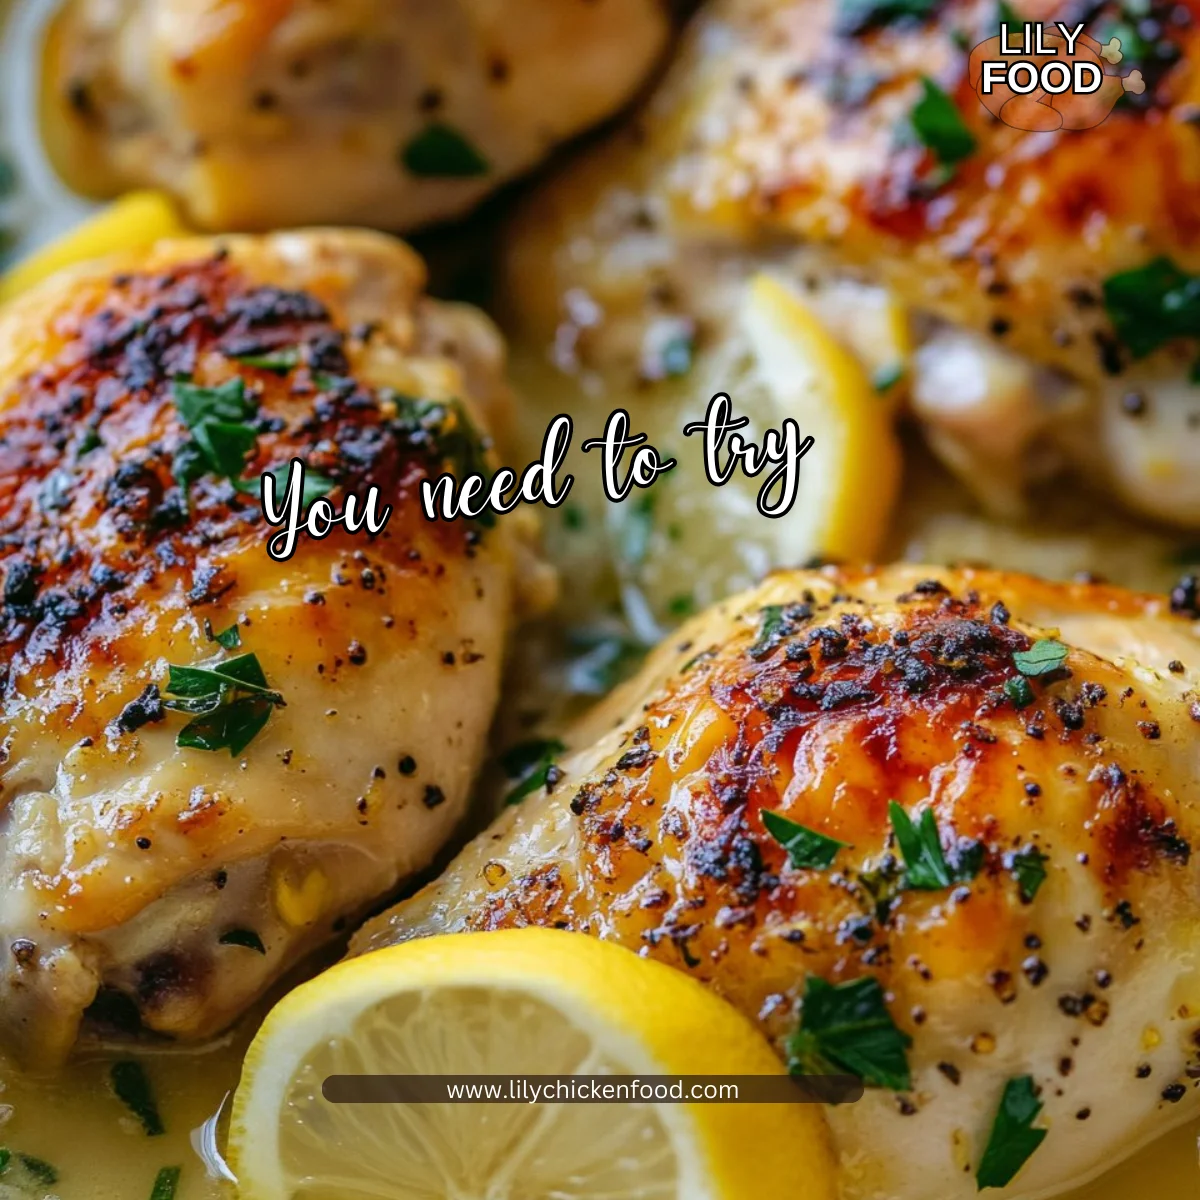
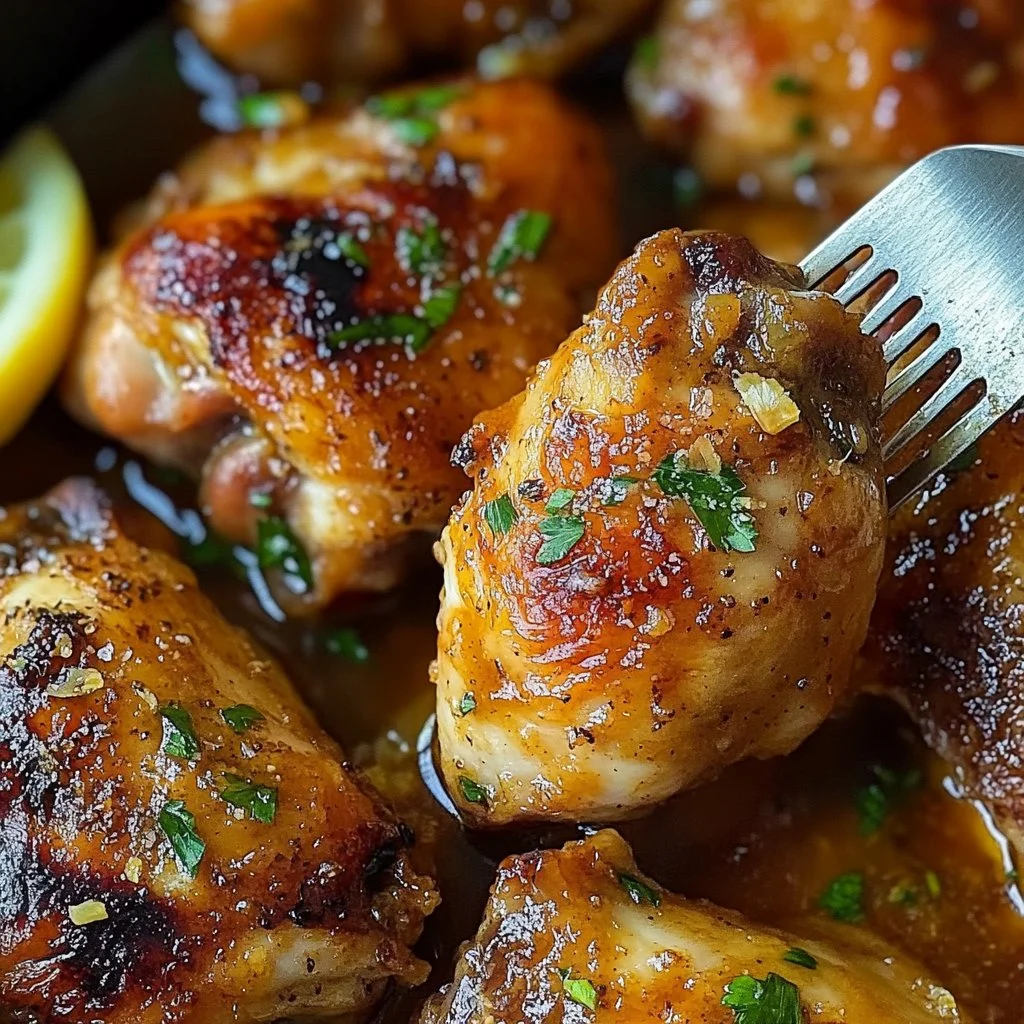
4. Baked Lemon Butter Chicken
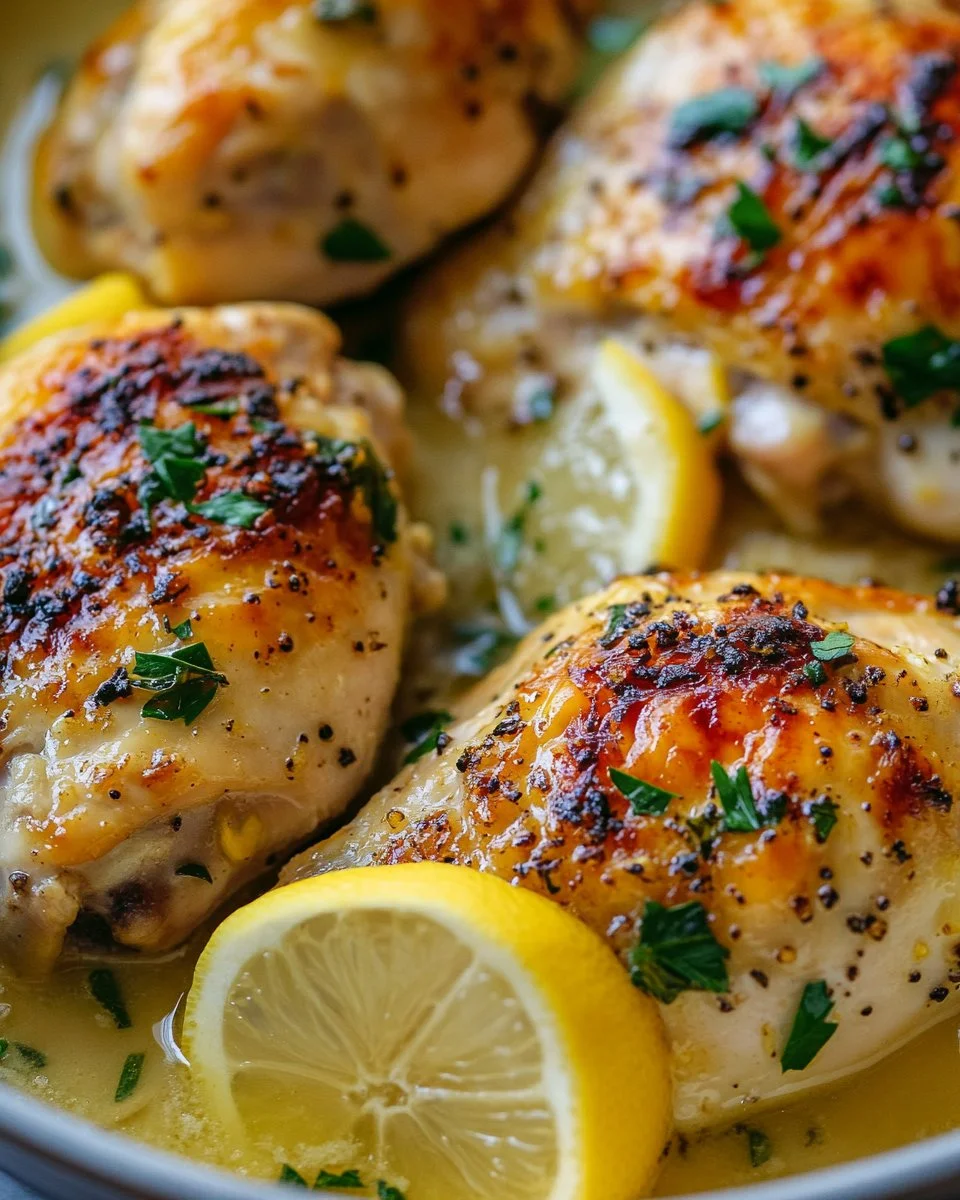
There’s something magical about the aroma of chicken baking in the oven, especially when it’s laced with bright, zesty lemon and warm, buttery goodness. As you hear the gentle hum of the oven doing its work, you can almost taste the comfort and joy this dish will bring to your family. The experience of cooking is not just about the meal; it’s about the memories created around the kitchen. With Baked Lemon Butter Chicken, you’ll be creating not just a delicious dinner but also cherished family moments.
Why This Works
Baked Lemon Butter Chicken is a celebration of simple ingredients coming together to create something extraordinary. The beauty of this recipe lies in its ability to infuse your kitchen with comforting scents while saving you valuable time. With minimal prep and hands-off cooking, you can spend more time with your loved ones rather than stuck in the kitchen.
Dark meat chicken pieces are not only flavorful but also stay juicy as they bake. This recipe is designed for family gatherings, weeknight meals, or anytime you want to impress without the fuss. Plus, everything is cooked in one dish, making cleanup a breeze.
Process Overview
“This is where the magic happens—when the aroma fills the kitchen.”
From the moment you start preparing this dish, the smell of garlic sautéing in butter fills the air. As the chicken bakes, those rich flavors deepen and intermingle, creating a symphony of taste that your family will adore. Let’s dive deeper into how you can create this tantalizing meal in just a few easy steps.
Ingredients
To make Baked Lemon Butter Chicken, you will need the following:
- 10 pieces dark meat chicken (I used drumsticks and thighs, trimmed of any excess fat)
- 2 tsp kosher salt
- 1 tbsp smoked paprika
- 1 tbsp Montreal chicken seasoning blend or any chicken seasoning of choice (bullion is fine)
- 2 tbsp butter
- 1/2 cup red onion (minced)
- 1/2 cup flat leaf parsley (chopped)
- 1 tbsp garlic (minced)
- 1/2 tsp red pepper flakes
- 1 cup chicken stock
- 1 tbsp fresh lemon juice
- 1 cup freshly grated Parmesan cheese
- 1/3 cup heavy whipping cream
Here’s a little tip: Use fresh parsley for the best flavor, and feel free to adjust the seasoning based on your family’s preferences. The lemon juice brightens up the entire dish, so don’t skip it.
Directions
-
In a skillet, melt butter over medium heat.
- This step fills your kitchen with the lovely scent of melting butter, a perfect start.
-
Once the butter is melted, add onions and sauté until fragrant, about 2 minutes.
- Stir those onions around and enjoy the aroma; it’s one of the best parts of cooking.
-
To the onions, add chopped parsley and garlic. Mix well to combine and add lemon juice, followed by red pepper flakes.
- Adding these ingredients early allows their flavors to bloom.
-
Add chicken stock followed by Parmesan cheese. Mix well to combine and then add heavy cream.
- This creamy mixture will become the delicious sauce enveloping your chicken.
-
Bring to a simmer for a minute, then turn off the heat and allow the sauce to cool slightly.
- The cooling step helps to thicken the sauce, making it perfect for the bake.
-
While the sauce cools, season chicken with salt, smoked paprika, and chicken seasoning. Toss well to combine.
- Ensure every piece is coated evenly for maximum flavor.
-
Pour the sauce over the chicken in a baking dish.
- Watching the sauce cascade over the chicken is satisfying. You know this will be good.
-
Bake UNCOVERED at 375°F for 1 hour and 45 minutes, flipping halfway through.
- This step ensures even cooking and allows the skin to become beautifully crisp.
-
Broil on the skin side until golden brown.
- Keeping a close eye during broiling is key; just a few minutes can make a big difference.
-
Baste in sauce to finish and enjoy!
- A quick basting before serving keeps the chicken moist and flavorful.
Serving
To serve your Baked Lemon Butter Chicken family-style, take a large platter and arrange the chicken pieces in the center. Drizzle some extra sauce over them for a nice, glossy finish. Offer sides like roasted vegetables or fluffy rice to soak up the delicious sauce.
Gather your family around the table, and watch as smiles spread with each bite. This dish is a real crowd-pleaser and brings everyone closer together as they savor a comforting meal.
Storage
If you have any leftovers (which might be unlikely!), store the chicken in an airtight container in the fridge. To reheat, simply place it in the oven at 350°F until warmed through. This keeps the chicken juicy while reviving that lovely aroma. You can also microwave individual portions for a quick meal.
Kitchen Notes
- Make-Ahead: Prep the sauce a day in advance and pour it over the chicken just before baking.
- Use Leftovers: Shred any leftover chicken and toss it on salads or in sandwiches for quick meals.
- Parmesan Substitute: If you don’t have Parmesan cheese, any hard cheese can work in a pinch.
- Broiling Tips: If you prefer less crispy skin, skip the broiling step.
- Time Saver: Use pre-minced garlic and store-bought chicken seasoning to save time.
Variations
- Picky Eaters: If your family isn’t fond of lemon, you can reduce the lemon juice or switch it out for a splash of apple cider vinegar for a different flavor profile.
- Gluten-Free: Ensure that your chicken seasoning and chicken stock are gluten-free.
- Herb Substitutes: If basil or thyme is more to your family’s liking, feel free to swap them in place of parsley.
- Cream Alternatives: For a lighter dish, swap heavy cream for Greek yogurt or milk but note that the flavor will be slightly different.
- Spice Level: Adjust the amount of red pepper flakes to make it milder or spicier.
FAQ
1. Can I use boneless chicken instead of bone-in?
Yes, boneless chicken will work well, but you may need to reduce the cooking time.
2. What sides go well with this dish?
Mashed potatoes, rice, or salad are great complements to this chicken.
3. Can I freeze this dish?
Yes, you can freeze the chicken before baking. Just make sure to thaw it in the fridge before cooking.
4. Can I use other types of meat?
You can use pork or turkey, but cooking times may need adjustment.
5. What’s the best way to tell when the chicken is done?
Use a meat thermometer; chicken should reach an internal temperature of 165°F.
As you wrap up your cooking, remember that the heart of cooking lies in the love and care you put into it. This Baked Lemon Butter Chicken is more than just a meal; it’s a way to gather your family and create lasting memories, one delicious bite at a time. I hope this recipe becomes a staple in your kitchen as it has in mine. Happy cooking!
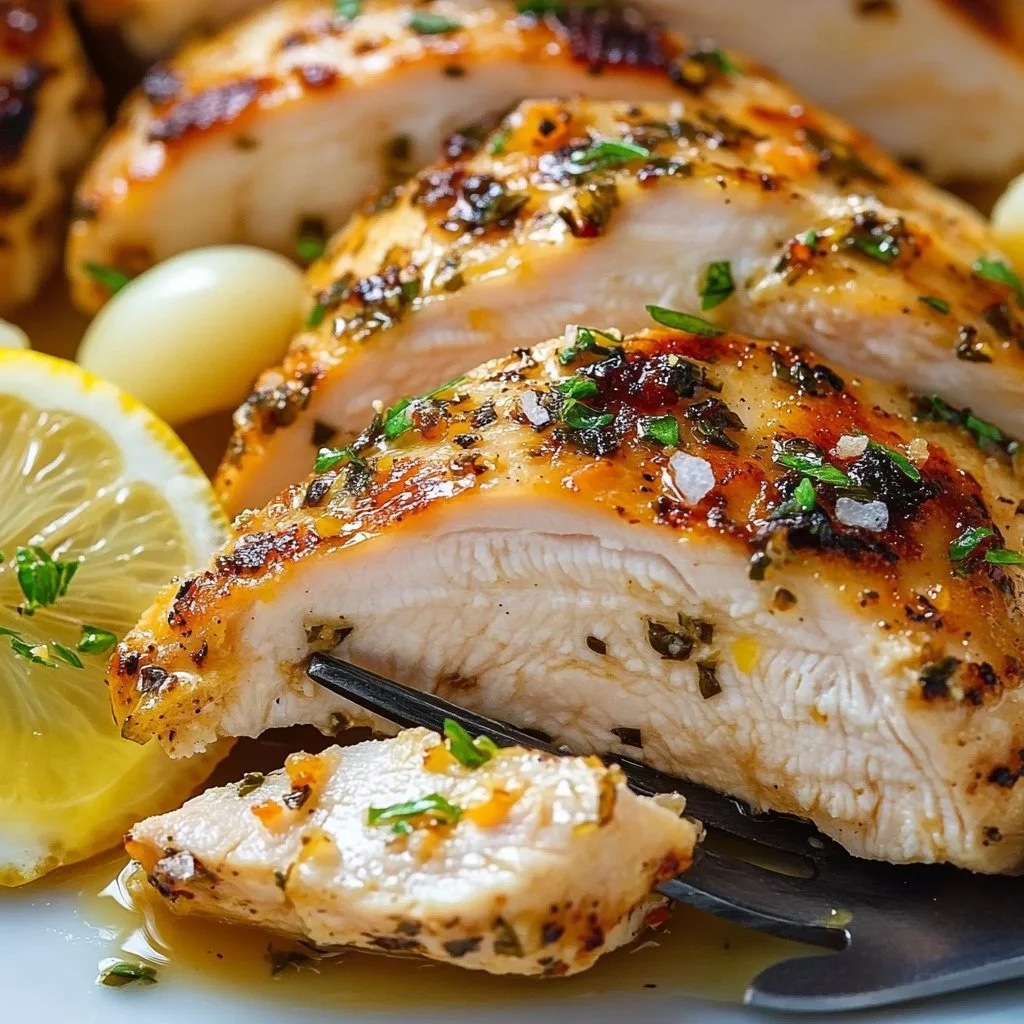
5. Lemon Garlic Chicken
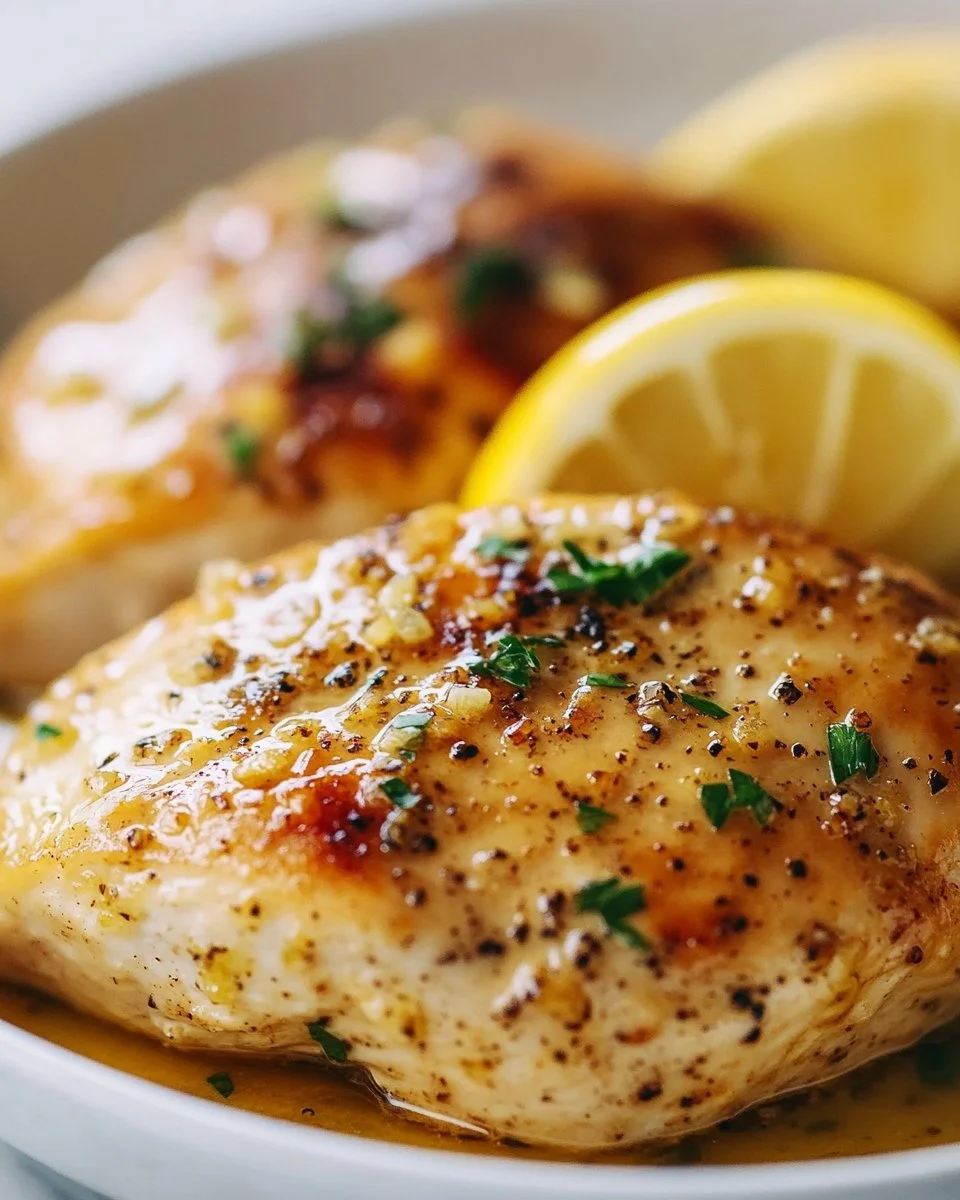
The kitchen fills with the bright, zesty aroma of lemons and the savory scent of garlic. It’s comforting, inviting, and just what you need after a long day. The sound of sizzling chicken softens the air, promising a meal that will bring everyone together. Lemon Garlic Chicken is not just a dish; it’s an experience that warms the heart and nourishes the soul.
Why This Works
This recipe stands out for several reasons. First, it’s incredibly easy to prepare. The marinade does most of the hard work while you go about your day. Lemon Garlic Chicken is a favorite in my family because it doesn’t just taste good; it creates a sense of home.
This dish comes together quickly, making it perfect for busy weeknights. The fresh, vibrant flavors appeal to both kids and adults, making it a win-win for family dinners. You’ll appreciate how little time it takes to both prepare and clean up.
Process Overview
“This is where the magic happens—when the aroma fills the kitchen.”
When you mix lemon juice, garlic, and olive oil, the whole process feels effortless. Letting the chicken marinate allows the flavors to seep in, making each bite juicy and tender.
The actual cooking is just as simple, whether in a skillet or oven. As it cooks, the meal becomes a symphony of scents that call your family to the dinner table. Nothing beats the anticipation of sharing a homemade meal with loved ones.
Ingredients
- Chicken Breasts (2 lbs): Choose skinless and boneless for easy eating. Quality matters, so look for organic or free-range if possible.
- Lemon Juice (1/4 cup): Freshly squeezed is best. It adds depth and brightness. Avoid bottled for a fresher taste.
- Garlic Cloves (4, minced): The more garlic, the better, in my book! If you love garlic, feel free to play around with the quantity.
- Olive Oil (1/4 cup): Use extra virgin for a robust flavor. Olive oil helps keep the chicken moist and adds richness.
- Salt (1/2 tsp): Just a sprinkle enhances the flavors beautifully. You can adjust this to your personal taste, especially if you’re watching your sodium intake.
Directions
-
In a bowl, mix together lemon juice, minced garlic, olive oil, and salt to create the marinade. This step is simple but essential. Take a moment to appreciate the bright scents as they combine.
-
Add the chicken breasts to the marinade and let it sit for at least 30 minutes. If you have more time, allowing it to marinate longer will intensify the flavor.
-
Heat a skillet on the stovetop over medium heat or preheat the oven to 400°F (200°C). Set up your kitchen for success by having everything within reach.
-
For stovetop, cook the chicken for about 6-7 minutes on each side or until fully cooked. For oven, place the chicken in a baking dish and bake for 20-25 minutes. Listen for that little sizzle—it’s a good sign!
-
Serve hot with your favorite sides. You can pair it with steamed veggies, rice, or a fresh salad.
Serving
For a family-style presentation, arrange the chicken on a big platter. Let everyone help themselves, creating a warm and communal dining experience. A sprinkle of fresh parsley or additional lemon wedges on the side adds a nice touch and elevates the dish visually. Family mealtime is about connection, and a simple setup makes serving easy.
Storage
Make any leftovers last by putting them in an airtight container. They will stay fresh in the refrigerator for up to 3-4 days. If you want to reheat, a skillet works best for retaining the juicy texture. Just add a splash of water or broth to keep it moist. You can also microwave it, but be cautious not to overdo it, as it can dry out.
Kitchen Notes
- Use a meat mallet to flatten chicken breasts for even cooking.
- Marinate the chicken overnight for even more flavor.
- Double the marinade for a larger family meal.
- Try adding herbs like thyme or rosemary for diversity.
- Consider using chicken thighs for a juicier option.
Variations
If you have picky eaters or need to cater to different diets, here are some tweaks to consider:
- For a keto version: Skip the sugar in bottled marinades and focus on fresh herbs.
- Low-sodium option: Reduce the amount of salt or use salt-free seasoning blends.
- For added flavor: Toss in red pepper flakes for a little heat.
- Vegetarian option: Substitute the chicken with firm tofu or portobello mushrooms, marinated the same way.
- For younger palates: Use less garlic and lemon if your kids prefer milder flavors.
FAQ
1. How long can I marinate the chicken for best results?
You can marinate the chicken for 30 minutes up to 24 hours. The longer it sits, the more flavorful it becomes.
2. Can I use frozen chicken breasts?
Yes, but make sure to thaw them completely before marinating and cooking.
3. What sides go well with Lemon Garlic Chicken?
Consider pairing it with rice, quinoa, steamed vegetables, or a fresh garden salad.
4. Is this dish gluten-free?
Absolutely! All the ingredients used in this recipe are naturally gluten-free.
5. How can I make this dish spicier?
Add red pepper flakes to the marinade or serve with a spicy dipping sauce on the side.
As you wrap up your Lemon Garlic Chicken, remember this dish is about more than just taste. It brings people together, sparks laughter, and creates cherished memories. Cooking is more than a task; it is an act of love, a chance to care for our families. So, gather around the table, share stories, and enjoy every bite. This meal is sure to become a favorite in your home, just like it has in mine. Happy cooking!
6. Lemon Garlic Chicken
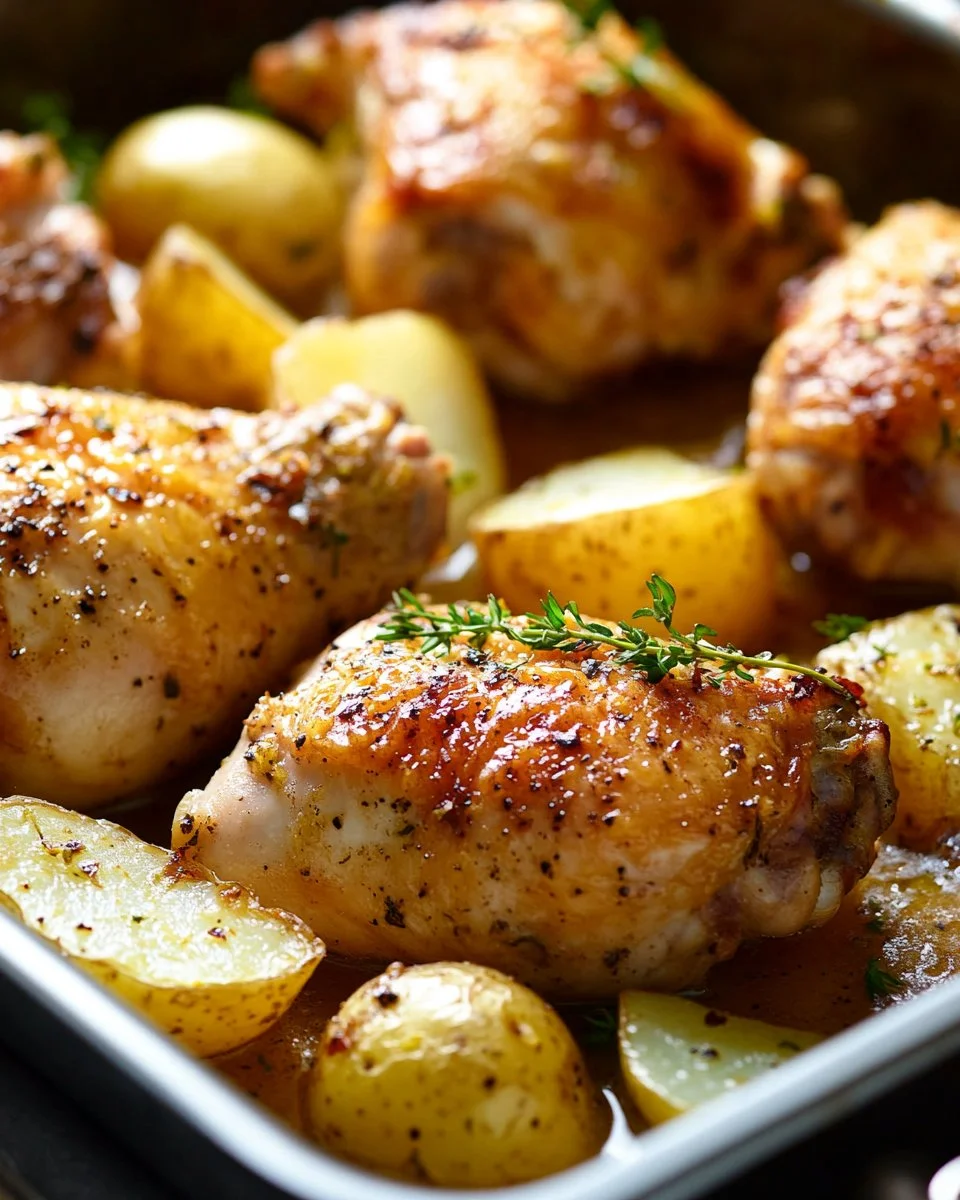
There’s nothing quite like the smell of roasted chicken wafting through the kitchen. The garlic, lemon, and spices mingle together, creating a melody of flavors that sing of comfort and home. As the chicken sizzles in the oven, the family can hardly wait to gather around the table. This Lemon Garlic Chicken recipe is not just a dish; it’s a celebration of family time shared over a warm meal.
Why this works
This Lemon Garlic Chicken recipe comes together quickly, making it perfect for busy weeknights or special family dinners. The beauty of this dish lies in its simplicity. With just a handful of ingredients, you can whip up a satisfying meal that everyone will love.
What’s more, the chicken’s crispy skin infused with lemon and garlic pairs beautifully with tender potatoes, making it a complete meal. You can throw it all together and let the oven do the work. So, whether you are a seasoned cook or a novice in the kitchen, this recipe will inspire confidence and bring everyone to the table.
Process Overview
“This is where the magic happens—when the aroma fills the kitchen.”
The process for making Lemon Garlic Chicken is straightforward. You start by preparing the chicken and potatoes, then season everything with aromatic spices. Once it’s in the oven, sit back and let the delicious smells fill your home. It truly makes cooking feel effortless and enjoyable.
Ingredients
To make this delightful Lemon Garlic Chicken, you will need the following ingredients:
- 3½ pounds bone-in chicken (about 6 leg quarters)
- 3 large potatoes (peeled and cut into chunks)
- 1½ teaspoons garlic powder
- 1½ teaspoons onion powder
- 1½ teaspoons paprika
- 1 teaspoon coriander powder
- ½ teaspoon black pepper
- 1½ teaspoons salt
- ¼ teaspoon turmeric
- 2 tablespoons extra virgin olive oil
- 10 cloves garlic
- ½ cup lemon juice
- ⅓ cup extra virgin olive oil
- ⅓ cup cold water
- 1 teaspoon Aleppo pepper
Lily’s Tips:
- Use high-quality chicken for the best flavor. Look for organic or free-range varieties when possible.
- Choose Yukon Gold potatoes for their buttery texture; they hold up well during roasting.
- Adjust the salt according to your preference, especially if you are watching your sodium intake.
- Fresh garlic can enhance the dish even further; just mince it and mix it into the marinade.
- For a burst of flavor, try adding some fresh herbs, like rosemary or thyme.
Directions
- Preheat your oven to 425°F.
- Clean the chicken and pat it dry using a paper towel. Add it to a 9×13 pan that’s lined with parchment paper.
- Add the peeled potatoes around the chicken in the pan.
- In a small bowl, mix the garlic powder, onion powder, paprika, coriander, salt, black pepper, and turmeric.
- Sprinkle the spice mixture all over the chicken and potatoes, making sure to get it under the skin for maximum flavor.
- Drizzle two tablespoons of olive oil over everything and rub it all over to coat.
- Pour the lemon juice, cold water, and Aleppo pepper into the pan, allowing the flavors to meld.
- Bake in the preheated oven, uncovered, for about 30 minutes, or until the chicken is golden brown and the juices run clear.
Encouraging Notes:
- Don’t be afraid to get your hands dirty when rubbing the olive oil and spices onto the chicken. It’s all part of the cooking experience!
- Keep an eye on the chicken as it cooks. Every oven is different, and you want the skin crispy, but not burnt.
- If you like, baste the chicken with the pan juices halfway through cooking for extra moisture.
Serving
Serving Lemon Garlic Chicken family-style makes for a cozy meal. Lay the chicken and potatoes out on a large platter. Encourage everyone to help themselves. Pair this dish with a simple green salad or steamed vegetables to round out the meal.
When you all sit down together, it fosters connection and conversation, making the meal much more than just food.
Storage
Leftovers can be just as delightful as the original meal. Store any leftover chicken and potatoes in an airtight container in the refrigerator for up to three days.
To reheat, place the chicken and potatoes on a baking sheet and warm them in a 350°F oven for about 15-20 minutes. You can also microwave them, but the oven gives the chicken its crispy skin back.
Kitchen Notes
- Use Parchment Paper: It makes for effortless cooking and cleanup.
- Cut Potatoes Evenly: This ensures they cook uniformly.
- Marinate Ahead: For an even richer flavor, marinate the chicken for a few hours or overnight in the lemon-garlic mixture before cooking.
- Opt for Bone-In Chicken: The bones add moisture and flavor to the meat.
- Stock Up on Spices: Keep your spices fresh for the best flavor.
Variations
Cooking for picky eaters? Here are some tweaks to make this dish work for everyone:
- Substitute Chicken Parts: Feel free to use chicken breasts if your family prefers white meat. Reduce baking time slightly for more tenderness.
- Skip the Potatoes: If watching carbs, add steamed broccoli or green beans instead.
- Add Different Spices: Experiment with your favorite spice blends, like Italian seasoning or even a dash of cumin for a different flavor profile.
- Gluten-Free Option: This dish is naturally gluten-free, so it’s perfect for gluten-sensitive family members.
- Herb Variation: Fresh herbs like thyme or parsley can be added right before serving for an added burst of flavor.
FAQ
-
Can I use skinless chicken parts?
Yes, but keep in mind that skinless chicken may be less flavorful and can dry out faster. -
What can I substitute for Aleppo pepper?
If you don’t have Aleppo pepper, crushed red pepper flakes or a bit of cayenne can work as a substitute. -
Is it okay to prepare this dish ahead of time?
Absolutely! You can prep everything, marinate it, and then put it in the fridge until you are ready to bake. -
Can this recipe be made in a slow cooker?
Yes, you can cook this dish in a slow cooker on low for about 6 hours. Add the potatoes halfway through for optimal cooking. -
What side dishes pair well with Lemon Garlic Chicken?
Green salads, roasted vegetables, and rice pilaf are great options to complement the dish.
Conclusion
Cooking Lemon Garlic Chicken is more than just a dinner recipe; it’s an opportunity to create lasting memories around your table. Share smiles, laughter, and stories as you gather to enjoy this heartwarming meal. Remember, the aromas and flavors will weave themselves into the fabric of your family traditions. Happy cooking!
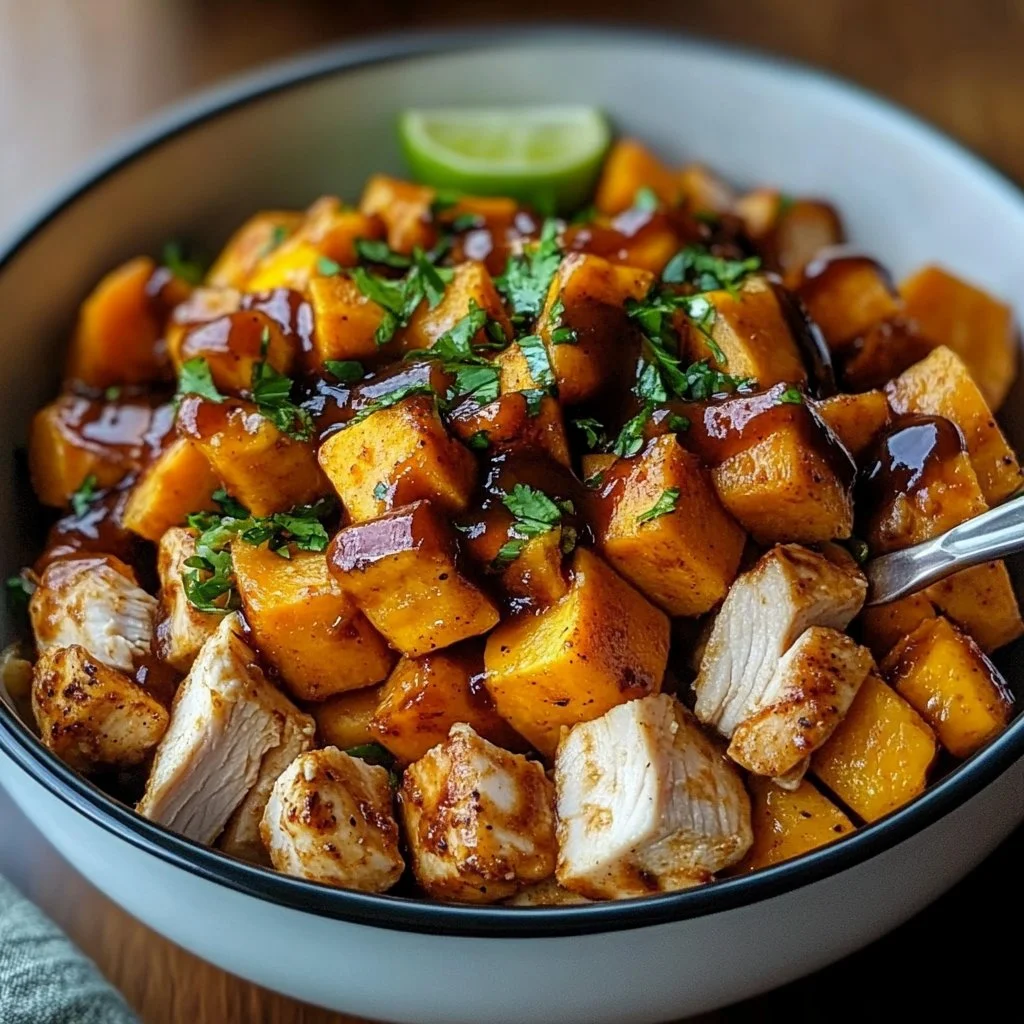
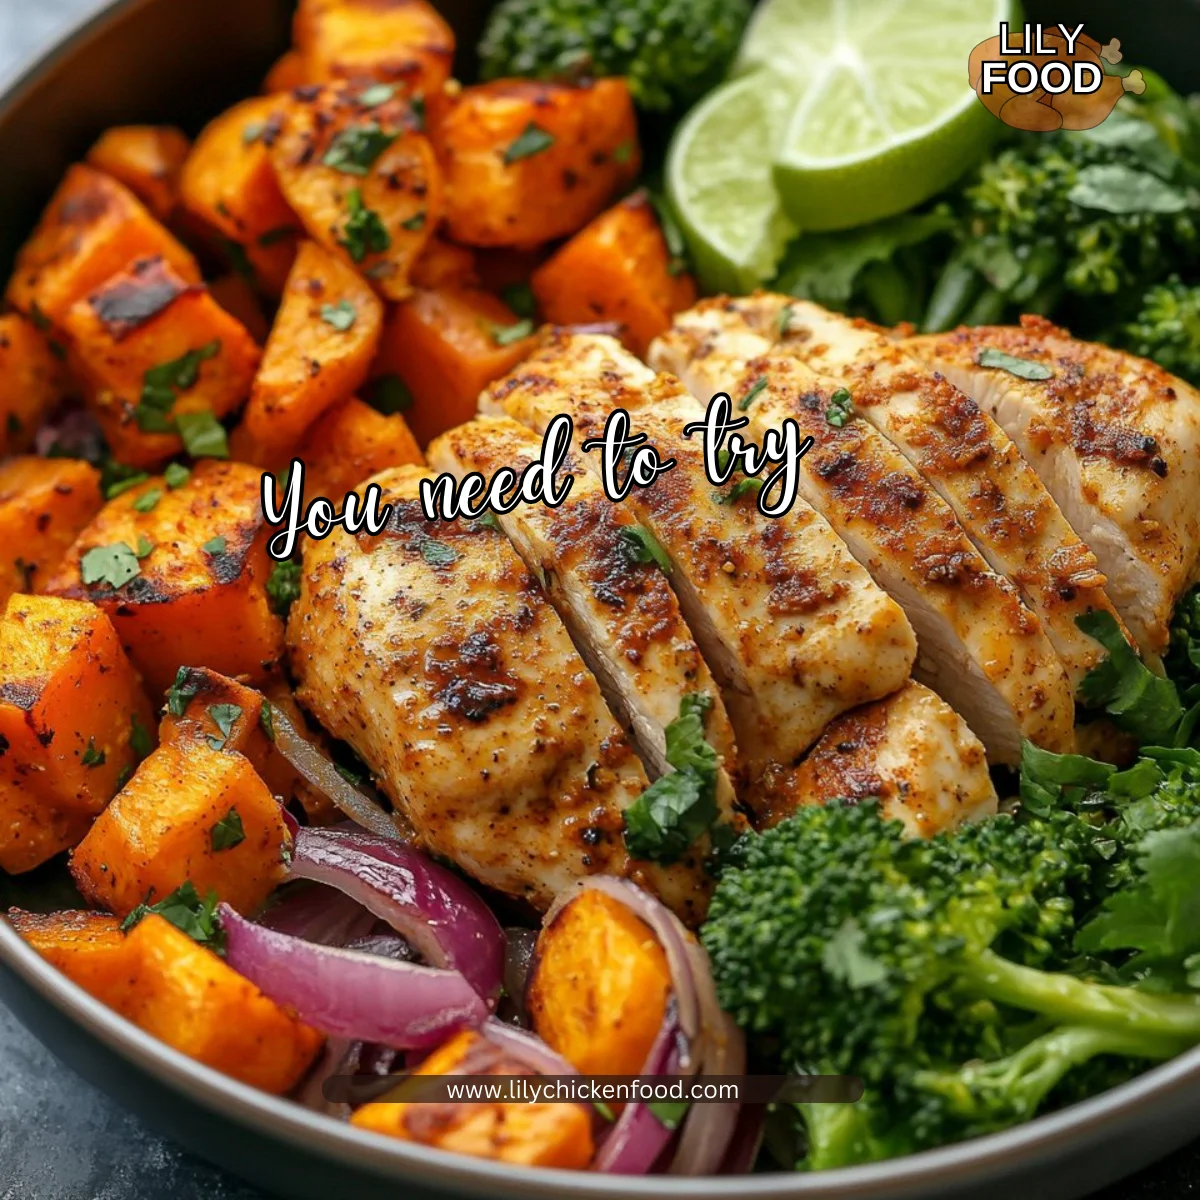
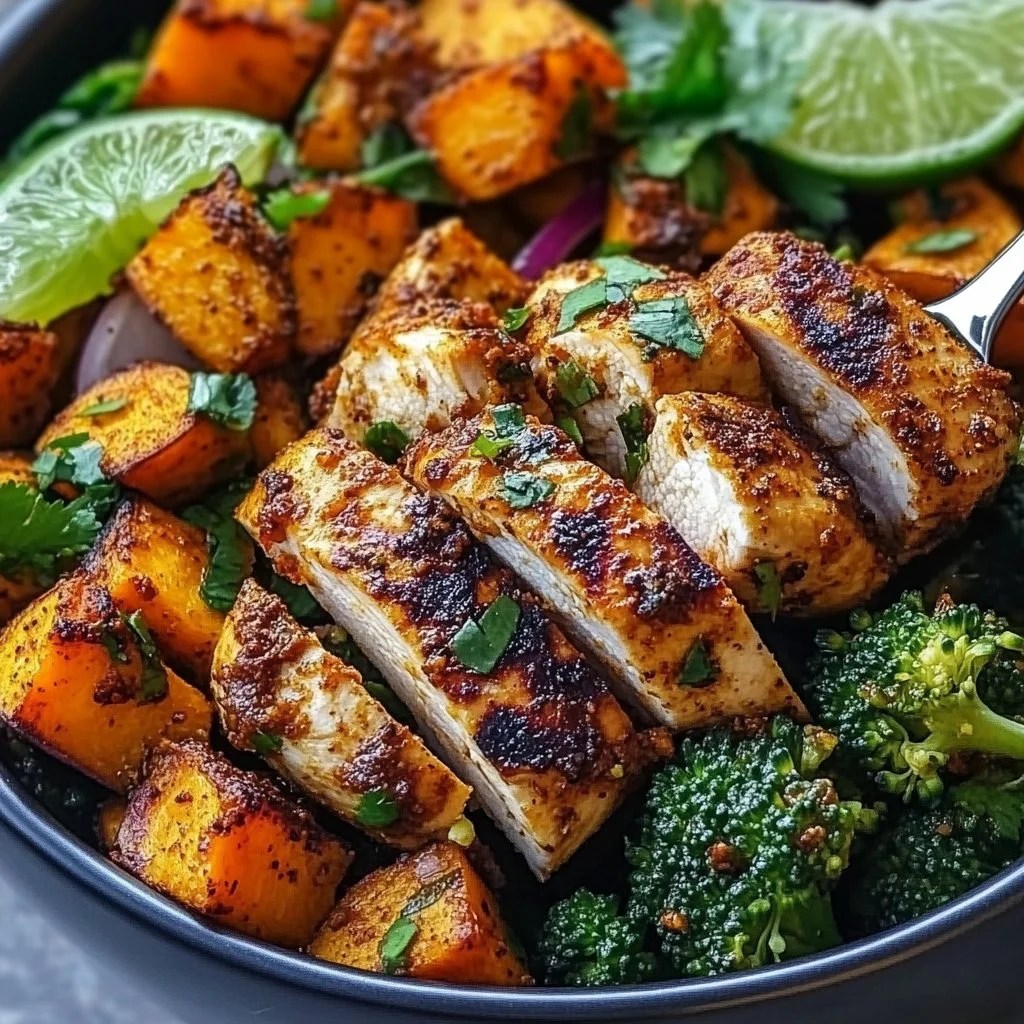
7. BBQ Chicken Sweet Potato Bowl

There’s something truly comforting about stepping into the kitchen as the sun is setting. The rich smell of sweet potatoes roasting in the oven mingles with the sound of sizzling chicken on the stove. It’s a symphony of scents and sounds, hinting at the delicious meal you’re about to create. Today, we are diving into a delightful and hearty recipe: the BBQ Chicken Sweet Potato Bowl. It’s a dish that brings warmth to your family as you gather around the table. Let’s get started!
Why This Works
This BBQ Chicken Sweet Potato Bowl is the perfect weeknight dinner solution. It’s not only flavorful but also incredibly satisfying. Sweet potatoes are a wonderful source of fiber and nutrients, and paired with protein-rich chicken, they create a well-rounded meal.
Making this dish is a great way to bring the family together. Everyone can customize their bowl with their favorite toppings. Plus, it saves you time. The sweet potatoes roast in the oven while you heat up the chicken, creating a delicious and filling dinner in under an hour.
Process Overview
“This is where the magic happens—when the aroma fills the kitchen.”
As the sweet potatoes roast and the chicken simmers, your kitchen will be filled with mouthwatering scents. This dish comes together seamlessly, allowing you to spend less time cooking and more time enjoying a meal with your loved ones.
Ingredients
Here’s what you’ll need to make these delightful bowls:
- 2 chicken breasts, cooked and shredded
Tip: Use leftover rotisserie chicken for quicker prep. - 2 medium sweet potatoes, cubed
Tip: Look for firm sweet potatoes free from blemishes. - 1 cup corn, fresh or frozen
Tip: Frozen corn is a great time-saver. - 1 avocado, diced
Tip: Choose a ripe avocado for the creamiest texture. - 1/2 cup barbecue sauce
Tip: Use your favorite store-bought or homemade sauce. - 1 tablespoon olive oil
Tip: Extra virgin olive oil adds great flavor. - Salt and pepper to taste
Tip: Adjust to your preference for seasoning. - Optional: diced red onion, cilantro, lime for serving
Tip: Fresh herbs elevate the flavor and add brightness.
Directions
-
Preheat the oven to 400°F (200°C).
This step gets the kitchen ready for a delicious dish. The heat will bring out the best in the sweet potatoes! -
Toss the cubed sweet potatoes with olive oil, salt, and pepper. Spread out on a baking sheet and roast for 25-30 minutes until tender.
Keep an eye on them and give them a gentle shake halfway through for even roasting. -
In a skillet, heat the shredded chicken and barbecue sauce until warmed through.
This will take only a few minutes, and the smell will be simply irresistible. -
To assemble the bowls, place roasted sweet potatoes at the bottom, top with barbecue chicken, corn, and diced avocado.
Layering creates a beautiful presentation; feel free to make it colorful and fun! -
Add any additional toppings such as red onion, cilantro, or a squeeze of lime. Serve warm.
Encourage everyone to make their bowl unique—it’s all about enjoying what you love!
Serving
Serving this BBQ Chicken Sweet Potato Bowl family-style can be a wonderful experience. Place all the components in the center of the table and let everyone build their bowl. This approach brings a sense of togetherness as everyone selects their favorite ingredients. You can share stories about your day while enjoying a hearty meal.
Storage
Storing leftovers is easy! You can keep any extra BBQ Chicken Sweet Potato Bowls in airtight containers in the refrigerator for up to three days. When you’re ready to eat, reheat them in the microwave or on the stove until warmed through. Just be careful not to overheat the sweet potatoes, as they can become mushy.
Kitchen Notes
- Prep Ahead: Wash and cut the sweet potatoes a day in advance for time-saving.
- Shredding Chicken: Use a hand mixer to shred cooked chicken quickly.
- Batch Cooking: Make extra sweet potatoes and chicken for quick lunches or dinners later on.
- Frozen Corn: No need to thaw if using frozen corn; just toss it in when assembling the bowls.
- Use One Pan: Roast the sweet potatoes and warm the chicken in one skillet to save on dishes!
Variations
This recipe can easily adapt to suit different tastes or dietary restrictions:
- For Veggie Eaters: Substitute the chicken with black beans for a delicious plant-based option.
- For Keto Dieters: Skip the corn and avocado for a lower-carb option.
- Picky Eaters: Serve ingredients separately and let them choose what they want.
- Wealth of Toppings: Consider adding cheese, salsa, or Greek yogurt for extra flavor.
- Spicy Kick: Add jalapeños or a spicy barbecue sauce for those who like a little heat.
FAQ
1. Can I use other proteins instead of chicken?
Yes, you can use beef, turkey, or even tofu if you prefer a vegetarian option.
2. How can I make this dish healthier?
You can reduce the use of barbecue sauce or opt for a low-sugar version.
3. Can I prepare this dish in advance?
Yes, you can pre-cook the sweet potatoes and chicken, then assemble the bowls just before serving.
4. Is this recipe gluten-free?
Yes, all ingredients are gluten-free unless you use a barbecue sauce with gluten.
5. How do I know when the sweet potatoes are done?
They should be fork-tender and lightly browned on the edges.
Conclusion
As the meal comes together, the kitchen fills with warmth and delight. This BBQ Chicken Sweet Potato Bowl is not just food; it’s a way to connect with your loved ones, nourishing both body and soul. Remember, the best meals are those shared with family and friends, so gather around the table and enjoy every bite together. Happy cooking!
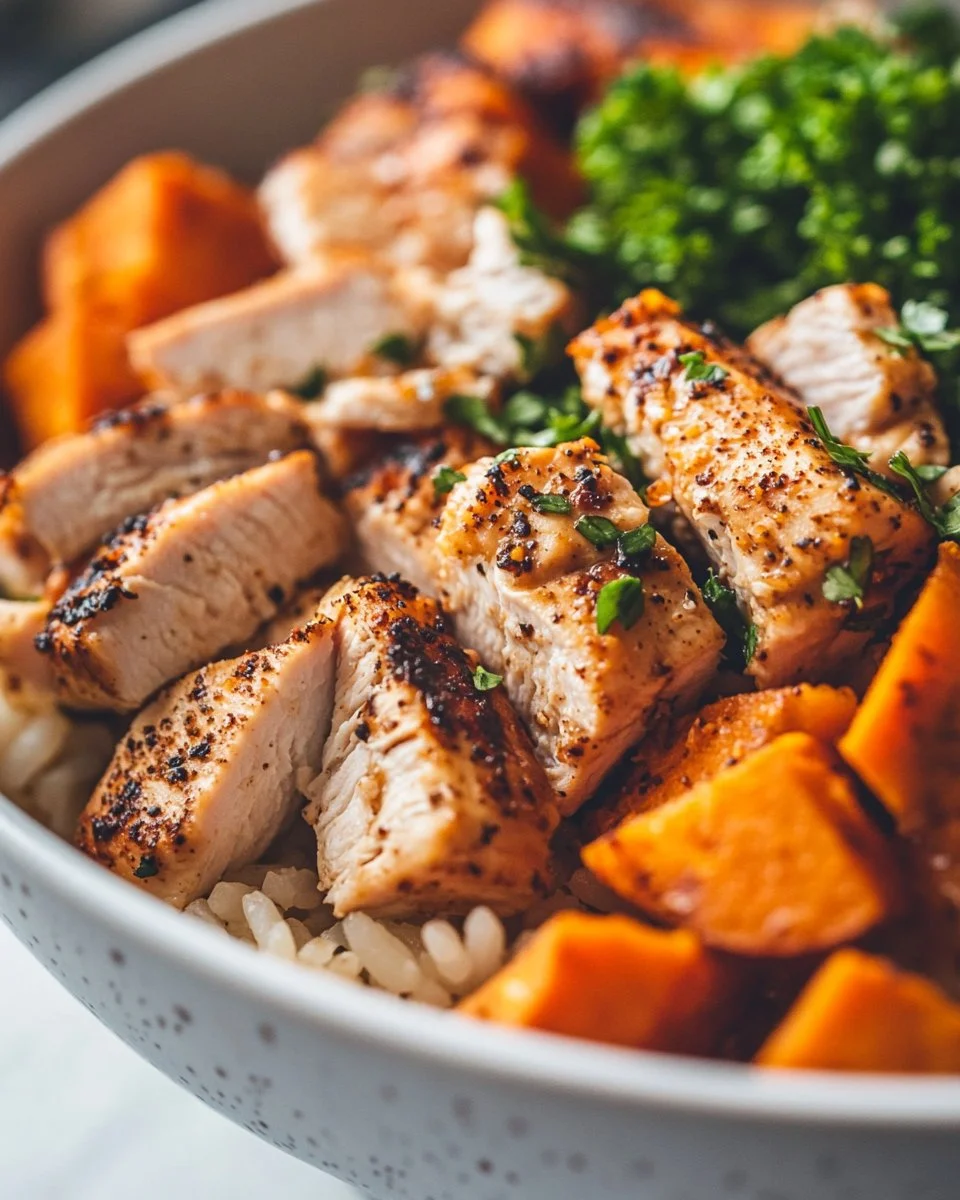
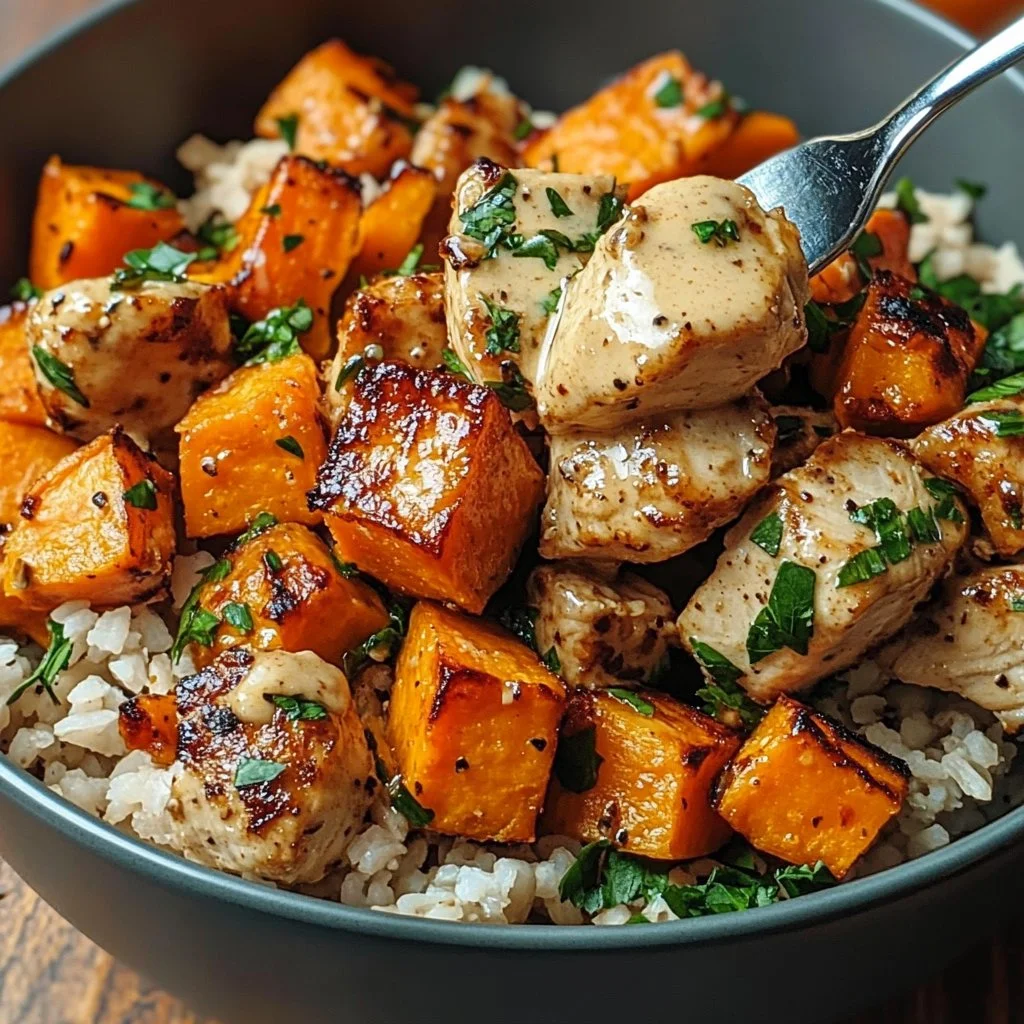
8. Chicken & Sweet Potato Rice Bowl
There’s something comforting about the sounds and smells that fill the kitchen while cooking a delicious meal. Imagine the soft sizzle of chicken in a skillet, mingling with the sweet aroma of roasting sweet potatoes. The harmony of these ingredients transforms your home into a warm gathering place. A Chicken & Sweet Potato Rice Bowl is exactly what you need. It’s comforting, nutritious, and perfect for busy families looking for a wholesome meal without spending all day in the kitchen.
Why This Works
This recipe is a favorite in our household. It’s quick to prepare, so you can focus on what really matters—your family. Using simple ingredients, you create a dish bursting with flavor. The combination of tender chicken, sweet potatoes, and hearty brown rice makes for a filling meal. Plus, it’s easy to customize for different tastes.
After a long day, I appreciate recipes that are not only straightforward but also healthy. The sweet potatoes provide vitamins, and the chicken offers lean protein. When you toss this bowl together, it feels like more than just a meal; it’s an experience that brings everyone to the table.
Process Overview
“This is where the magic happens—when the aroma fills the kitchen.”
This Chicken & Sweet Potato Rice Bowl is simple yet satisfying. The recipe comes together in about 40 minutes, making it ideal for a weeknight dinner. You’ll roast the sweet potatoes while cooking the chicken. Then, it all comes together in a delicious bowl you can share with your loved ones.
Ingredients
- 1 lb chicken breast, diced and seasoned with salt and pepper
- 2 cups sweet potatoes, diced
- 2 cups cooked brown rice
- 1 tbsp olive oil
- 1 tsp paprika
- Salt and pepper, to taste
- 2 tbsp tahini
- 1 tbsp lemon juice
- 1 tbsp water
Lily’s Tips:
- For even cooking, make sure the sweet potato cubes are uniform in size.
- Use a meat thermometer to ensure the chicken reaches an internal temperature of 165°F.
- Cook extra rice for quick meals throughout the week or to use in salads.
- If you prefer a little spice, add chili powder or red pepper flakes to the chicken.
- Opt for a whole rotisserie chicken if you’re short on time—this can cut down prep significantly.
Directions
-
Preheat your oven to 400°F (200°C). This temperature helps caramelize the sweet potatoes while keeping them tender.
-
In a bowl, toss the diced sweet potatoes with olive oil, paprika, salt, and pepper. Spread them out on a baking sheet. Note: The key is to keep them in a single layer for the best roasting.
-
Roast the sweet potatoes for 20 minutes, flipping halfway through. The sweet smell will start to fill your kitchen.
-
While the sweet potatoes roast, heat a skillet over medium-high heat. Add the seasoned chicken and cook until browned and no longer pink in the center. Encouragement: Stir occasionally and keep an eye on it. It will only take about 8-10 minutes.
-
In a small bowl, whisk together tahini, lemon juice, and water until smooth. Adjust the consistency with water as needed. This drizzle adds a lovely creaminess to the dish.
-
Now, let’s assemble! In bowls, layer the cooked brown rice, chicken, and roasted sweet potatoes. Tip for a beautiful bowl: Take your time with the layers—it makes the meal feel special.
-
Drizzle your tahini sauce on top just before serving. This final touch not only looks great but adds a burst of flavor.
Serving
Serving this dish family-style makes it even more inviting. Place all components in the center of the table and let everyone build their own bowl. This not only allows for customization but also encourages conversation and sharing. You can put out some extra toppings like fresh herbs, nuts, or even avocado slices.
This is more than a meal; it’s a wonderful way to connect over food. Trust me; everyone will love choosing their favorite flavors.
Storage
Leftovers can be stored in an airtight container in the fridge for up to four days. To reheat, simply place in the microwave for 1-2 minutes, or until heated through. The sweet potatoes may lose some texture, so if you like them crispy, consider reheating them in an oven or skillet for a few minutes.
Kitchen Notes
- Prep Ahead: Dice sweet potatoes and chicken the night before to save time.
- Cook Extra: Make double the amount of chicken to have for lunch or add to salads.
- One-Pan Wonder: Roast the chicken with the sweet potatoes if you use oven-safe cookware.
- Freeze Portions: Consider freezing individual servings for easy meals later on.
- Use Leftover Rice: If you have leftover rice, this is a perfect dish to use it up and reduce waste.
Variations
Not everyone in your family may be a fan of sweet potatoes, and that’s okay! Here are a few adjustments:
- For Picky Eaters: Substitute sweet potatoes with regular potatoes or carrots for a more familiar taste.
- For Vegans: Replace chicken with chickpeas or tofu and omit the tahini sauce for a different drizzle, like a balsamic reduction.
- Low-Carb Option: Skip the rice and serve the chicken and sweet potatoes over a bed of leafy greens.
- Spice it Up: Use garlic powder or hot sauce for extra flavor in the chicken.
- Herbs and Greens: Incorporate fresh herbs like parsley or spinach for an extra boost of nutrition.
FAQ
1. Can I use different grains?
Absolutely! Quinoa or couscous would work well in place of brown rice.
2. How do I know when the chicken is done?
Check the internal temperature with a meat thermometer. It should read 165°F.
3. Is this recipe suitable for meal prep?
Yes! These bowls store well and are perfect for making ahead of time.
4. Can I add more veggies?
Yes, feel free to add veggies like bell peppers or broccoli to the mix.
5. What’s tahini, and what can I use instead?
Tahini is a sesame seed paste that adds creaminess. If you don’t have it, you can use yogurt or a creamy dressing.
At the heart of cooking is the desire to nourish our loved ones. This Chicken & Sweet Potato Rice Bowl embodies warmth, flavor, and the joy of family. Whip it up for your next dinner, and enjoy the wonderful aroma and flavors that come together in this simple yet satisfying dish. Happy cooking!
9. Chipotle Honey Chicken Thighs with Smoked Gouda Mashed Potatoes

There’s something magical about the sounds and smells that fill the kitchen when you’re cooking, especially when preparing a meal for your family. The crackling of chicken thighs as they roast, the rich aroma of smoked gouda wafting through the air, and the comforting sizzle of mashed potatoes coming together create an atmosphere that feels both warm and inviting. Today, I’m excited to share a recipe for Chipotle Honey Chicken Thighs with Smoked Gouda Mashed Potatoes. It’s a dish that not only delights the taste buds but also saves time in the kitchen, making it perfect for busy families.
Why This Works
This recipe is all about ease and family time. With just a few simple ingredients, you can whip up a meal that tastes fantastic and has that lovely homemade feel. The chicken thighs are tender and juicy, coated in a sweet and spicy chipotle honey glaze that will have your family asking for seconds. The smoked gouda mashed potatoes add a creamy, cheesy richness that pairs beautifully with the chicken.
Not only is this dish quick to prepare, but it also frees up your evening for family bonding. While the chicken bakes, you can tend to other tasks or enjoy some quality time with your loved ones. It’s a win-win!
Process Overview
“This is where the magic happens—when the aroma fills the kitchen.”
Preparing this meal is straightforward and can be done in less than an hour. You start by prepping your ingredients and marinating the chicken. Then, while it roasts, you can focus on your mashed potatoes. The two components of this dish come together seamlessly, creating a comforting and satisfying meal.
Ingredients
- 4 chicken thighs: Choose bone-in, skin-on thighs for maximum flavor and juiciness. They hold up well during baking.
- 2 tablespoons chipotle honey: This sweet and spicy honey elevates the flavor of the chicken. If you can’t find it, a mix of honey and a touch of chipotle powder will work too.
- 1 teaspoon smoked paprika: This adds a warm, smoky flavor that enhances the chicken’s profile.
- 1 teaspoon garlic powder: Garlic brings a robust flavor, balancing the sweetness of the honey.
- Salt and pepper to taste: Essential for seasoning and enhancing flavor.
- 2 pounds potatoes: I prefer Yukon Gold or Russet potatoes for their creamy texture when mashed.
- 1/2 cup milk: Whole milk will give your mashed potatoes a rich flavor, but you can use 2% or a dairy-free alternative if preferred.
- 1/4 cup butter: Unsalted butter is best, as it allows you to control the saltiness of your dish.
- 1 cup smoked gouda cheese, shredded: This cheese adds a wonderful creaminess and depth of flavor to the mashed potatoes.
Directions
-
Preheat the oven to 400°F (200°C).
- Make sure it’s fully heated before you pop the chicken in. This ensures it cooks evenly.
-
In a bowl, mix the chipotle honey, smoked paprika, garlic powder, salt, and pepper.
- This mixture should smell fantastic as you combine the ingredients.
-
Coat the chicken thighs in the mixture and place them in a baking dish.
- Ensure each thigh is well covered with the glaze for the best flavor.
-
Bake the chicken for 30-35 minutes or until fully cooked.
- You want the internal temperature to reach 165°F for safety. The skin should be crispy and golden.
-
Meanwhile, peel and chop the potatoes, then boil them in salted water until tender.
- Test them with a fork. They should break apart easily.
-
Drain the potatoes and mash them with milk, butter, and smoked gouda until creamy.
- Feel free to adjust the milk based on your desired creaminess.
-
Serve the baked chicken thighs with the smoked gouda mashed potatoes.
- This is best enjoyed hot, with the flavor of the chicken and cheese melding beautifully together on the plate.
Serving
For a family-style presentation, I recommend serving everything on a large platter. Lay the chicken thighs in the center and mound the smoked gouda mashed potatoes around them. This not only looks inviting but also encourages everyone to dig in. Gather around the table, serve with a side salad, and enjoy each other’s company.
Storage
If you have leftovers, store them in an airtight container in the refrigerator for up to three days. To reheat, pop the chicken in the oven at 350°F until heated through, about 10-15 minutes. The mashed potatoes can be reheated in the microwave or on the stove with a bit of extra milk to bring back their creaminess.
Kitchen Notes
- Batch Cook: Double the recipe for meal prepping. The chicken freezes well for up to three months.
- Potato Skins: Leave the skins on the potatoes for added texture and nutrients.
- One-Pan Meal: Consider adding vegetables like green beans or broccoli to the baking dish half-way through the chicken cooking time. They’ll pick up the lovely flavors, too.
- Flavor Up: Feel free to add fresh herbs like thyme or rosemary for added fragrance.
- Spice Control: Adjust the chipotle honey to your spice preference. Use regular honey for a milder flavor.
Variations
If you have picky eaters at home, here are some tweaks you might consider:
- For Kids: Serve the chicken without the glaze and add a fun dipping sauce like ranch.
- For Vegetarians: Substitute the chicken with marinated tofu or portobello mushrooms.
- Low-Carb Option: Serve the chicken with cauliflower mash instead of potatoes.
- Gluten-Free: This recipe is naturally gluten-free, making it perfect for those with gluten sensitivities.
- Dairy-Free: Use a dairy-free milk alternative and vegan butter for the mashed potatoes.
FAQ
-
Can I use boneless chicken thighs?
Yes, boneless thighs will work. Reduce the baking time by about 5-10 minutes. -
What if I don’t have smoked gouda?
Any creamy cheese will work, such as cheddar or mozzarella. Just be mindful of flavor differences. -
Can this recipe be grilled instead?
Absolutely! Preheat your grill and cook the marinated chicken over medium heat until cooked through. -
How do I know when the chicken is cooked?
Use a meat thermometer to check if the internal temperature reaches 165°F. -
Can I prepare this ahead of time?
Yes, you can marinate the chicken a few hours in advance and store the potatoes ready to boil.
In conclusion, life in the kitchen should be as easy as it is enjoyable. This Chipotle Honey Chicken Thighs with Smoked Gouda Mashed Potatoes recipe provides a delightful and hearty meal that the whole family will love. So gather your ingredients, ignite your passion for cooking, and create something beautiful. Happy cooking!
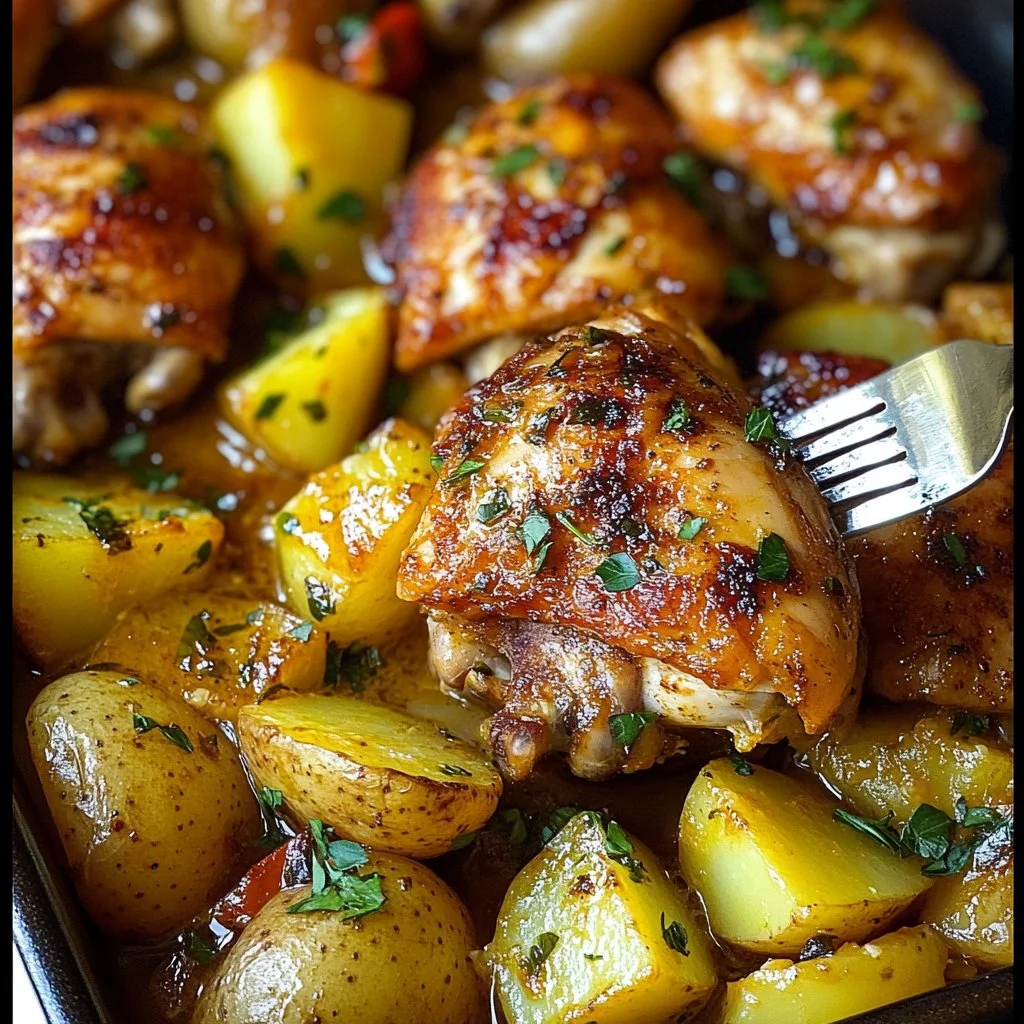
10. Crockpot Chicken and Sweet Potatoes
As you step into the kitchen, the sound of the crockpot gently bubbling is music to your ears. The sweet aroma of chicken and sweet potatoes fills the air, warming your heart and inviting your loved ones to gather around the table. You know that in just a few hours, you’ll have a comforting meal ready to serve, one that brings a smile to everyone’s face.
Why This Works
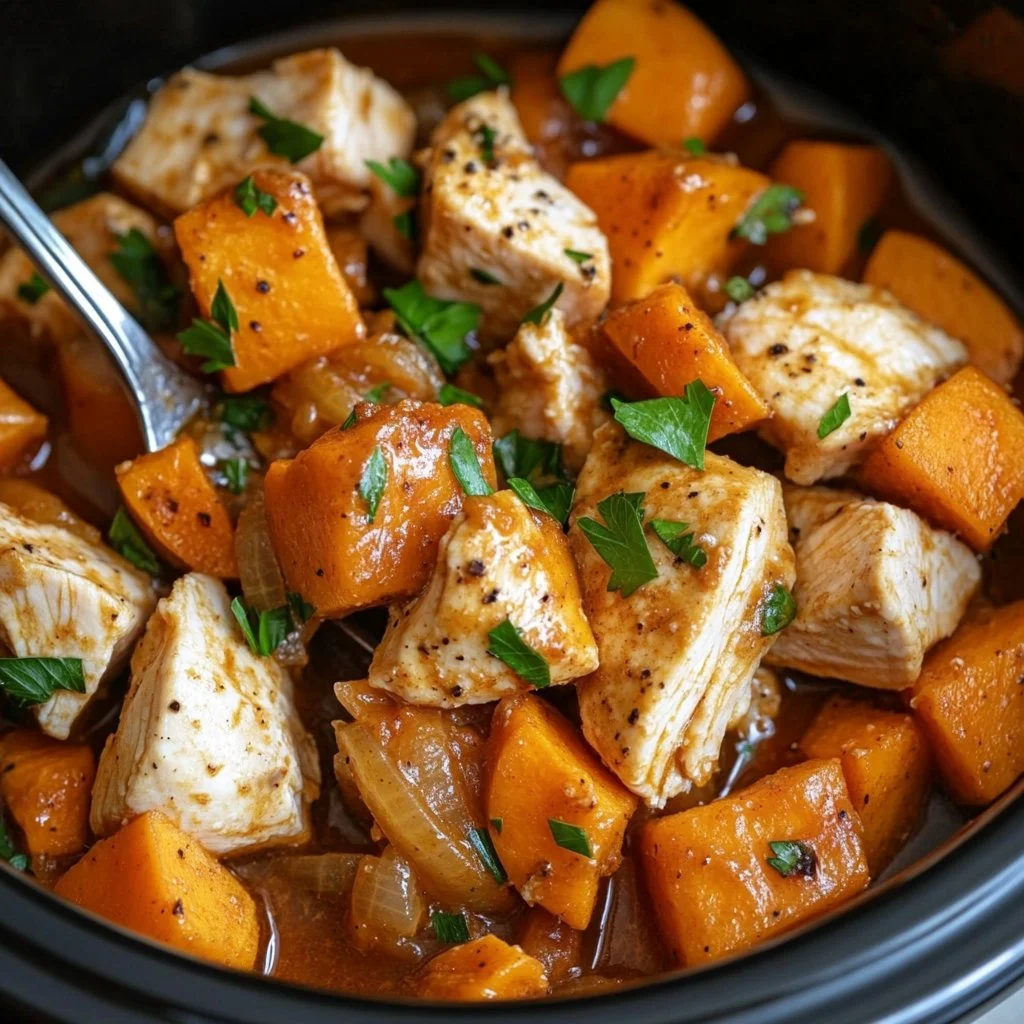
This crockpot chicken and sweet potatoes recipe is a family favorite. It’s simple, delicious, and perfect for busy weeknights. The beauty of this dish lies in its ability to blend flavors seamlessly over hours of cooking.
Using the crockpot saves you time without sacrificing quality. As the chicken cooks, it becomes tender and juicy, while the sweet potatoes absorb all the flavors. Your family will appreciate a hearty meal that warms not just their stomachs, but their hearts.
Process Overview
“This is where the magic happens—when the aroma fills the kitchen.”
Cooking in a crockpot is both convenient and rewarding. The first step is a quick prep, then you can walk away and let the slow cooker do its job. As the hours go by, you’ll be rewarded with an enticing smell that makes everyone excited for dinner.
Ingredients
To make this dish, here’s what you’ll need:
-
4 boneless, skinless chicken breasts
Tip: Look for chicken that feels moist and smells fresh. This will ensure the best flavor and texture. -
2 large sweet potatoes, peeled and cubed
Tip: Sweet potatoes should be firm with smooth skin. A little sweetness makes everything better! -
1 onion, chopped
Tip: Any type of onion will work, but yellow onions tend to be sweeter. -
2 cloves garlic, minced
Tip: Fresh garlic always adds a richer flavor than powdered. -
1 teaspoon paprika
Tip: Smoked paprika gives a wonderful depth of flavor, if you have it on hand. -
Salt and pepper to taste
Tip: Seasoning ensures that all the flavors pop; don’t be shy! -
1 cup chicken broth
Tip: Homemade broth is great if you have some, but store-bought works too! -
Fresh parsley for garnish (optional)
Tip: A sprinkle of parsley adds a fresh touch to the dish and enhances the visual appeal.
Directions
-
Place the cubed sweet potatoes and chopped onion in the bottom of the crockpot.
Start with a solid base. The sweet potatoes will soak up that delicious chicken flavor. -
Lay the chicken breasts on top of the veggies.
This way, the chicken juices will drip down, making everything even more flavorful. -
Sprinkle with minced garlic, paprika, salt, and pepper.
These seasonings create a beautiful aroma that will make your kitchen come alive. -
Pour the chicken broth over the top.
This adds moisture to keep everything nice and tender as it cooks. -
Cover and cook on low for 6-7 hours or on high for 4-5 hours, until the chicken is cooked through and tender.
Trust the process; the low slow method yields the best results. -
Shred the chicken with two forks and mix it with the vegetables before serving.
Shredding the chicken allows it to blend beautifully with the sweet potatoes and onions. -
Garnish with fresh parsley if desired.
This final touch completes your dish, adding color and freshness.
Serving
Serving this meal family-style is the way to go. Place the entire crockpot in the center of the table and let everyone help themselves. Consider offering a side of crusty bread to scoop up the delicious sauce and veggies. This creates a shared experience, encouraging laughter and connection around the table.
Storage
This crockpot chicken and sweet potatoes dish stores well. Leftovers can be kept in an airtight container in the fridge for up to 3 days. When reheating, add a splash of chicken broth to keep everything moist and flavorful. You can also freeze individual portions for up to 3 months. Just make sure to use freezer-safe containers.
Kitchen Notes
- Prep Ahead: Chop the vegetables the night before to save time.
- Use Leftovers: Shred any leftover chicken for sandwiches or salads.
- Make it Spicy: Add red pepper flakes for some heat.
- Switch Up the Veggies: You can add carrots or bell peppers for added flavor.
- Quick Clean-Up: Lining your crockpot with a special liner will help with easy clean-up.
Variations
If you have picky eaters, consider these tweaks:
- Swap the Chicken: Use turkey cutlets or even tofu for a plant-based option.
- Different Seasoning: Experiment with Italian seasoning for a different flavor profile.
- Change the Veggies: Use regular potatoes or even carrots if sweet potatoes aren’t popular.
- Dairy-Free: Substitute chicken broth with vegetable broth to cater to different diets.
FAQ
-
Can I use frozen chicken?
Yes, but you need to increase the cooking time by about an hour. -
What can I serve with this dish?
A simple salad or some steamed broccoli would be great compliments. -
Is there an alternative to paprika?
Yes, you can use cayenne for heat or skip it entirely for a neutral flavor. -
Can I cook this on the stove instead?
Absolutely! Just simmer on low heat in a pot for about 1-2 hours, stirring occasionally. -
How do I know when the chicken is done?
The internal temperature should reach 165°F, and it should shred easily.
Conclusion
As the day winds down, gather your loved ones around the table. Share stories, laughter, and this delicious crockpot chicken and sweet potatoes meal. It’s a dish that nourishes both body and soul, bringing everyone closer together. Remember, the best meals are those made with love. Enjoy!
11. Chicken and Sweet Potato Meal Prep

The smell of roasted sweet potatoes and seasoned chicken fills the air. You can hear the sizzling of the chicken as it cooks in the oven, bringing a sense of comfort and warmth. This is not just a meal; it’s a family gathering around the dinner table. Today, I’m excited to share a Chicken and Sweet Potato Meal Prep that is perfect for busy weeks. Not only is this dish delicious, but it’s also packed with nutrients, making it a family favorite that you’ll want to make again and again.
Why This Works
This Chicken and Sweet Potato Meal Prep recipe is a lifesaver. Between busy schedules, after-school activities, and the rush of daily life, who has time to cook every single night? This recipe allows you to cook once and enjoy delicious meals throughout the week.
The combination of chicken and sweet potatoes is not only satisfying but also nutritious. Sweet potatoes are rich in vitamins and minerals, while chicken is a great source of protein. This meal prep is perfect for families who want to eat healthy without sacrificing flavor or time. You can store your meals in individual containers, making it easy to grab and go when you need to.
Process Overview
“This is where the magic happens—when the aroma fills the kitchen.”
Meal prep is all about making life simpler in the kitchen. You can take an hour or so to prepare this dish, and the rewards will last you all week. Roasting the chicken and sweet potatoes together promotes flavor melding, and the broccoli adds a pop of green to your meals.
Your kitchen will transform into a haven of scents that will get the whole family excited about eating healthy.
Ingredients
Gather these simple ingredients for a hassle-free cooking experience:
- 2 pounds chicken breast, diced
Tip: Choose fresh chicken for the best flavor. If using frozen, be sure to thaw thoroughly before cooking. - 4 medium sweet potatoes, cubed
Tip: Be sure to peel them for a smoother texture, or leave the skin on for additional nutrients. - 1 tablespoon olive oil
Tip: A good quality olive oil enhances the flavor of the chicken and sweet potatoes. - 1 teaspoon garlic powder
Tip: Garlic powder is a quick way to add flavor. If you have fresh garlic, use that for an even stronger taste. - 1 teaspoon paprika
Tip: Smoked paprika can add a nice smoky flavor, which pairs beautifully with sweet potatoes. - 1 teaspoon salt
Tip: Adjust the salt based on your family’s taste preferences; you can always add more later. - 1/2 teaspoon black pepper
Tip: Freshly ground black pepper is more flavorful than pre-ground. - 2 cups broccoli florets
Tip: Fresh or frozen broccoli works; just adjust the cooking time slightly if using frozen. - 1/4 cup fresh parsley, chopped
Tip: Fresh herbs brighten up any dish. You can substitute with cilantro or thyme if you prefer.
Directions
- Preheat your oven to 400°F (200°C).
This is the first step to ensuring your meal cooks evenly. - In a large bowl, combine the diced chicken, cubed sweet potatoes, olive oil, garlic powder, paprika, salt, and black pepper. Mix well.
Get your hands in there! This is part of the fun. - Spread the mixture onto a baking sheet in a single layer.
A single layer ensures even cooking and browning. - Bake for 25-30 minutes or until the chicken is cooked through and sweet potatoes are tender.
You want to see that lovely golden brown color on the edges. - In the last 10 minutes of baking, add the broccoli florets to the baking sheet.
This way, the broccoli stays bright and crisp, which adds color to your meal. - Remove from the oven, garnish with chopped parsley, and let cool before portioning.
Letting it cool makes it easier to pack away into containers.
Serving
To serve this meal, I recommend family-style plating. You can set everything out on the table, letting everyone fill their plates. This fosters a sense of togetherness and allows your family members to choose their portions.
Pair this meal with a light salad or some whole-grain bread if you like. It’s all about making it a complete and satisfying dinner for everyone to enjoy.
Storage
For proper storage, let the meal cool completely before transferring it to airtight containers. You can keep these meals in the fridge for up to five days. When reheating, simply microwave them for about 2-3 minutes until they are warmed through.
If you want to freeze some portions, it’s best to do so before adding the broccoli. Freeze in single-serve containers, and they’ll last for about 3 months. To reheat, defrost in the fridge overnight and then microwave.
Kitchen Notes
- Pre-chop the sweet potatoes and chicken the night before to save time on cooking day.
- Use parchment paper on your baking sheet for easy cleanup.
- Experiment with spices according to your family’s preferences.
- Swap out the veggies based on what’s in season or on sale.
- Invest in good-quality meal prep containers for better storage.
Variations
Are there picky eaters in your family? No problem! Here are some tweaks to make this dish more appealing:
- Substitute chicken with turkey or even firm tofu for a vegetarian option.
- Try different protein options like shrimp or sausage.
- For the sweet potatoes, use butternut squash or pumpkin for a different flavor.
- If broccoli isn’t a hit, add green beans or snap peas instead.
- For a spicier kick, add chili powder or red pepper flakes in the mix.
FAQ
1. Can I use other vegetables?
Absolutely! Feel free to mix in your family’s favorite veggies. Carrots and bell peppers work great, too.
2. How can I make this gluten-free?
This recipe is naturally gluten-free, just ensure any spices used are gluten-free as well.
3. Can I prep this dish in advance?
Yes, it’s perfect for meal prep! Just prepare ahead of time and store in the fridge.
4. Can I use frozen chicken?
You can, but make sure it’s thawed completely for even cooking.
5. How do I know when the chicken is fully cooked?
The internal temperature should reach 165°F. Use a meat thermometer for accuracy.
Conclusion
Cooking doesn’t have to be a chore. With this Chicken and Sweet Potato Meal Prep, you’re not just making a meal; you’re creating a wonderful family experience. Your kitchen will fill with delightful aromas, and your family will gather around the table, enjoying nourishing food together. So, roll up your sleeves and enjoy the process. Happy cooking!
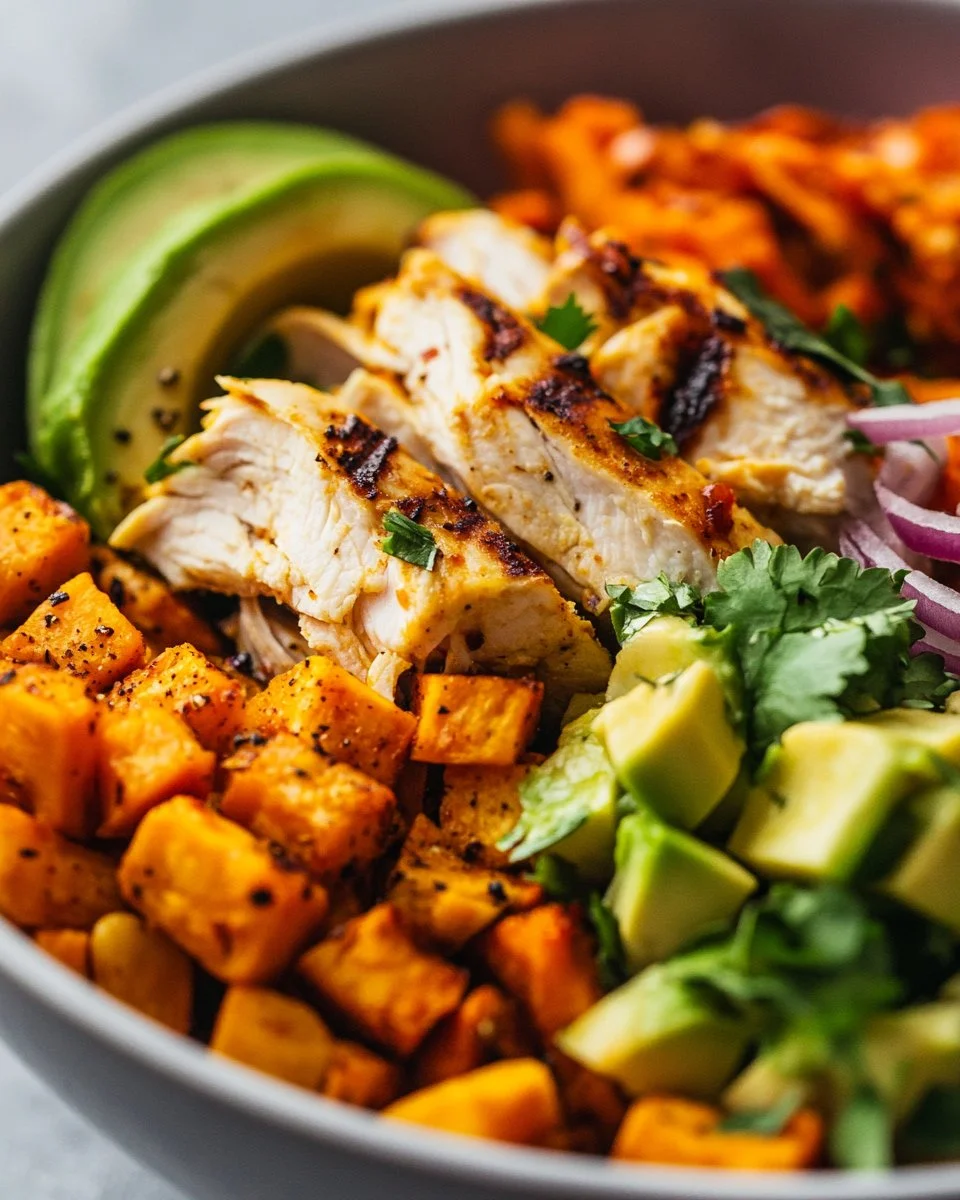
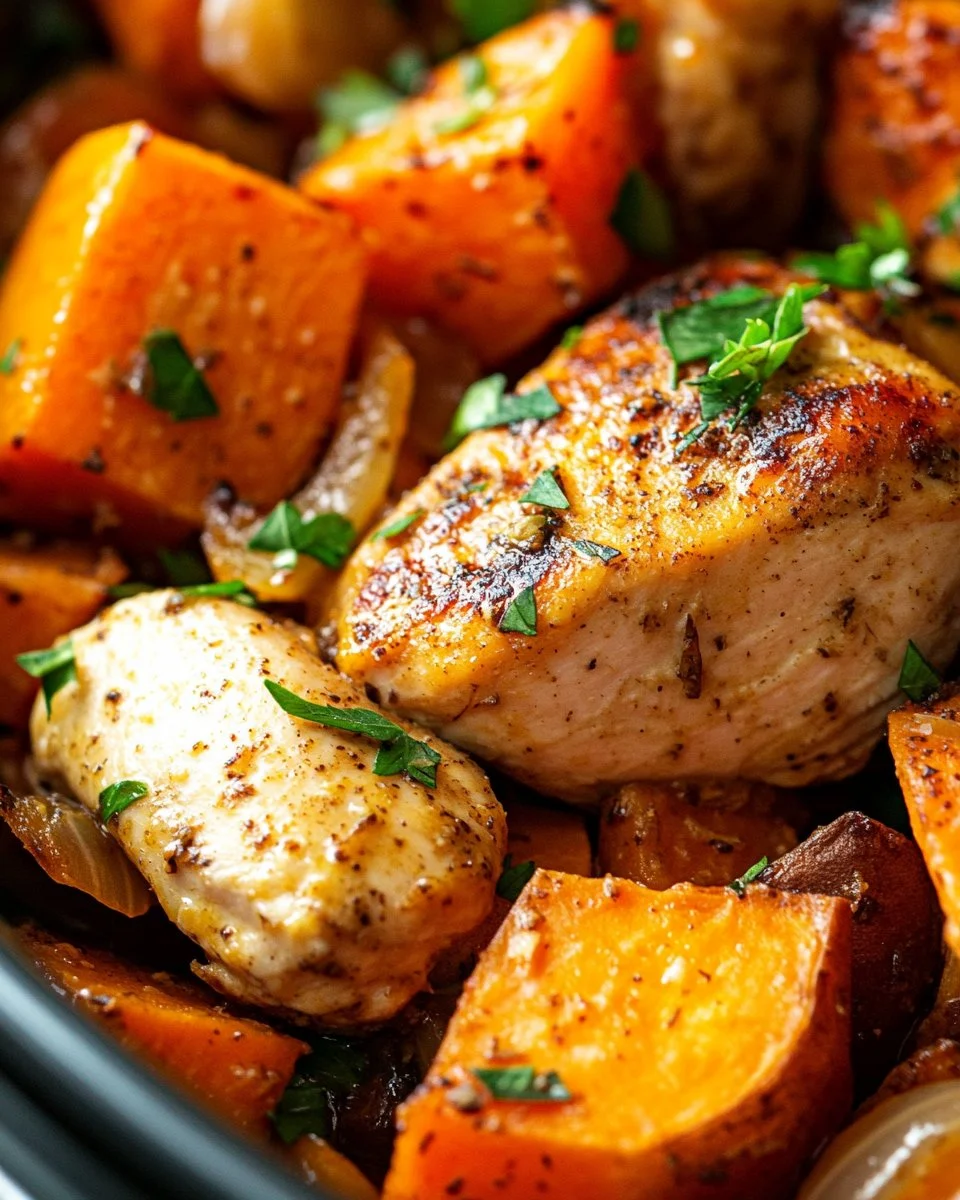
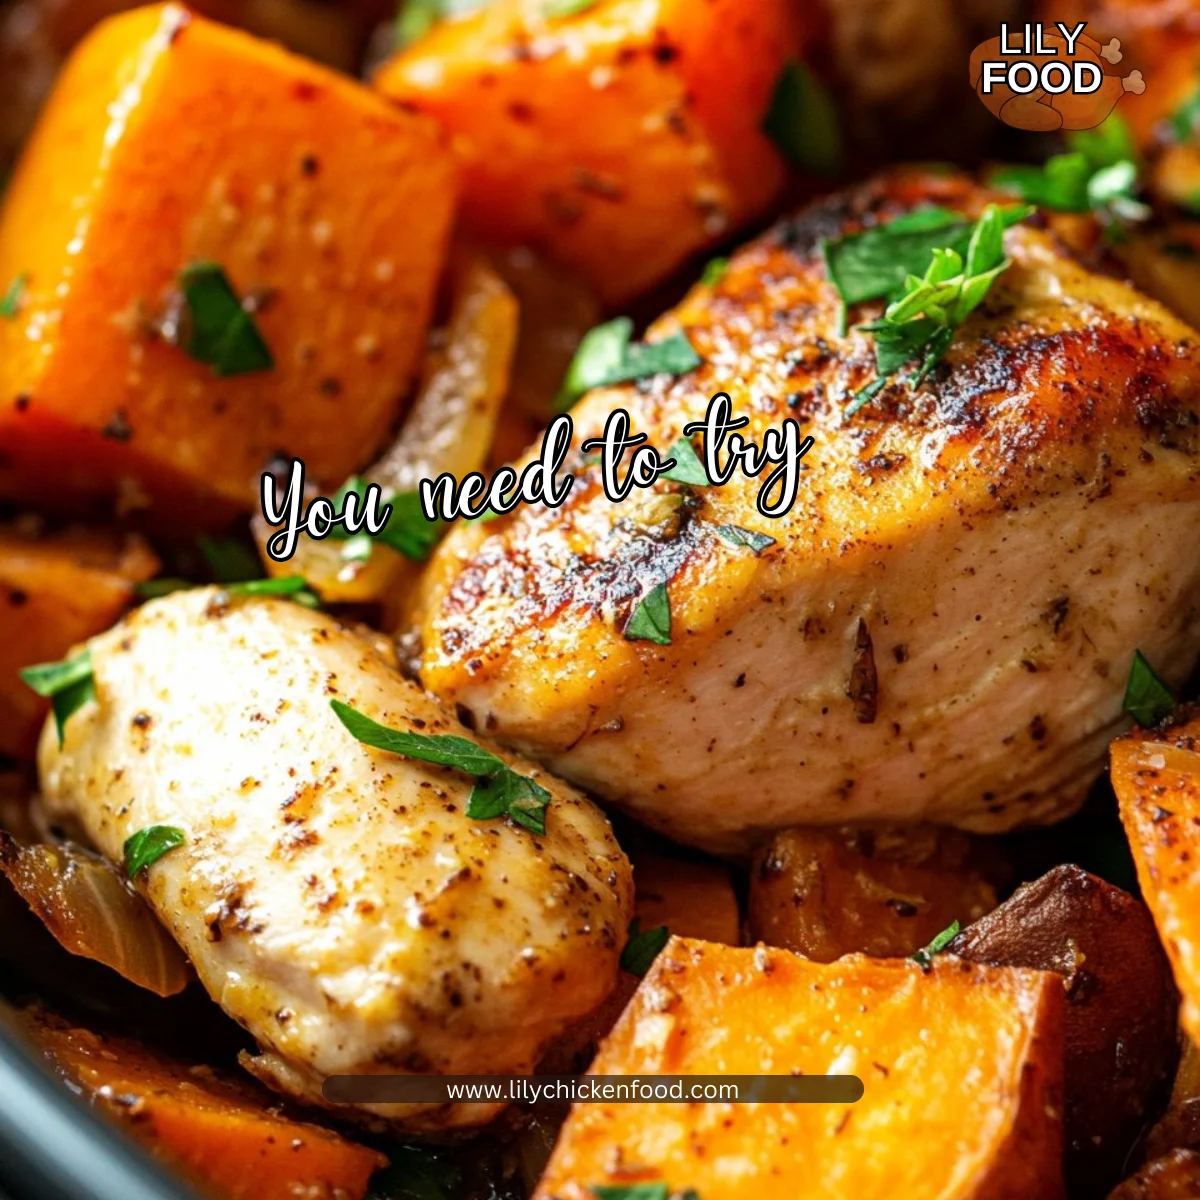
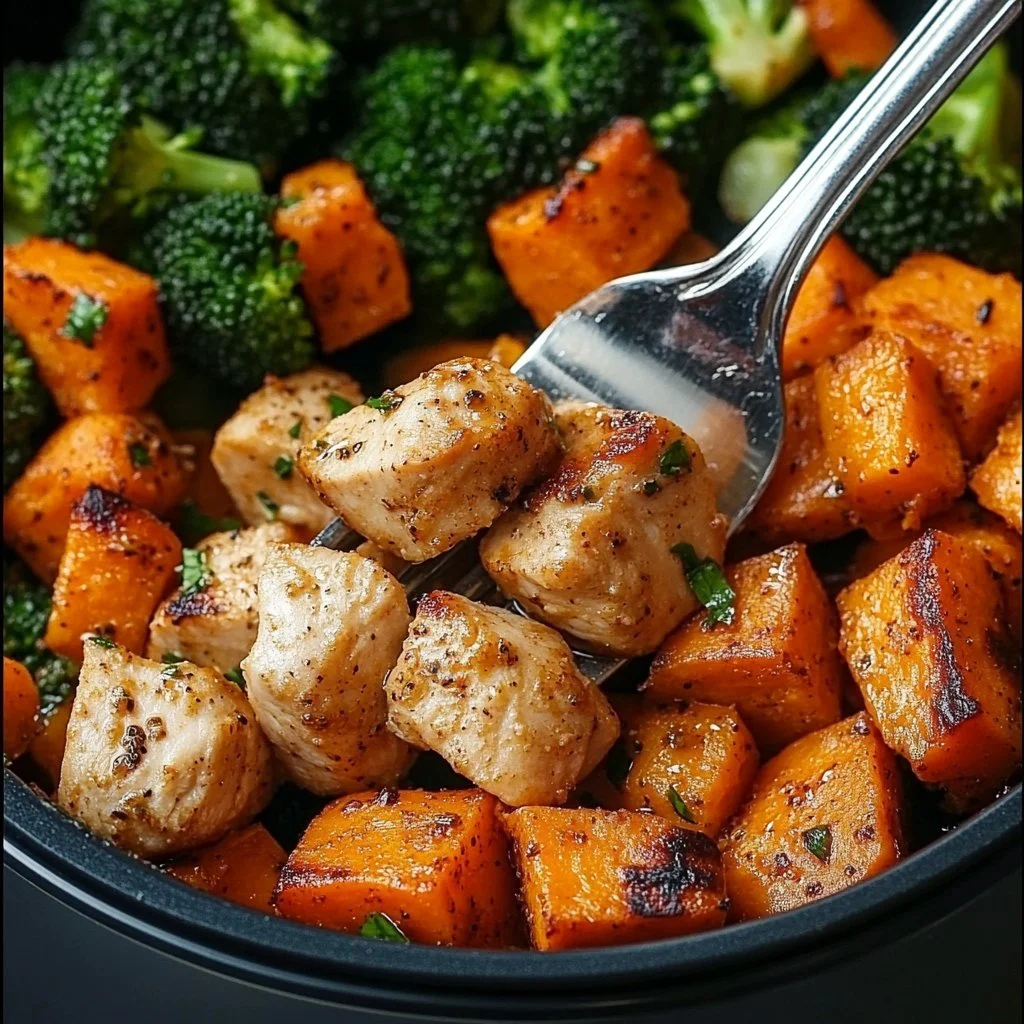
12. Cajun Chicken & Sweet Potato Bowls: An Amazing Ultimate Recipe
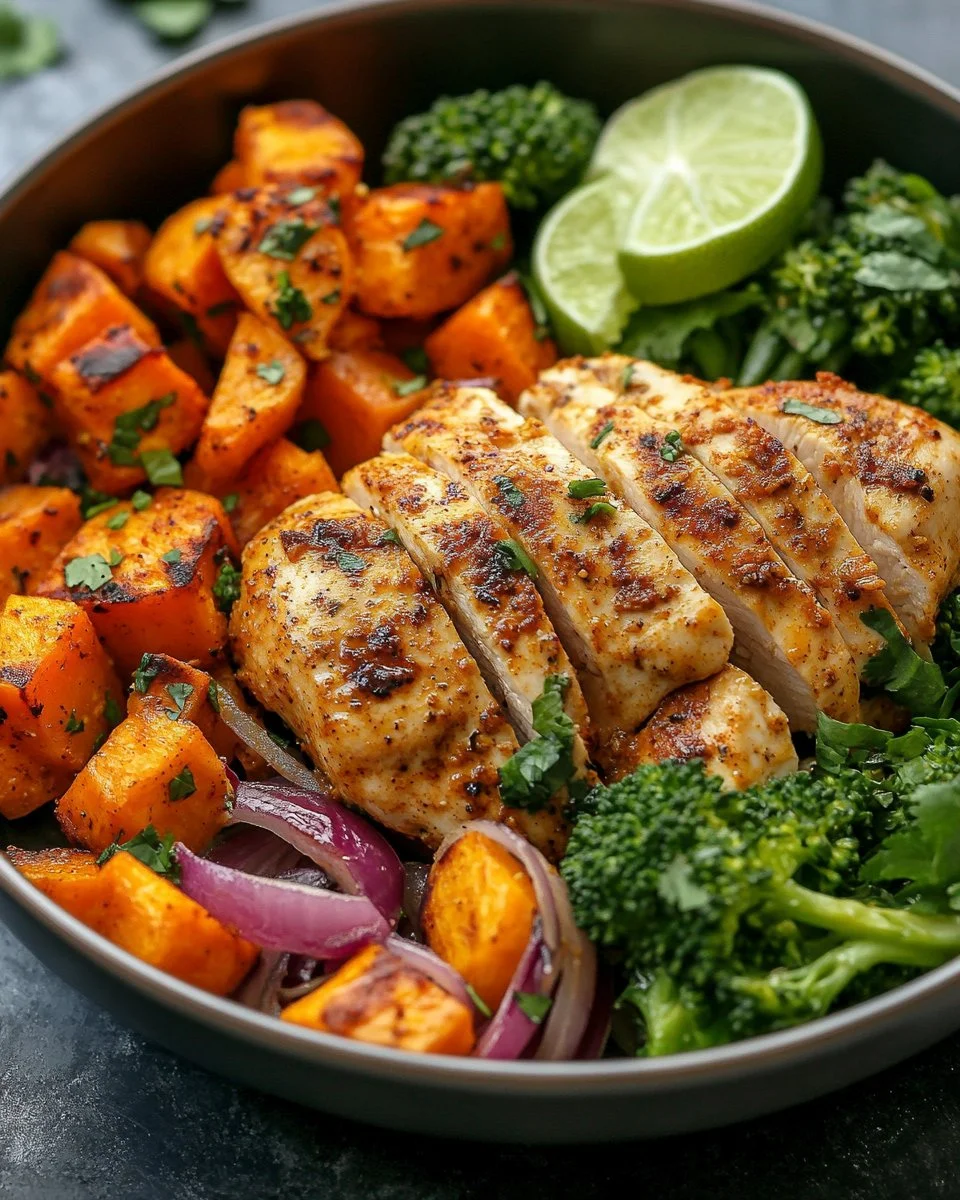
The kitchen is the heart of every home, a place where aromas dance and flavors blend. As you step in, the sounds of sizzling and gentle stirring beckon you to create something magical. Today, we’re diving into the savory world of Cajun Chicken & Sweet Potato Bowls. The blend of spices and fresh ingredients will fill your home with warmth, making it a perfect dish for family gatherings or a cozy weeknight dinner.
Why This Works
Cajun Chicken & Sweet Potato Bowls are a fantastic choice for families. They are not only nutritious but also incredibly flavorful. The sweet potatoes bring a touch of natural sweetness, while the Cajun seasoning on the chicken adds a warm heat that everyone will love.
Additionally, this recipe is a time-saver. With a handful of simple steps, you can whip up a delicious dinner that doesn’t consume your entire evening. This meal not only satisfies the taste buds but also brings loved ones together at the table. There’s something about sharing a hearty bowl that feels like a warm hug after a long day.
Process Overview
“This is where the magic happens—when the aroma fills the kitchen.”
Making Cajun Chicken & Sweet Potato Bowls is a delightful process. Each step is straightforward, ensuring you spend more time enjoying the meal and less time scrambling around. The combination of roasting sweet potatoes while sautéing the chicken and veggies creates a symphony of flavors.
Let’s gather our ingredients and prepare to create a masterpiece that will leave everyone at the table smiling.
Ingredients
- 2 large chicken breasts
- 2 tablespoons Cajun seasoning
- 2 medium sweet potatoes, peeled and diced
- 2 tablespoons olive oil
- 1 bell pepper, diced
- 1 red onion, diced
- 1 cup broccoli florets
- Salt and pepper to taste
- Fresh cilantro (for garnish)
- Lime wedges (for serving)
Lily’s Tips:
- Chicken Breasts: Choose chicken breasts that are similar in size for even cooking.
- Cajun Seasoning: For a homemade blend, mix paprika, garlic powder, onion powder, and cayenne.
- Sweet Potatoes: Look for vibrantly colored sweet potatoes; they’re usually sweeter.
- Veggies: Feel free to swap the broccoli with seasonal vegetables you enjoy.
- Lime: Fresh limes add a zesty kick that brightens the dish.
Directions
-
Preheat Oven: Start by preheating your oven to 425°F (220°C). This high temperature will caramelize your sweet potatoes beautifully.
-
Prepare Sweet Potatoes: In a large bowl, toss the diced sweet potatoes with 1 tablespoon of olive oil, salt, and pepper. Spread them out on a baking sheet in a single layer. This helps them cook evenly.
-
Bake Sweet Potatoes: Place the baking sheet in the oven and roast the sweet potatoes for about 20-25 minutes or until tender and slightly caramelized. The sweetness will intensify as they bake.
-
Season Chicken: While the sweet potatoes are roasting, rub the chicken breasts with 1 tablespoon of olive oil and then coat evenly with Cajun seasoning. Don’t be shy – make sure the seasoning covers every inch of the chicken for an amazing flavor.
-
Cook Chicken: Heat a skillet over medium-high heat and add the seasoned chicken. Cook for about 6-7 minutes on each side, or until the internal temperature reaches 165°F (75°C). Removing the chicken from the skillet is key to allowing the juices to redistribute.
-
Sauté Veggies: In the same skillet, add the diced onion, bell pepper, and broccoli. Sauté for about 5-7 minutes until the vegetables are tender yet still crisp. This adds both color and nutrition to your bowls.
-
Slice Chicken: Once rested, slice the chicken into strips. This makes it easy to layer and enjoy in your bowls.
-
Assemble Bowls: In individual bowls, layer roasted sweet potatoes, sautéed veggies, and sliced chicken. The vibrant colors make the dish as appealing to the eye as it is to the palate.
-
Garnish and Serve: Top each bowl with fresh cilantro and serve with lime wedges for an extra burst of flavor. The lime will brighten each bite.
These steps are simple and straightforward, ensuring a delicious and satisfying meal that whisks you away to Cajun shores with every bite.
Serving
These bowls are not only perfect for individual servings but also for family-style gatherings. Present the entire tray of sweet potatoes, veggies, and sliced chicken at the center of the table. Let everyone build their own bowl, creating a sense of togetherness and fun.
Consider serving with a simple green salad or some cornbread on the side to round out the meal. Don’t shy away from adding your family’s favorite hot sauce for those looking for a bit more kick.
Storage
Leftovers? No problem! Store any extra Cajun Chicken & Sweet Potato Bowls in airtight containers in the refrigerator for up to three days.
When you’re ready to enjoy them again, simply reheat in the microwave for 1-2 minutes until warmed through. If you prefer, you can also reheat them in a skillet over medium heat. This helps maintain the texture of the veggies.
Kitchen Notes
- Prep Ahead: You can dice sweet potatoes and veggies ahead of time to make meal prep a breeze.
- Batch Cooking: Double the recipe and freeze half for an easy meal later.
- Rotisserie Chicken: Use rotisserie chicken to save time on the protein.
- Sheet Pan Cooking: Feel free to roast the chicken alongside the sweet potatoes if you have a large enough baking sheet.
- Non-Stick Skillet: Using a non-stick skillet can help reduce the amount of oil needed for cooking.
Variations
For a twist on this recipe, consider these variations:
- For Picky Eaters: Substitute sweet potatoes for regular potatoes and change the veggies to those your family prefers.
- Vegetarian Version: Replace chicken with black beans or chickpeas for a protein-packed vegetarian meal.
- Low-Carb Option: Use cauliflower rice instead of sweet potatoes for a low-carb alternative.
- Spicy Kick: Add diced jalapeños or a sprinkle of cayenne pepper to the sautéed veggies for more heat.
- Different Proteins: Try shrimp or tofu with the same seasoning for a delicious alternative.
FAQ
-
Can I make this dish ahead of time?
Yes, you can prep the ingredients a day before and cook them just before serving. -
What if I don’t have Cajun seasoning?
You can use a blend of paprika, garlic powder, and pepper as a substitute. -
Can I bake everything at once?
Yes, if you have enough space on your baking sheet, you can roast the chicken and sweet potatoes together. -
Is this dish freezer-friendly?
Yes, you can freeze the components separately and assemble them when ready to eat. -
How can I make this spicier?
Add extra Cajun seasoning or your favorite hot sauce during cooking for increased heat.
Conclusion
Cooking brings joy not only to the cook but also to those who gather around the table. Cajun Chicken & Sweet Potato Bowls are more than just a meal; they represent a shared moment, filled with laughter and connection.
I hope you enjoy making and sharing this dish with your loved ones. The warmth and flavor will keep you coming back for more. Happy cooking!
13. Healthy Chicken & Sweet Potato Rice Bowl
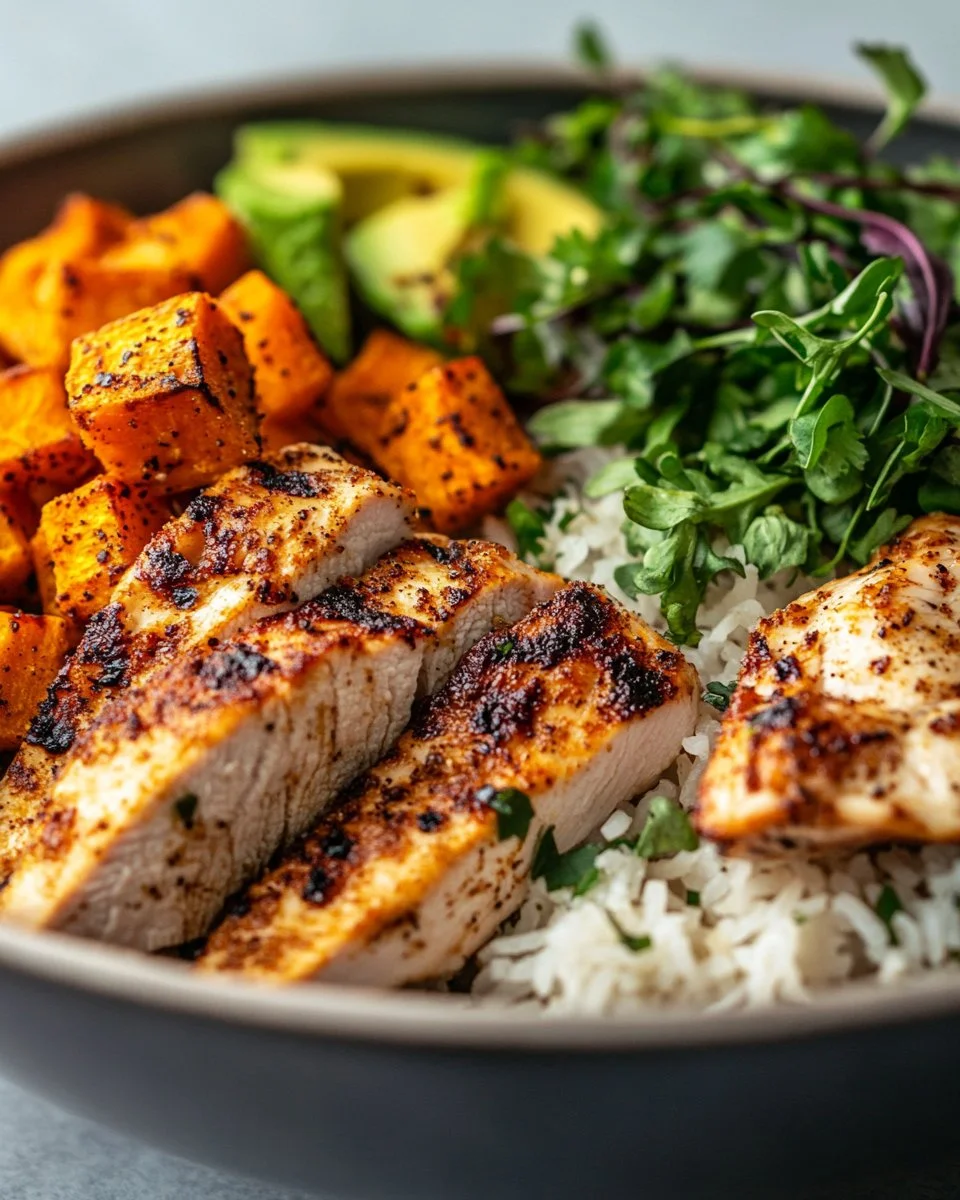
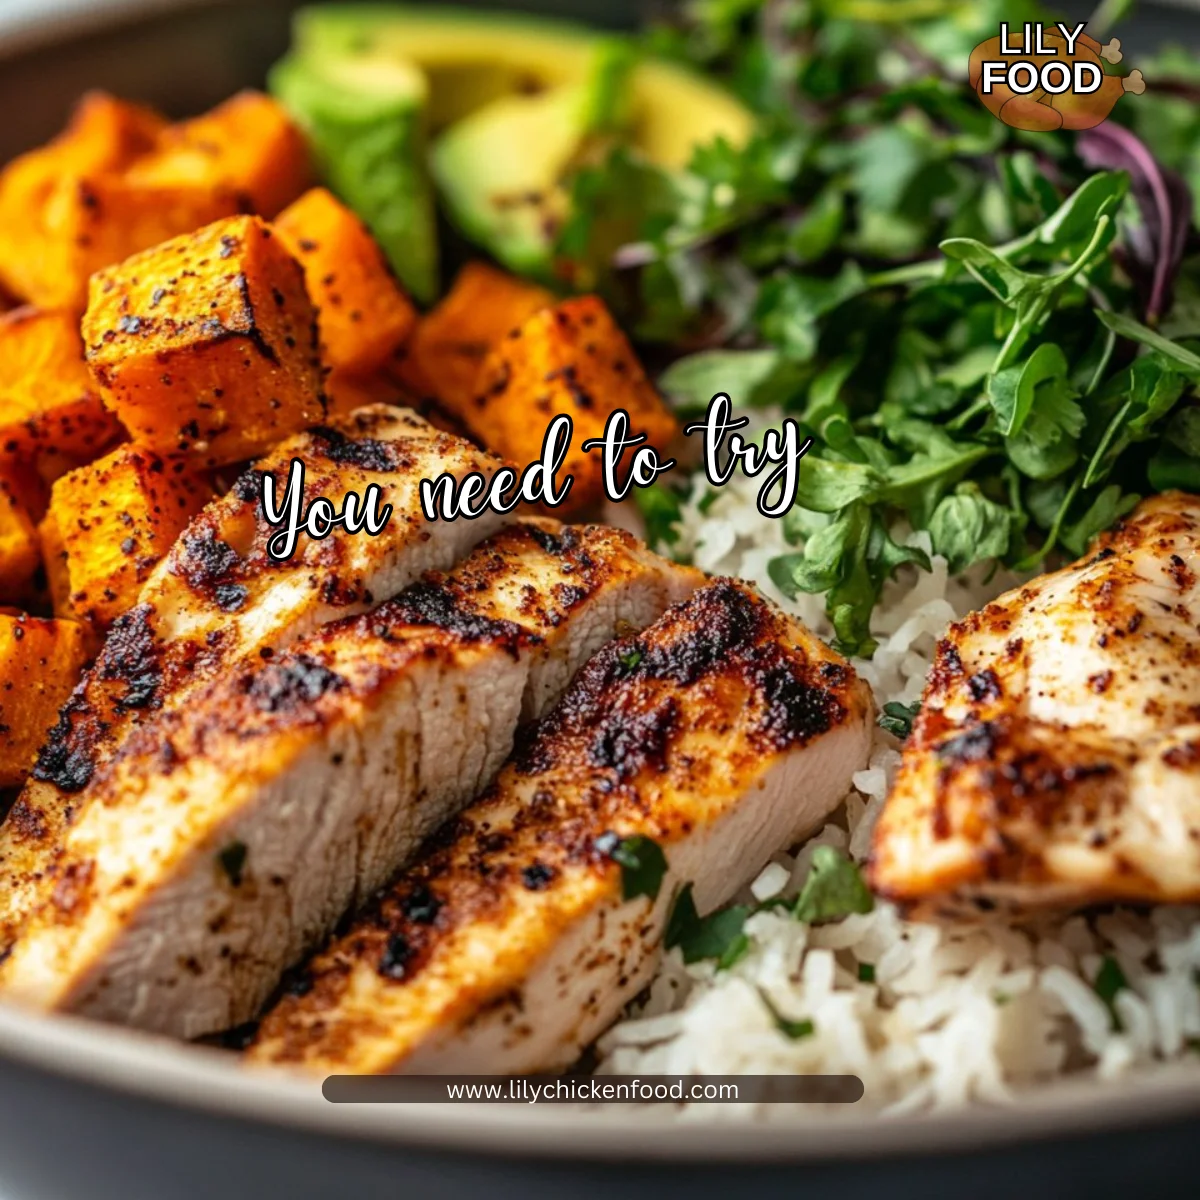
The smell of sweet potatoes roasting in the oven fills the kitchen, blending with the enticing aroma of seasoned chicken sizzling in a pan. The sound of chopping and stirring creates a cozy rhythm that reminds me of family dinners gathered around the table. Each element in the air invites everyone in the house to come together and enjoy a wholesome meal. Today, we’re making a Healthy Chicken & Sweet Potato Rice Bowl that is not only delicious but also simple enough for any weeknight dinner.
Why This Works
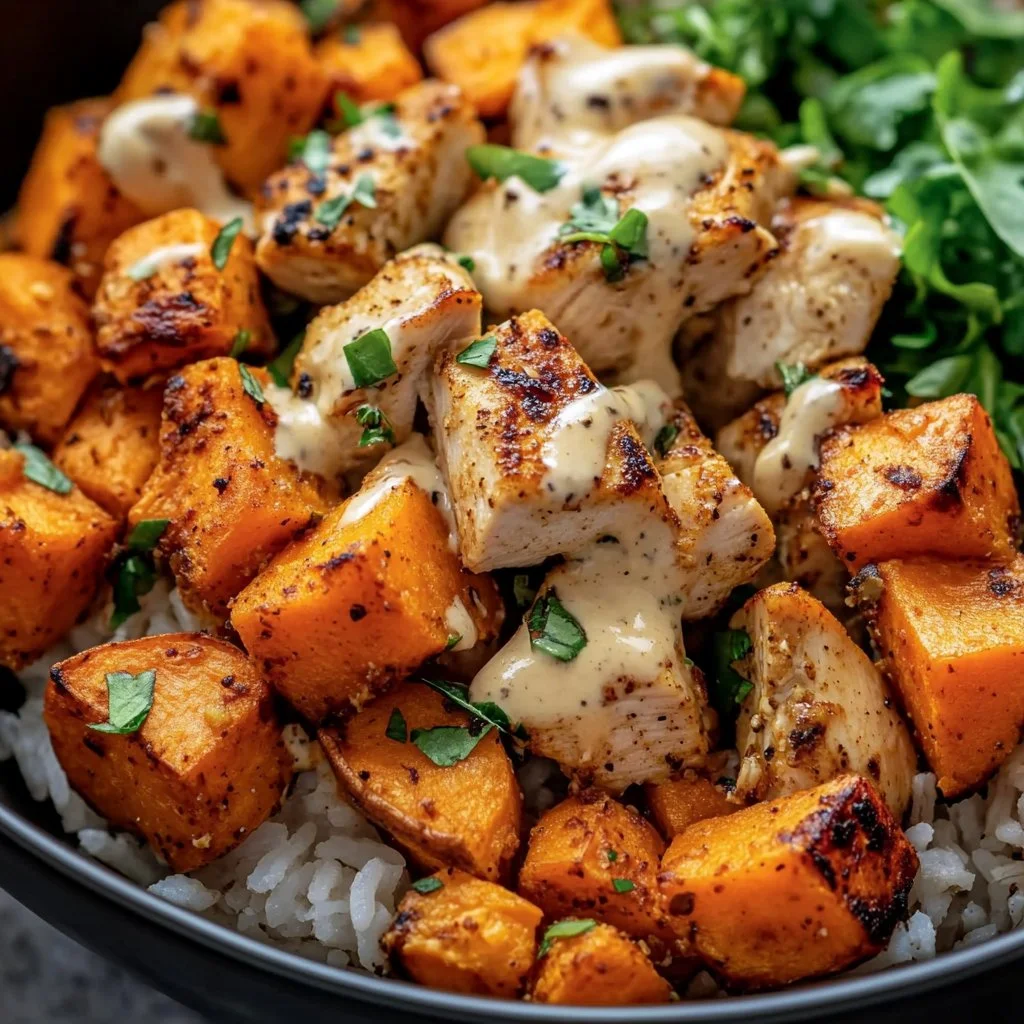
This Healthy Chicken & Sweet Potato Rice Bowl is perfect for busy families. With prep and cooking time combined, you can have a healthy and tasty dinner ready in about 45 minutes. Roasting sweet potatoes brings out their natural sweetness while keeping the chicken juicy and flavorful. Plus, this dish is always a hit, meaning your family and friends will ask for seconds. It’s a win-win in the kitchen!
Process Overview
“This is where the magic happens—when the aroma fills the kitchen.”
By focusing on fresh, wholesome ingredients, we can create a meal that nourishes our bodies and warms our hearts. The process is straightforward, meaning more time to spend with loved ones and less time stressing over dinner.
Ingredients
Here’s what you will need for our Healthy Chicken & Sweet Potato Rice Bowl:
- Chicken breast: About 1 pound. I recommend using boneless and skinless for easier cooking and slicing.
- Sweet potatoes: 2 medium-sized. Choose firm sweet potatoes without blemishes. They are the star of the dish!
- Rice: 1 cup, white or brown. Brown rice is great for added fiber, but use whatever you prefer.
- Olive oil: 2 tablespoons. A pantry staple that adds flavor and helps to roast the veggies perfectly.
- Salt: To taste. A little sprinkle can elevate the flavors.
- Pepper: To taste. Freshly cracked black pepper enhances the dish beautifully.
- Garlic powder: 1 teaspoon. Adds a wonderful depth of flavor with ease.
- Paprika: 1 teaspoon. Not only for flavor but also for a lovely color.
- Optional toppings: Feel free to add greens, avocado, or nuts. These toppings not only bring added nutrition but also beautiful color and flavors. For example, a handful of spinach or sliced almonds can give it a nice crunch.
Directions
-
Preheat the oven to 400°F (200°C). This is an important first step. A hot oven ensures that your sweet potatoes will roast to perfection.
-
Cut the sweet potatoes into cubes and toss them with olive oil, salt, pepper, garlic powder, and paprika. Spread them out on a baking sheet and roast for 25-30 minutes until tender. Keep an eye on them; flipping halfway will help them brown evenly.
-
While the sweet potatoes are roasting, cook the rice according to package instructions. You can use a rice cooker or stovetop, depending on what you have on hand. This is a great time to let the kids help rinse the rice.
-
Season the chicken with salt, pepper, and any desired spices. Grill or sauté the chicken in a pan until cooked through, about 6-8 minutes on each side. Use medium-high heat for that lovely sear!
-
In a bowl, layer cooked rice, roasted sweet potatoes, and sliced chicken. Encourage the kids to help build their own bowl. It makes dinner interactive and fun.
-
Add any optional toppings and serve. A sprinkle of greens or a couple slices of avocado can take your bowl to the next level.
Serving
When serving, consider creating a family-style setup. Place large bowls of the rice, sweet potatoes, and sliced chicken in the center of the table and let everyone build their own bowl. This not only encourages creativity but also brings everyone together, fostering conversation and connection over a shared meal.
Storage
Leftovers can be stored in an airtight container in the fridge for up to three days. To reheat, simply pop it in the microwave for about 1-2 minutes. If you like, you can add a splash of water to keep it moist while reheating. Alternatively, you can heat it on the stove in a little olive oil, which also adds more flavor.
Kitchen Notes
- Use pre-cooked rotisserie chicken to save time on busy nights.
- Cut sweet potatoes into smaller cubes for quicker cooking.
- Cook rice in advance during meal prep for easy dinners later in the week.
- Feeling creative? Try adding beans or lentils for extra protein.
- Use frozen veggies if you’re short on time; they are just as nutritious.
Variations
If you have picky eaters or specific dietary requirements, this recipe can easily be tweaked.
- Substituting quinoa for rice adds a nutty flavor and is gluten-free.
- Swap chicken for chickpeas or tofu for a vegetarian or vegan option.
- If your family prefers milder flavors, reduce spices and stick with just olive oil, salt, and pepper.
FAQ
-
Can I make this meal ahead of time?
Yes, you can roast the sweet potatoes and cook the chicken in advance. Just reheat when ready to serve. -
Can I use other vegetables in this bowl?
Absolutely. Broccoli, bell peppers, or kale would work wonderfully. -
What can I substitute for rice?
Quinoa, cauliflower rice, or even farro can be delicious alternatives. -
Is this dish freezer-friendly?
Yes, you can freeze the components separately. Just ensure everything is cool before sealing. -
Can I adjust the spice levels?
Definitely! Feel free to play around with the spices and make it as mild or spicy as your family likes.
Conclusion
Crafting a healthy meal for the family doesn’t have to be complicated. This Chicken & Sweet Potato Rice Bowl is not only easy to make but also packed with nutrients that everyone will love. I hope this dish fills your kitchen with warmth and brings your family to the table for memorable meals together. Enjoy the laughter, the love, and, most importantly, the delicious food!
14. Chicken and Sweet Potato Skillet
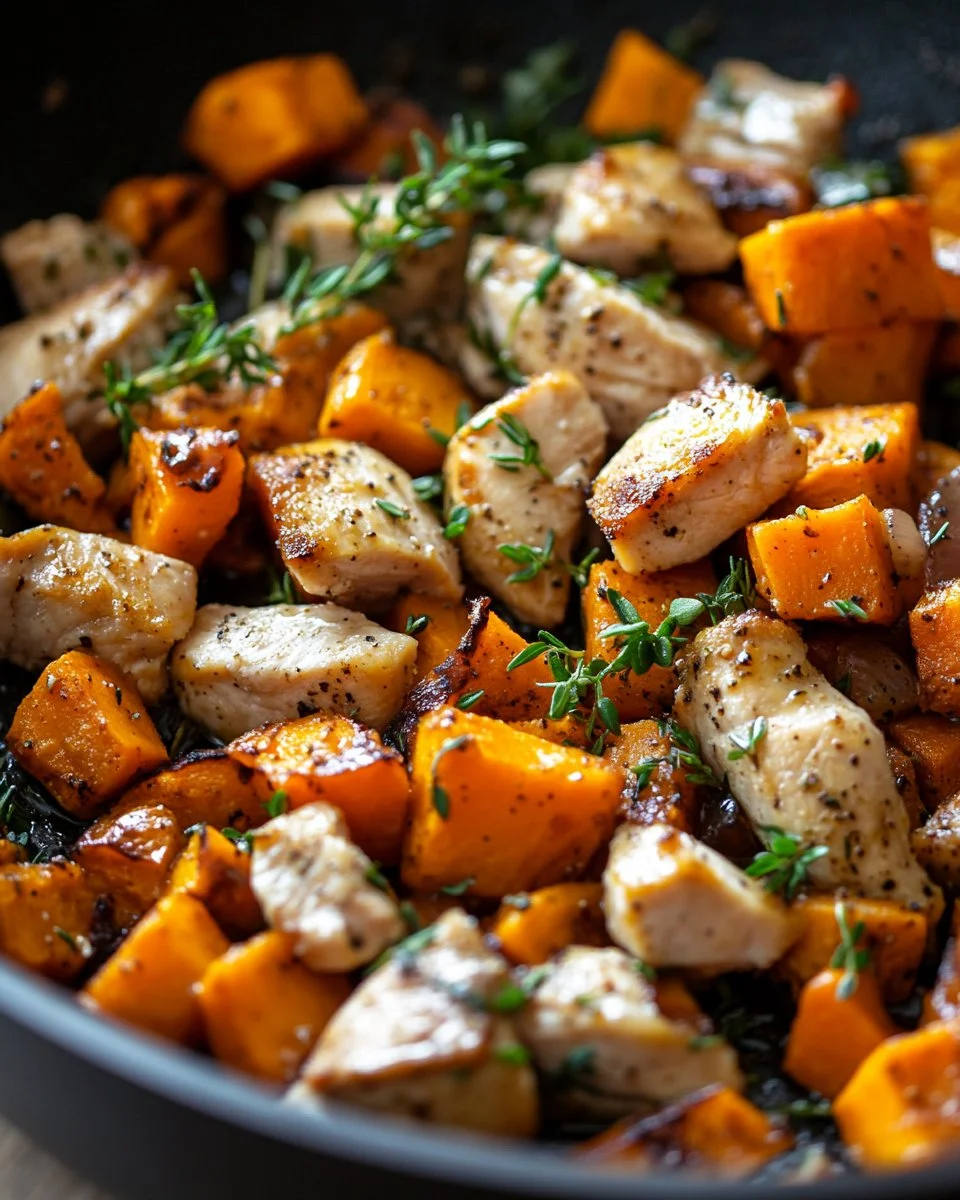
There’s something undeniably comforting about the smell of dinner cooking in the kitchen. As you chop vegetables, the gentle sizzle of the skillet starts to fill the air. The inviting aroma of seasoned chicken and sweet potatoes brings everyone together, creating a warmth that wraps around you like a cozy blanket. It’s the kind of meal that not only nourishes the body but also feeds the soul.
Why This Works
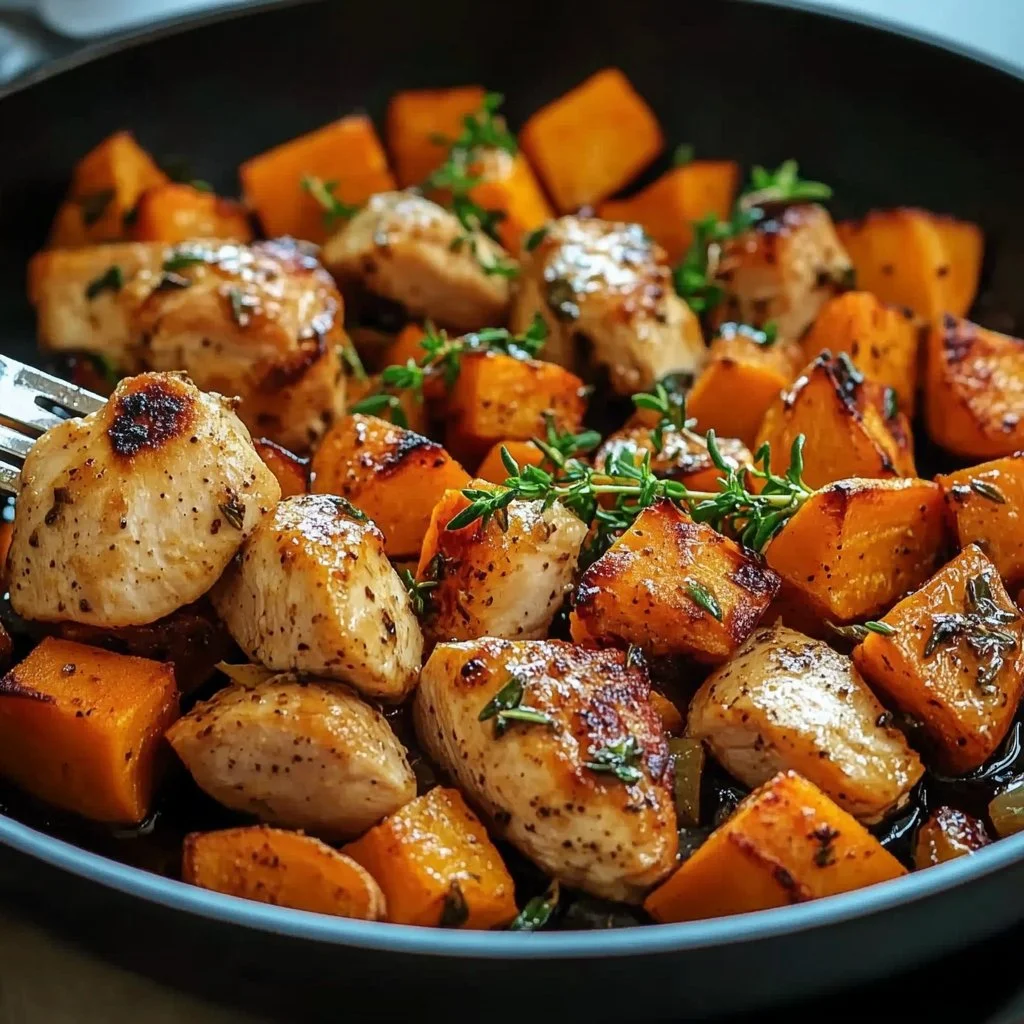
This Chicken and Sweet Potato Skillet is a perfect weeknight dinner that checks all the boxes. It’s quick, simple, and made with wholesome ingredients. This dish is great for busy families or anyone who wants to spend less time in the kitchen without sacrificing flavor or nutrition.
The best part is how easily everything comes together in one skillet. This minimizes the mess and clean-up. You can savor your time with family while this delightful meal cooks. Just think of it as a time-saver that lets you enjoy the hustle of life while still serving a dish everyone will love.
Process Overview
“This is where the magic happens—when the aroma fills the kitchen.”
When you cook this meal, you won’t just be following a recipe; you’ll be creating an experience. The combination of sweet and savory flavors brings comfort to the dinner table. Plus, it’s a great opportunity to introduce kids to cooking. They can help when it comes to stirring, washing vegetables, or even garnishing.
You’ll find that this chicken and sweet potato skillet recipe is straightforward, allowing you to focus on what matters: quality time with your loved ones while sharing delicious food.
Ingredients
To make this comforting dish, you’ll need the following ingredients:
- 1 lb chicken breast, diced: Opt for organic or free-range, if available. This adds extra flavor to your meal.
- 2 medium sweet potatoes, peeled and cubed: Select firm sweet potatoes without blemishes for the best texture.
- 1 onion, diced: A yellow onion works best, adding a slightly sweet flavor when cooked.
- 2 cloves garlic, minced: Fresh garlic elevates the taste; avoid pre-minced for the best flavor.
- 1 teaspoon paprika: This spice gives a warm color and a hint of smoky flavor.
- 1 teaspoon dried thyme: Fresh thyme can be used; it offers an aromatic touch.
- Salt and pepper to taste: Remember, seasoning is key; always start sparingly and adjust to your preference.
- 2 tablespoons olive oil: Extra virgin olive oil is a healthy fat that enhances the dish.
- Fresh herbs for garnish (optional): Fresh parsley or cilantro add color and freshness.
Directions
-
Heat olive oil in a large skillet over medium heat.
Start by warming the oil; you’ll hear it gently sizzling. This is the sound of flavor building.
-
Add onions and garlic; sauté until softened.
The onions should become translucent and aromatic. Enjoy that enticing smell.
-
Add the diced chicken and cook until browned.
Cook the chicken for about 5-7 minutes. You’re looking for a beautiful golden color, which means it’s full of flavor.
-
Stir in the sweet potatoes, paprika, thyme, salt, and pepper.
Mix everything well, allowing the sweet potatoes to soak up all the spices. This step is key for a taste explosion!
-
Cover and cook for about 20 minutes, stirring occasionally, until the sweet potatoes are tender, and the chicken is cooked through.
While it simmers, use this time to set the table or serve a light salad. Delegating is part of the fun.
-
Garnish with fresh herbs if desired and serve hot.
Serving it hot showcases all the beautiful colors. A final sprinkle of fresh herbs adds a pop of freshness.
Serving
When it comes to serving this chicken and sweet potato skillet, I recommend presenting it family-style. Serve directly from the skillet for a warm, inviting display. Place some simple plates and utensils nearby, and watch your family gather around the table.
Feel free to accompany this dish with a fresh green salad or some crusty bread for a complete meal. It’s all about sharing and making memories. Everyone can help themselves while discussing their day, creating a lovely atmosphere.
Storage
Got leftovers? No problem! Store any leftovers in an airtight container in the fridge for up to three days. To reheat, simply place it in a skillet over low heat, stirring occasionally until warmed through. You can also pop it in the microwave for about 1-2 minutes.
Make sure it’s piping hot before serving again. If you think you’ll have leftovers, try to undercook the sweet potatoes slightly when you first serve it. This will help them hold their texture when reheating.
Kitchen Notes
- Pre-cooked chicken: If you’re short on time, use rotisserie chicken to speed up preparation.
- Frozen sweet potatoes: You can use pre-cubed sweet potatoes; just adjust cooking time.
- Batch cooking: Double the recipe and enjoy the leftovers for lunch or dinner later in the week.
- Prep ahead: Chop your veggies in advance and store them in the fridge for a quick weeknight meal.
- Turn up the heat: For a little kick, add some cayenne pepper or crushed red pepper flakes to the chicken mixture.
Variations
This recipe is quite flexible and can accommodate various tastes and dietary needs. Here are a few ideas:
- For picky eaters, swap the sweet potatoes with regular potatoes or add some frozen peas at the end for greenery.
- If you’re looking for a vegetarian option, replace the chicken with chickpeas or lentils. Sauté them directly with the spices.
- For those on a paleo or Whole30 diet, omit the sweet potatoes, and add more vegetables like bell peppers and zucchini.
- If you prefer a little creaminess, stir in a splash of coconut milk at the end, which pairs very well with the spices.
FAQ
Q: Can I use chicken thighs instead of chicken breasts?
A: Absolutely! Chicken thighs will give you a juicier result and can be more flavorful. Just ensure they are cooked thoroughly.
Q: How can I make this dish spicier?
A: Add some diced jalapeños or sprinkle red pepper flakes during cooking to give it some heat.
Q: Is it necessary to peel the sweet potatoes?
A: No, it’s not necessary. The skin contains nutrients, but make sure to scrub them well if you decide to leave the skin on.
Q: Can I prepare this ahead of time?
A: Yes, you can prep the chicken and sweet potatoes and store them in the fridge until you’re ready to cook.
Q: Can I freeze this dish?
A: Yes, it freezes well. Store in an airtight container, and it should be good for about 3 months.
In conclusion, this Chicken and Sweet Potato Skillet is more than just a meal; it’s a way to bring the family together. Sharing simple yet delicious food can create lasting memories. Encourage everyone to gather around the table, share stories, and enjoy this comforting dish together. Happy cooking!
15. Chicken Fettuccine Alfredo
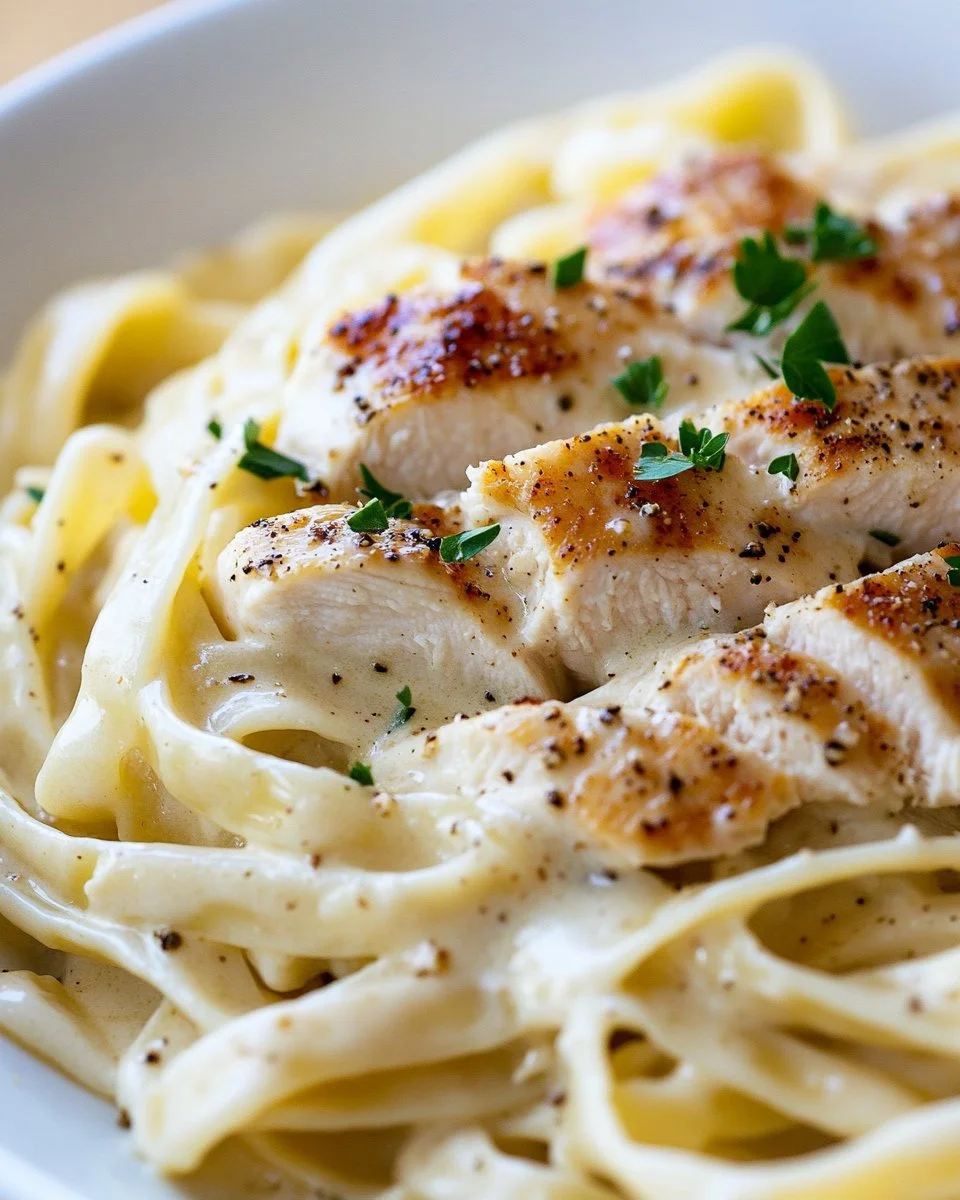
There’s something magical about the sound of sizzling chicken and the warm, inviting aroma of garlic filling your kitchen. As you prepare to make Chicken Fettuccine Alfredo, the anticipation builds. The soft clinks of utensils and the bubbling of cream create a cozy atmosphere, making it feel like a special occasion, even on an ordinary weeknight. This dish is more than just a meal; it’s a way to bring family together, filling hearts as well as bellies.
Why This Works
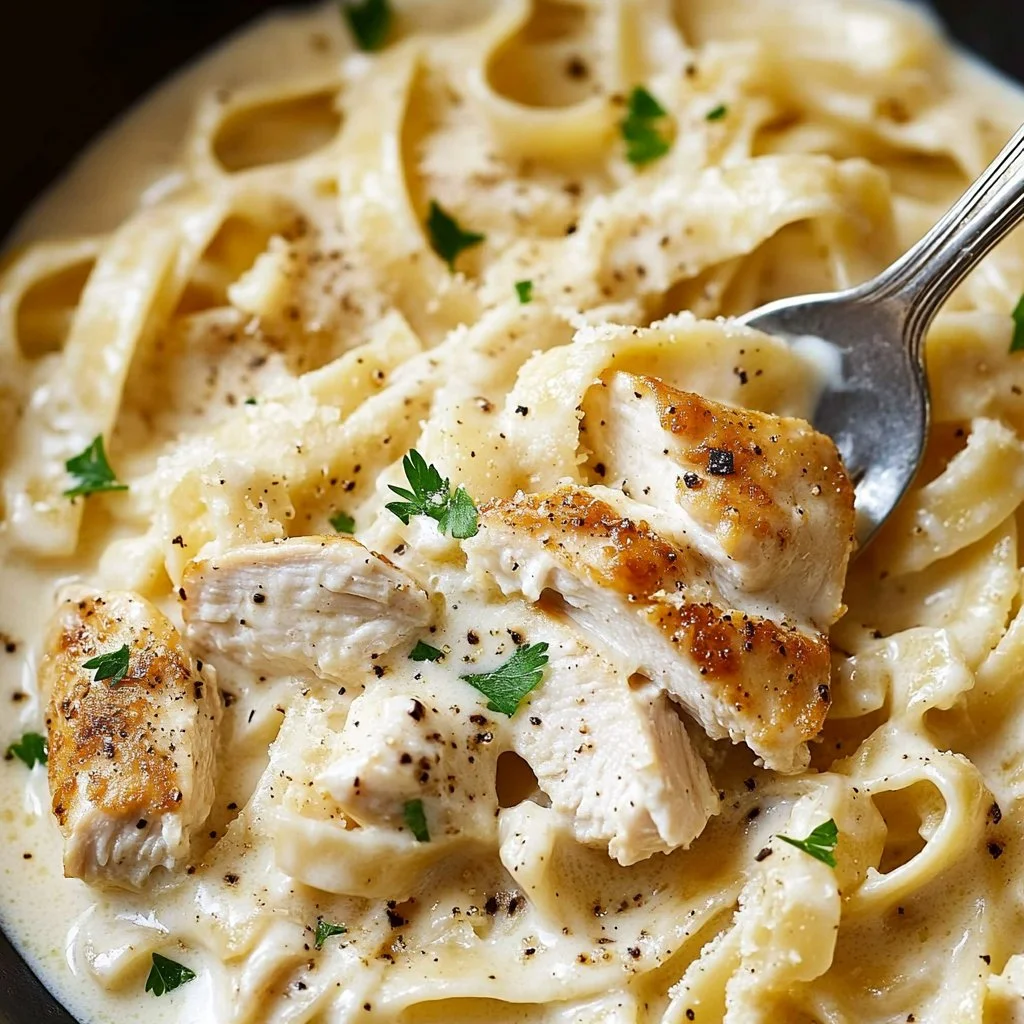
Chicken Fettuccine Alfredo is the epitome of a family meal. It is rich, creamy, and completely comforting. In less than 30 minutes, you can transform simple ingredients into a dish that feels gourmet.
Busy schedules can make it tough to gather around the table. However, this recipe prioritizes family time without compromising on flavor. You can set the table, serve up hearty portions, and share laughter, making memories that last a lifetime.
Process Overview
“This is where the magic happens—when the aroma fills the kitchen.”
The process of making Chicken Fettuccine Alfredo is simple and straightforward. From cooking the pasta to creating a creamy sauce, each step builds upon the last. You’ll feel accomplished as you watch fresh ingredients turn into a delightful dish that everyone will love, and the best part? It all comes together in one skillet, making cleanup a breeze.
Ingredients
- 8 oz fettuccine pasta: Choose fresh pasta if you can for a tender texture.
- 1 lb chicken breast, sliced: Lean and protein-packed, it gives the dish substance.
- 2 tablespoons olive oil: A healthy fat that adds flavor and helps cook the chicken evenly.
- 3 cloves garlic, minced: Garlic elevates the dish with its aromatic qualities.
- 1 cup heavy cream: Creates a rich base for the sauce—don’t substitute with low-fat versions for the best results.
- 1 cup grated Parmesan cheese: Use fresh cheese for the best melt and flavor.
- Salt and pepper, to taste: Enhances the overall taste—always season to your liking.
- Fresh parsley, for garnish: Not just for decoration; it adds a fresh touch.
Directions
-
Cook the fettuccine pasta according to package instructions. Drain and set aside.
Tip: Save a bit of the pasta water to adjust the sauce later if needed. -
In a large skillet, heat olive oil over medium heat. Add the sliced chicken and cook until golden and cooked through, about 5-7 minutes.
Tip: Avoid overcrowding the skillet; cook in batches if necessary for even browning. -
Add minced garlic to the skillet and sauté for 1-2 minutes until fragrant.
Tip: Keep a close eye on the garlic to prevent burning; you want a light golden color. -
Pour in the heavy cream, bringing it to a simmer. Stir in the Parmesan cheese until melted and the sauce thickens.
Tip: If the sauce is too thick, add a splash of pasta water to reach the desired consistency. -
Season with salt and pepper to taste.
Tip: Taste as you go to ensure the flavors are balanced—that’s the secret to a great dish! -
Add the cooked fettuccine to the sauce, tossing until well coated.
Tip: Use tongs to ensure every strand is perfectly enveloped in the creamy sauce. -
Serve hot, garnished with fresh parsley.
Tip: A sprinkle of extra Parmesan on top never hurts; it makes the dish look extra special.
Serving
When it comes to serving Chicken Fettuccine Alfredo, family-style is the way to go. Place the pasta in a large, warm dish at the center of the table. Encourage everyone to help themselves. This not only makes for a cozy atmosphere but also allows everyone to enjoy the meal at their own pace.
Pair it with a fresh salad or grilled vegetables for a delightful balance. Don’t forget to have some crusty bread on the side to soak up every last drop of that delicious sauce.
Storage
If you have leftovers, you can store them in an airtight container in the fridge for up to three days. When you’re ready to reheat, do so gently in a skillet over low heat, adding a splash of cream or water to loosen the sauce. Avoid using the microwave, as it can cause the pasta to become chewy.
Kitchen Notes
- Make-Ahead: Prepare the sauce ahead of time and store it in the fridge. Cook the pasta fresh when you are ready to serve.
- Batch Cook: Double the recipe and freeze half for an easy meal later on. Just thaw and reheat for wonderful flavors on a busy day.
- Use Leftover Chicken: Rotate your leftovers by shredding rotisserie chicken into the dish to save time.
- Fresh Herbs: Experiment with different herbs like basil or thyme to enhance the flavor profile.
- Cheese Options: For a twist, try adding mozzarella for extra melty goodness.
Variations
Chicken Fettuccine Alfredo is incredibly versatile, making it easy to adapt for different tastes or diets.
- For Picky Eaters: Leave out the garlic or use a milder cheese like mozzarella to soften flavors.
- Healthier Version: Use whole wheat fettuccine or zucchini noodles to lighten the dish.
- Vegetarian Option: Substitute chicken with sautéed mushrooms and spinach for a hearty, meatless meal.
- Gluten-Free: Swap in gluten-free pasta for those with dietary restrictions.
- Spicy Add-In: Toss in some crushed red pepper flakes for a kick if your family enjoys a bit of heat.
FAQ
1. Can I use other types of pasta?
Yes, feel free to use any pasta shape you like. However, fettuccine is traditional for Alfredo.
2. How long does this dish take to make?
From start to finish, you can have this dish ready in about 30 minutes.
3. Can I prepare this without cream?
While cream is essential for the classic Alfredo sauce, you can use a combination of low-fat milk and cornstarch as a lighter alternative.
4. Is this recipe good for meal prep?
Absolutely! It’s great for meal prep, ensuring you have tasty lunches or quick dinners ready to go.
5. What can I serve with Chicken Fettuccine Alfredo?
It pairs well with garlic bread, a fresh salad, or steamed vegetables for a complete meal.
Conclusion
Chicken Fettuccine Alfredo is a comforting dish that brings warmth to the table. It’s a recipe that not only serves to nourish your family but also creates moments to share together. Whether it’s a simple weeknight dinner or a special gathering, this meal is sure to impress. As you savor each bite, relish in the laughter and love that fills your home. Bon appétit!
16. Chicken Alfredo
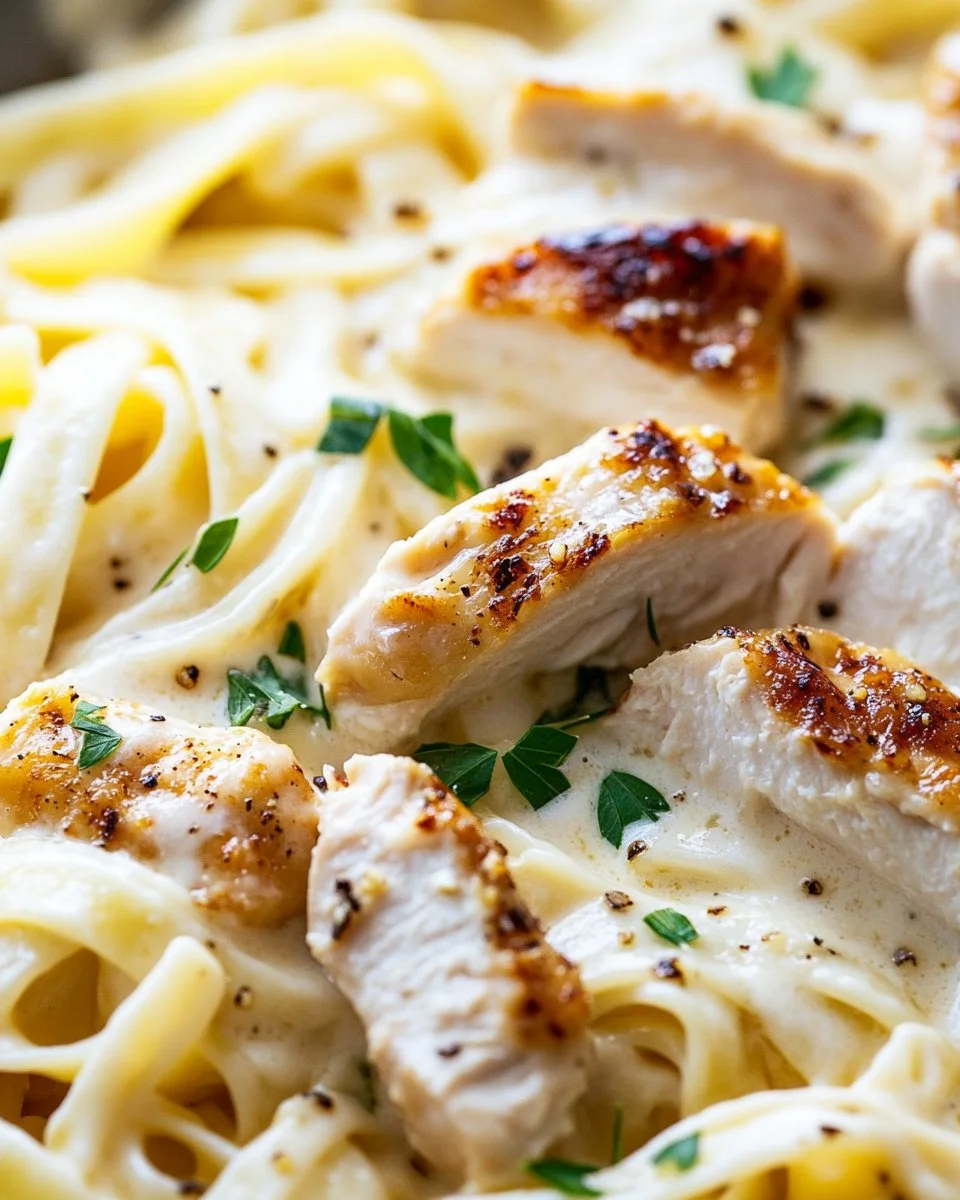
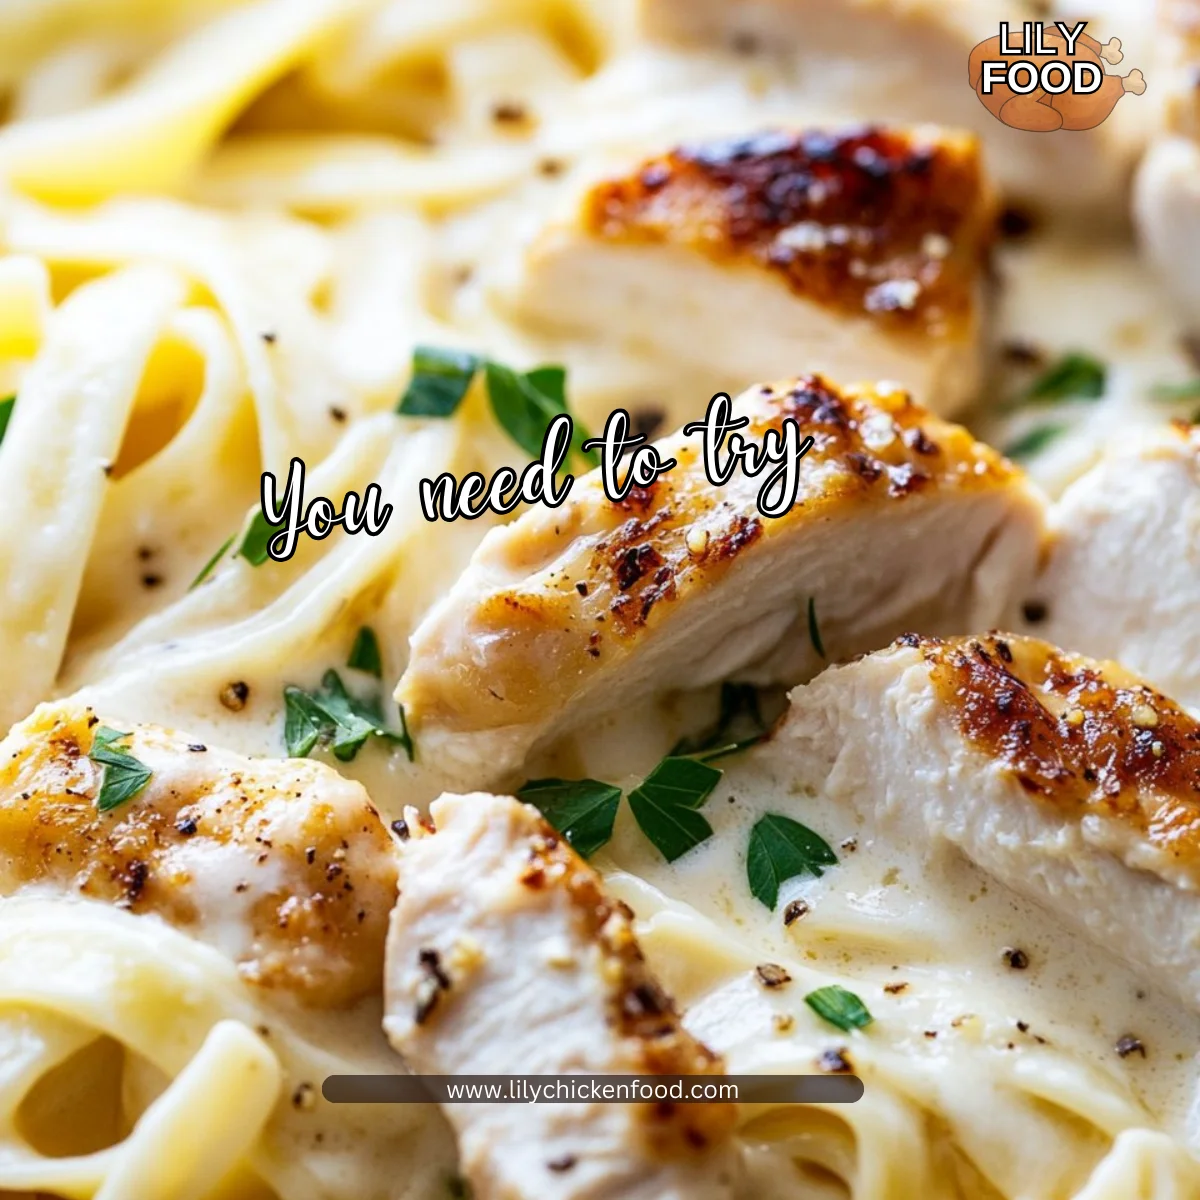
When you walk into a home filled with the comforting aroma of butter and garlic, you can’t help but feel at ease. The sound of water boiling and sizzling pans creates a symphony of anticipation. This is the magic of cooking, especially when you’re preparing a dish as beloved as Chicken Alfredo. Whether it’s a busy weeknight or a cozy Sunday dinner, this creamy pasta dish brings everyone together around the table.
Why This Works
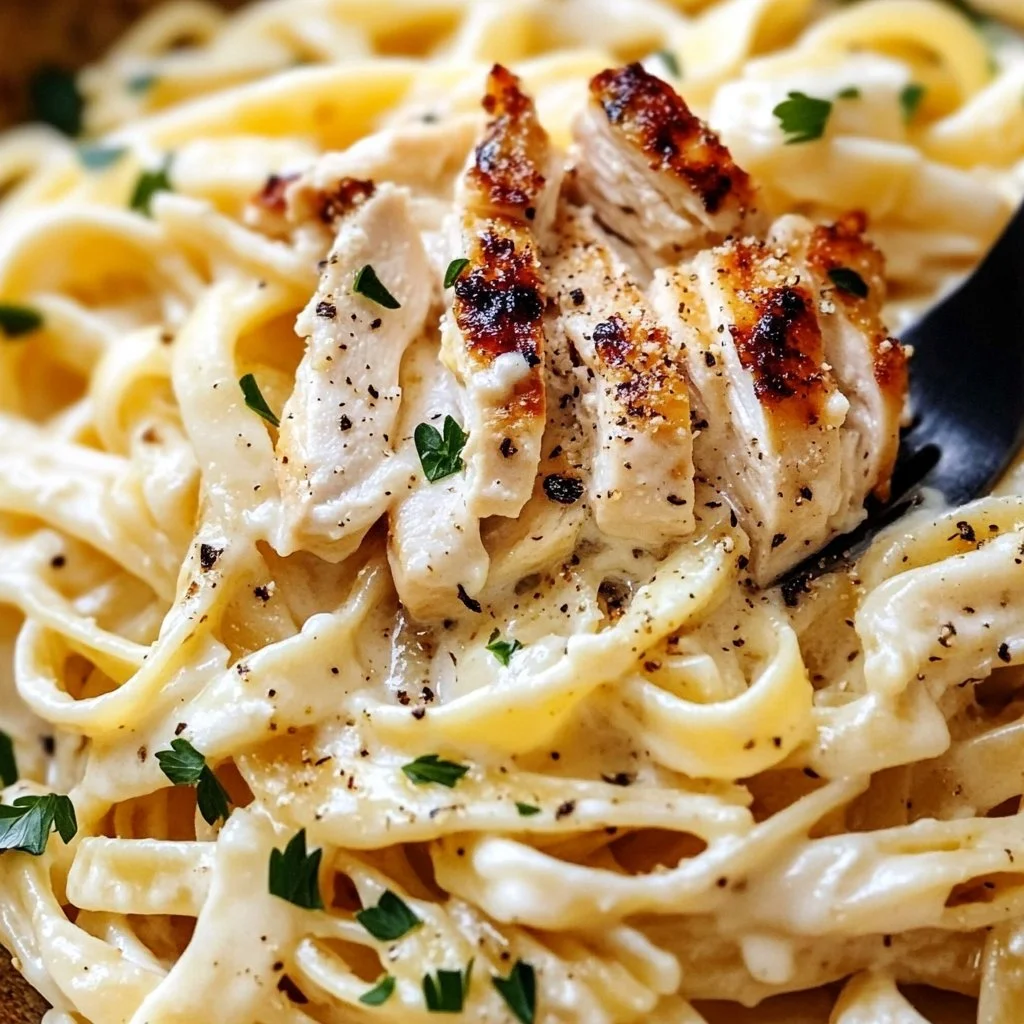
Chicken Alfredo is a fantastic choice for families. It’s quick to prepare, using ingredients that are often staples in your kitchen. In about 30 minutes, you can create a restaurant-quality meal without the fuss. The creamy sauce clings beautifully to the fettuccine, and the tender chicken makes it hearty enough to satisfy even the hungriest of appetites. You can serve it with a side salad or some garlic bread for a complete meal that will have everyone asking for seconds.
Process Overview
“This is where the magic happens—when the aroma fills the kitchen.”
This recipe is straightforward, making it accessible for cooks of all levels. You’ll be amazed at how simple ingredients can turn into a delicious feast. The whole process takes just a few steps and is perfect for those evenings when time is tight but you still want to make something special.
Ingredients
- 8 oz fettuccine pasta
Tip: For a healthier alternative, opt for whole wheat fettuccine or gluten-free pasta. - 2 cups cooked chicken, sliced
Tip: Use rotisserie chicken to save time. It adds flavor and is super convenient. - 1 cup heavy cream
Tip: For a lighter option, you can use half-and-half, but the cream gives a rich flavor. - 1/2 cup grated Parmesan cheese
Tip: Freshly grated cheese melts better than pre-packaged options. - 2 tablespoons butter
Tip: Don’t skip the butter; it adds a nice richness to the sauce. - 2 cloves garlic, minced
Tip: Fresh garlic really elevates the dish, but garlic powder can work in a pinch. - Salt and pepper to taste
Tip: Adjust according to your family’s preferences. - Parsley for garnish
Tip: Fresh parsley not only adds color but also a bright flavor contrast.
Directions
-
Cook the fettuccine pasta according to package instructions; drain and set aside.
Make sure to salt your water for flavor. Don’t forget to reserve a bit of the pasta water for later; it can help adjust the sauce consistency. -
In a large skillet, melt the butter over medium heat.
Keep an eye on it and stir occasionally to avoid burning. The butter should foam and then settle without browning. -
Add the minced garlic and sauté for about 30 seconds until fragrant.
The aroma is incredible, isn’t it? Just wait a moment longer to let that true garlic goodness shine without it burning. -
Pour in the heavy cream and bring to a simmer.
This is where the magic truly begins. Stir often for an even consistency. -
Stir in the Parmesan cheese until melted and smooth.
Once the cheese has melted, let it blend perfectly into the creamy sauce. It’s going to taste divine. -
Add the cooked chicken and cooked fettuccine to the skillet; toss to combine.
Coat the pasta and chicken well with the sauce. This is a chance to get those arms moving and mix everything together beautifully. -
Season with salt and pepper to taste.
Don’t be shy. Taste the sauce and adjust the seasonings until it’s just right for your family. -
Serve hot, garnished with parsley.
A little bit of green on top makes everything more appealing. Enjoy the smiles around the table.
Serving
When serving Chicken Alfredo family-style, use a large bowl or platter. This invites everyone to gather around and enjoy together. I like to sprinkle extra Parmesan on top for that cheesy goodness and have a side of garlic bread for dipping. It makes for a delightful meal that fosters conversation and connection.
Storage
If you have leftovers, store them in an airtight container in the refrigerator for up to three days. To reheat, add a splash of milk or reserved pasta water to get the sauce creamy again. Warm gently on the stovetop or microwave until heated through.
Kitchen Notes
- Use rotisserie chicken to save time.
- Prepare the sauce while the pasta cooks.
- Enhance flavor with extra herbs like basil or oregano.
- Make it a meal with a side salad.
- Double the recipe for larger gatherings.
Variations
For picky eaters or various diets, consider these tweaks:
- Substitute grilled shrimp or sautéed vegetables for the chicken.
- Use cauliflower fettuccine for a low-carb version.
- For a spicy kick, add red pepper flakes.
- Make it vegan by replacing heavy cream with coconut cream and using vegan cheese.
- Add broccoli or peas for extra veggies.
FAQ
1. Can I use a different type of pasta?
Absolutely! This sauce works well with any type you prefer, such as penne or rigatoni.
2. How can I make this dish healthier?
Use whole grain pasta and reduce the cream by replacing half with chicken broth.
3. Can I make Chicken Alfredo ahead of time?
While it’s best served fresh, the sauce can be made and stored in the fridge for up to two days. Just reheat and add the freshly cooked pasta.
4. What should I serve with Chicken Alfredo?
A side salad, garlic bread, or steamed vegetables make excellent accompaniments.
5. Can I freeze Chicken Alfredo?
It’s not recommended to freeze this dish because the cream can separate upon thawing, making it grainy. However, you can freeze any extra sauce separately.
In conclusion, Chicken Alfredo is not just a meal; it’s a way to create lasting memories with loved ones. Cooking this dish brings the family together, filling hearts and bellies with warmth. Remember, it’s about enjoying the process just as much as the meal. Happy cooking!
17. Chicken Fettuccine Alfredo
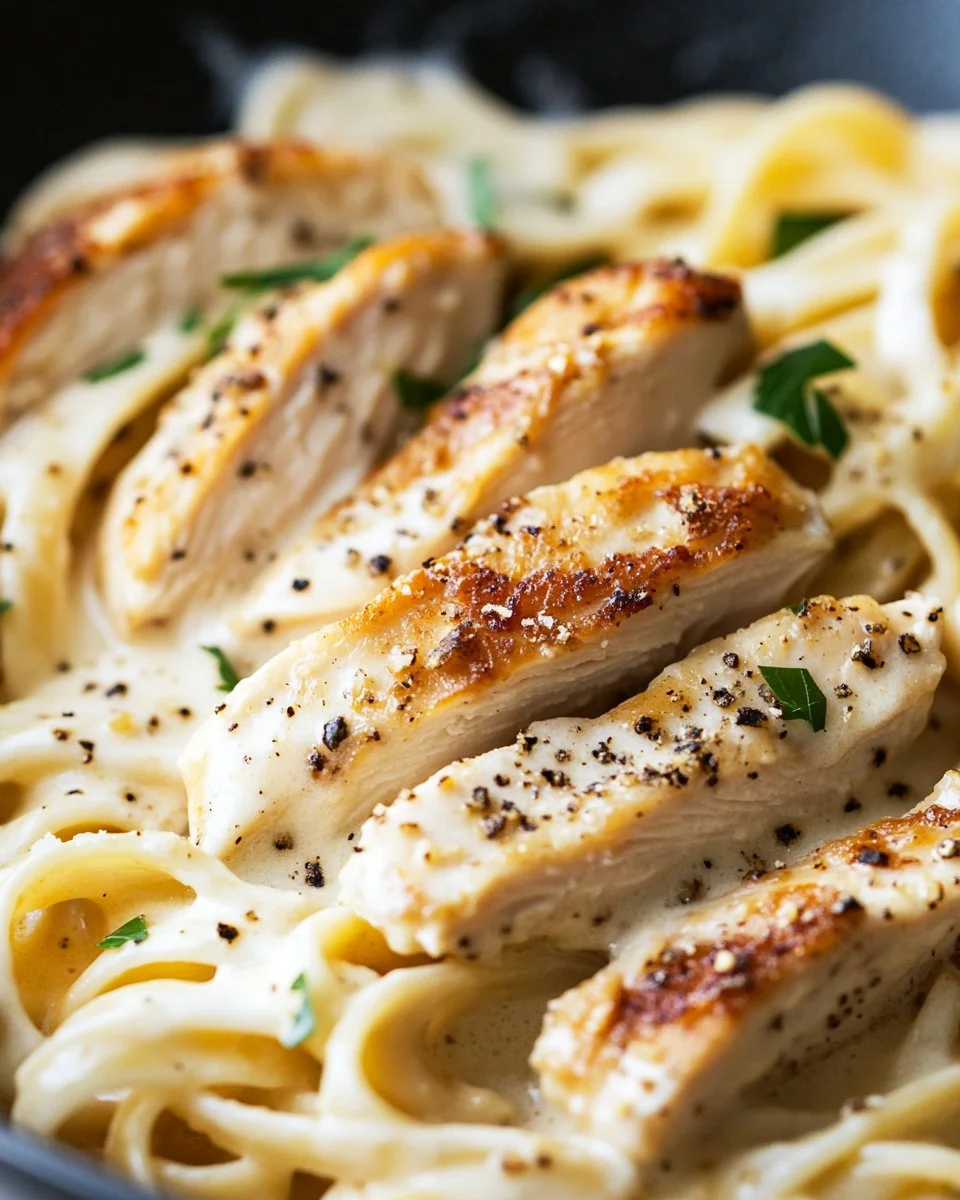
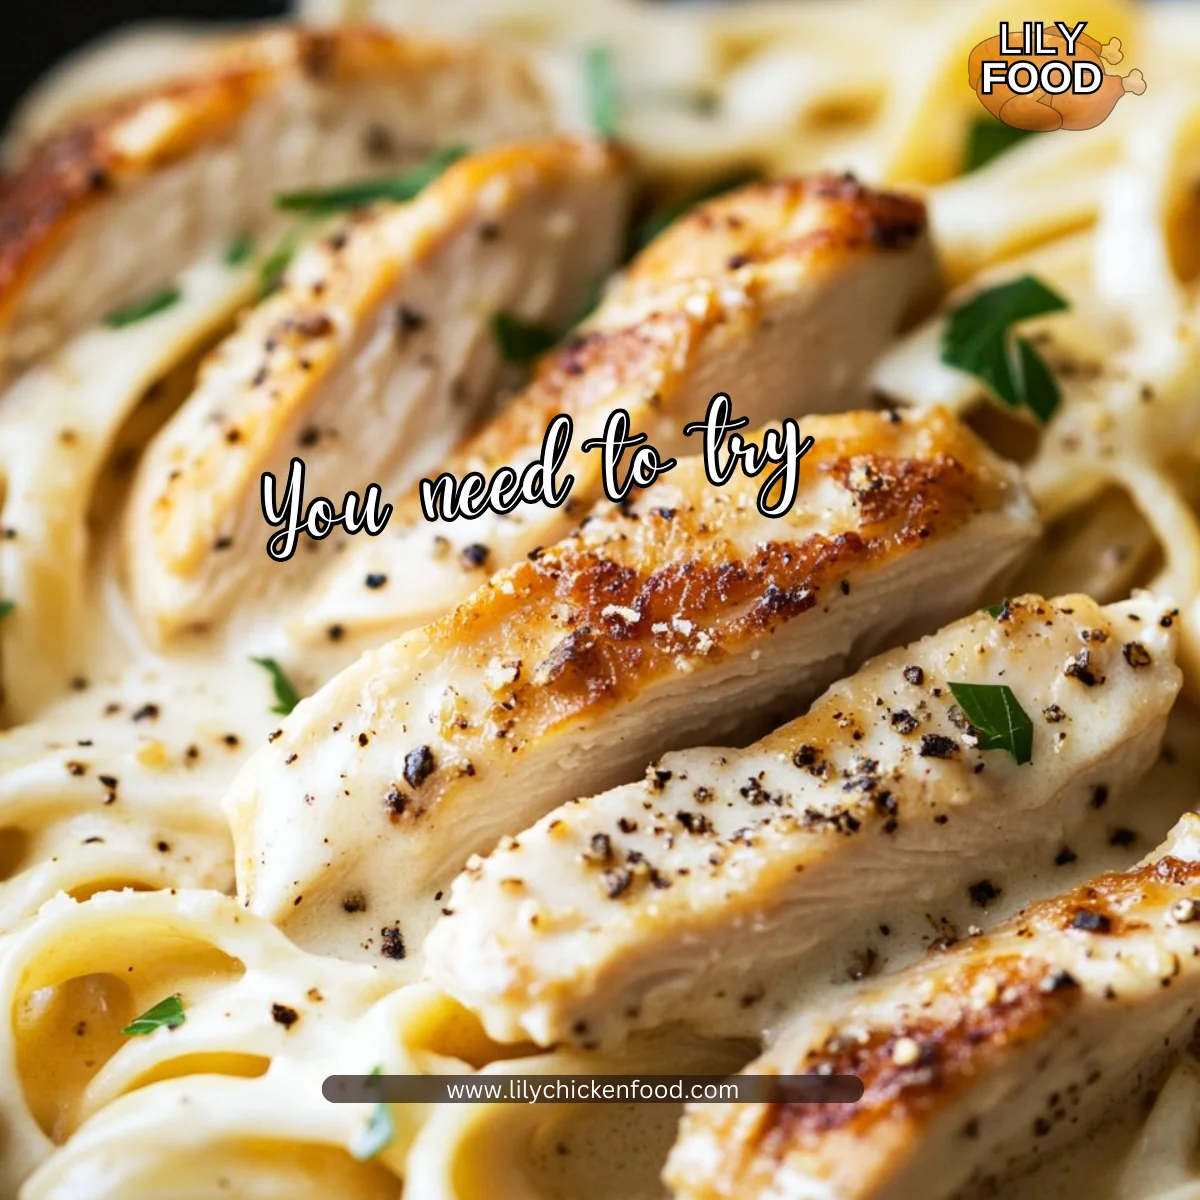
There’s something magical about the kitchen when you’re cooking a comforting meal like Chicken Fettuccine Alfredo. The rich aroma of garlic wafts through the air, mingling with the warmth of melted butter. You can hear the gentle bubbling of cream as it simmers on the stove. It’s an experience that invites everyone to gather around the table. This dish is not just a meal; it’s a time to connect with family and create memories that linger long after the plates are cleared.
Why This Works
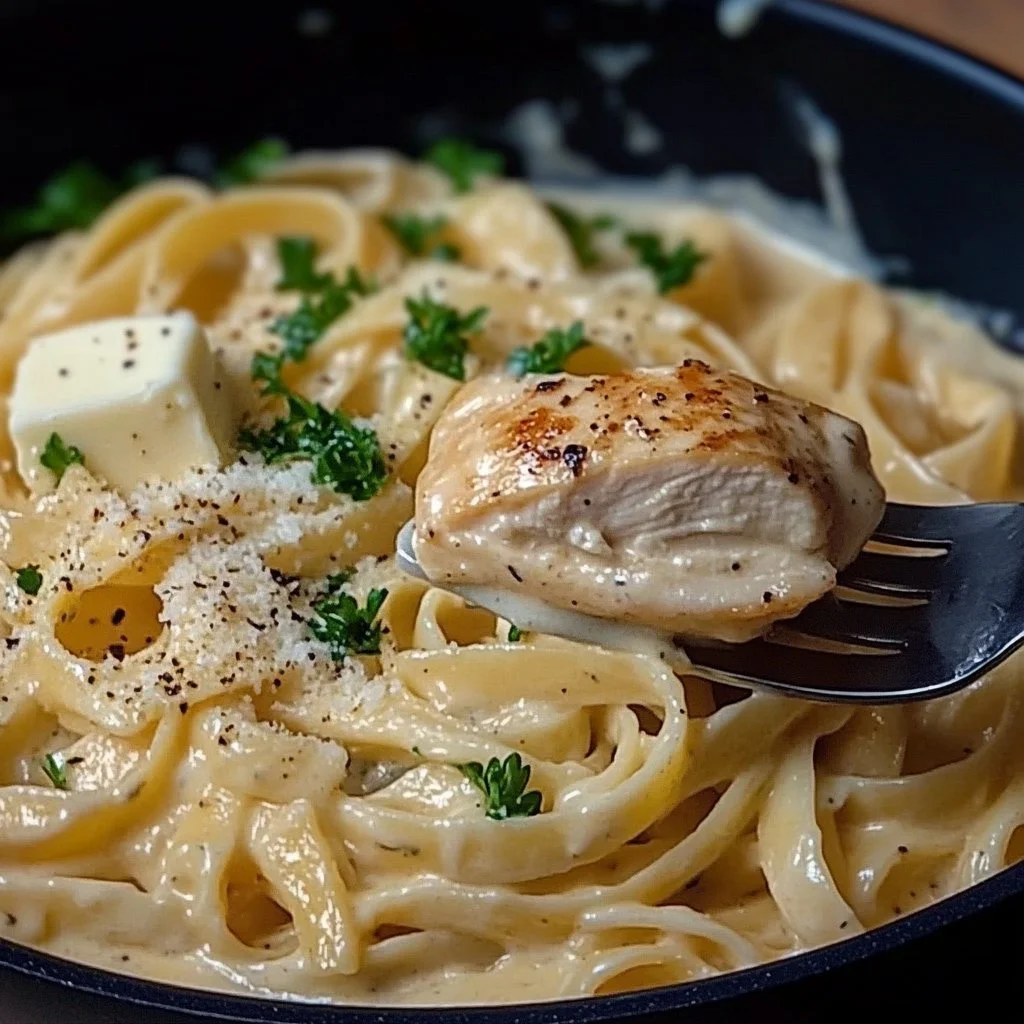
Chicken Fettuccine Alfredo is one of those timeless recipes that truly brings the family together. It’s creamy, indulgent, and so much easier to prepare than you might expect. This recipe makes great use of the simple ingredients that many of us already have in our kitchens. Plus, the way it comes together in less than 30 minutes makes it a perfect choice for busy weeknights. Who wouldn’t want to whip up a restaurant-quality dish in no time?
Process Overview
“This is where the magic happens—when the aroma fills the kitchen.”
Cooking is a multi-sensory experience. As you work through this recipe, you’ll be treated to delightful sights and smells that are sure to elevate your mood. Each step is designed to be straightforward, guiding you through the process of crafting this delicious meal. Let’s dive into what you need and how to make this happen.
Ingredients
Here’s what you’ll need for your Chicken Fettuccine Alfredo:
- Fettuccine pasta (12 oz): Go for fresh if possible; it cooks quicker and has a lovely texture.
- Chicken breast (1 lb): Use thinly sliced chicken for even cooking. You can also use rotisserie chicken for a shortcut.
- Heavy cream (1 cup): This is the secret to that velvety smooth sauce. Be sure to use heavy cream for the best results.
- Parmesan cheese (1 cup, grated): Freshly grated cheese melts better and adds a lovely flavor.
- Butter (4 tablespoons): Unsalted is best so you can control the saltiness of the dish.
- Garlic (3 cloves, minced): Fresh garlic elevates the dish. Avoid pre-minced if you can.
- Salt (to taste): Start with a little and adjust as you go.
- Pepper (to taste): Freshly cracked will give the best flavor.
- Parsley (for garnish): Fresh parsley adds a pop of color and a hint of freshness at the end.
Lily’s Tips:
- Pasta: Always salt your pasta water for better flavor absorption.
- Chicken: Marinate your chicken with a little olive oil, salt, and pepper for extra flavor.
- Cream: Never let your cream boil, as this can cause separation.
- Cheese: Save a little cheese for garnish.
- Garlic: Sauté garlic on medium-low heat to avoid burning, which can make it taste bitter.
Directions
-
Start by cooking the fettuccine pasta according to the package instructions until al dente. Drain it and set it aside. Remember to reserve a bit of pasta water if you want to adjust the sauce’s consistency later.
-
In a large skillet, melt the butter over medium heat. Add the minced garlic and sauté until fragrant. This step is crucial as the garlic infuses the butter and enhances the overall flavor.
-
Next, add the sliced chicken breast to the skillet. Cook until the chicken is no longer pink, about 5-7 minutes. Don’t rush this step; properly cooked chicken adds to the dish’s heartiness.
-
Pour in the heavy cream and bring it to a gentle simmer. The warmth will start to bring everything together.
-
Stir in the grated Parmesan cheese until it melts and the sauce becomes smooth. This is where the magic really begins. The cheese adds a wonderful creaminess.
-
Add your cooked fettuccine to the sauce and toss everything to coat. This step ensures that every noodle is enveloped in that delightful creamy sauce.
-
Season with salt and pepper to taste. Taste as you go, and remember that everyone’s preference is different.
-
Finish by garnishing with chopped parsley and serve. Your kitchen will smell irresistible!
Serving
Serving Chicken Fettuccine Alfredo family-style makes it even more inviting. Choose a large serving bowl and let everyone help themselves. Offer a sprinkle of extra Parmesan at the table, so everyone can have it to their liking. Pair it with a simple green salad and some crusty bread for a complete meal.
Storage
If you have leftovers (though I doubt it!), you can store them in an airtight container in the refrigerator for up to 3 days. When you’re ready to enjoy it again, reheat gently on the stovetop over medium-low heat. You may need to add a splash of cream or milk to bring back the creaminess of the sauce.
Kitchen Notes
Here are some handy shortcuts to make your life easier:
- Pre-cut Chicken: Buy pre-sliced chicken for quicker prep time.
- Frozen Fettuccine: Use frozen fettuccine for a fast meal option.
- Pre-minced Garlic: If you’re short on time, this might save you a few minutes.
- Use a Salad Kit: Adding a store-bought salad kit makes it easy to have fresh greens with your meal.
- Meal Prep: Make a double batch for quick meals later in the week.
Variations
If you’re cooking for picky eaters or special diets, try these tweaks:
- Vegetarian: Replace chicken with sautéed mushrooms or a medley of colorful bell peppers.
- Gluten-Free: Use gluten-free fettuccine pasta; many brands taste great!
- Spicy: Add some red pepper flakes to the sauce for a kick.
- Extra Veggies: Spinach, peas, or broccoli can be added for nutrition.
- Richer Flavor: Use a splash of white wine in the sauce for a deeper taste.
FAQ
-
Can I use a different type of pasta?
Yes, any pasta shape will work, but fettuccine is traditional. -
Is this dish kid-friendly?
Absolutely! Kids usually love creamy pasta dishes. -
Can I make this in advance?
While it’s best fresh, you can make the sauce ahead and reheat it when ready to serve. -
What other proteins can I add?
Shrimp or smoked salmon can be delicious alternatives. -
How do I make it dairy-free?
Use coconut cream and a dairy-free cheese alternative.
As you enjoy this Chicken Fettuccine Alfredo, remember the laughter and stories shared around the table. Cooking is more than just a means to fill our stomachs; it’s a way to connect with those we love. As you gather with your family, may your home be filled with warmth, joy, and the delightful aroma of good food. Happy cooking!
18. Chicken Alfredo Pasta Bake
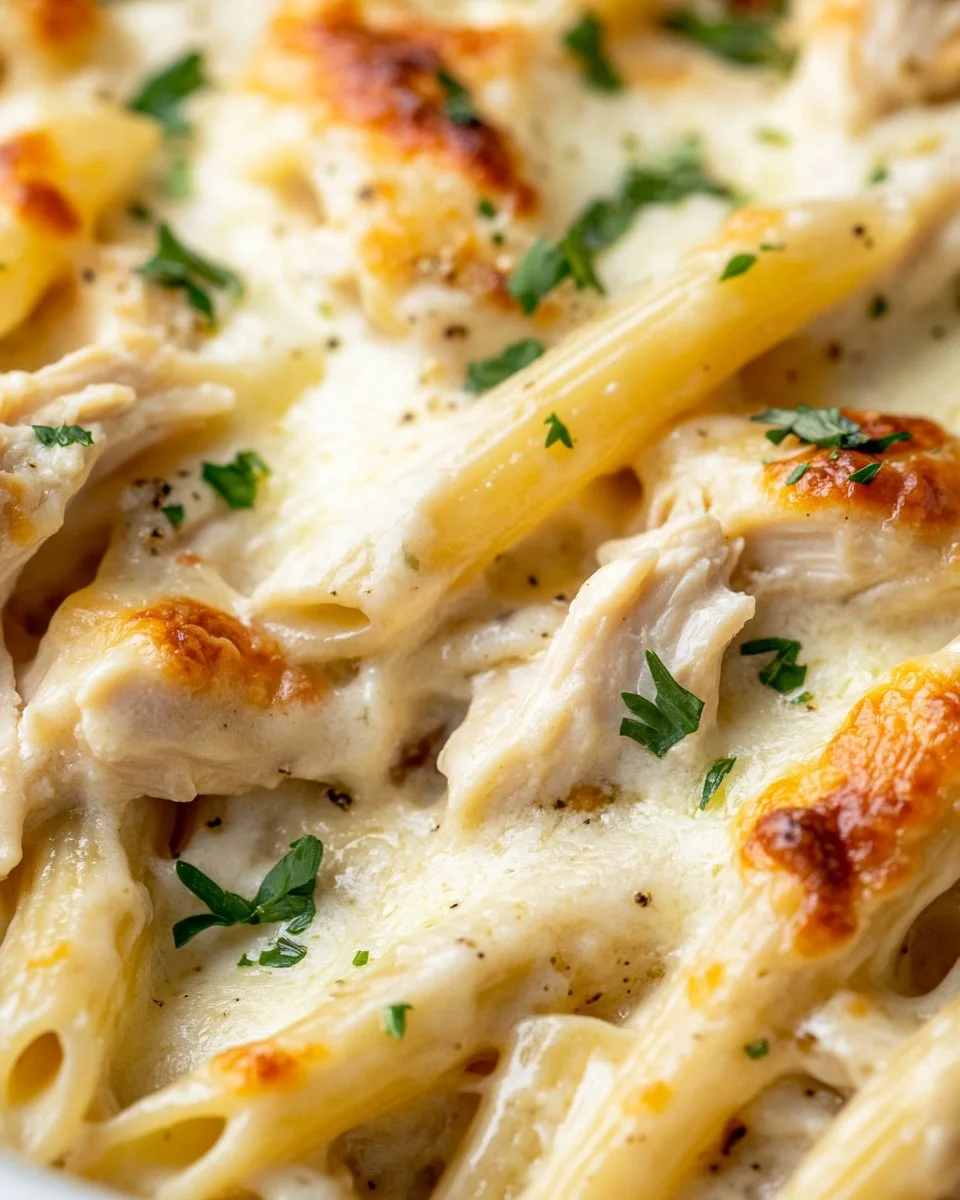
There’s something magical about the aroma of a freshly baked pasta dish filling your kitchen. As the sound of bubbling cheese wafts through the air, my heart warms, knowing a comforting meal is on its way. This Chicken Alfredo Pasta Bake is perfect for those busy weeknights or cozy family gatherings. It’s a rich, creamy masterpiece that can be made ahead of time, allowing you to spend more quality moments with your loved ones.
Why This Works
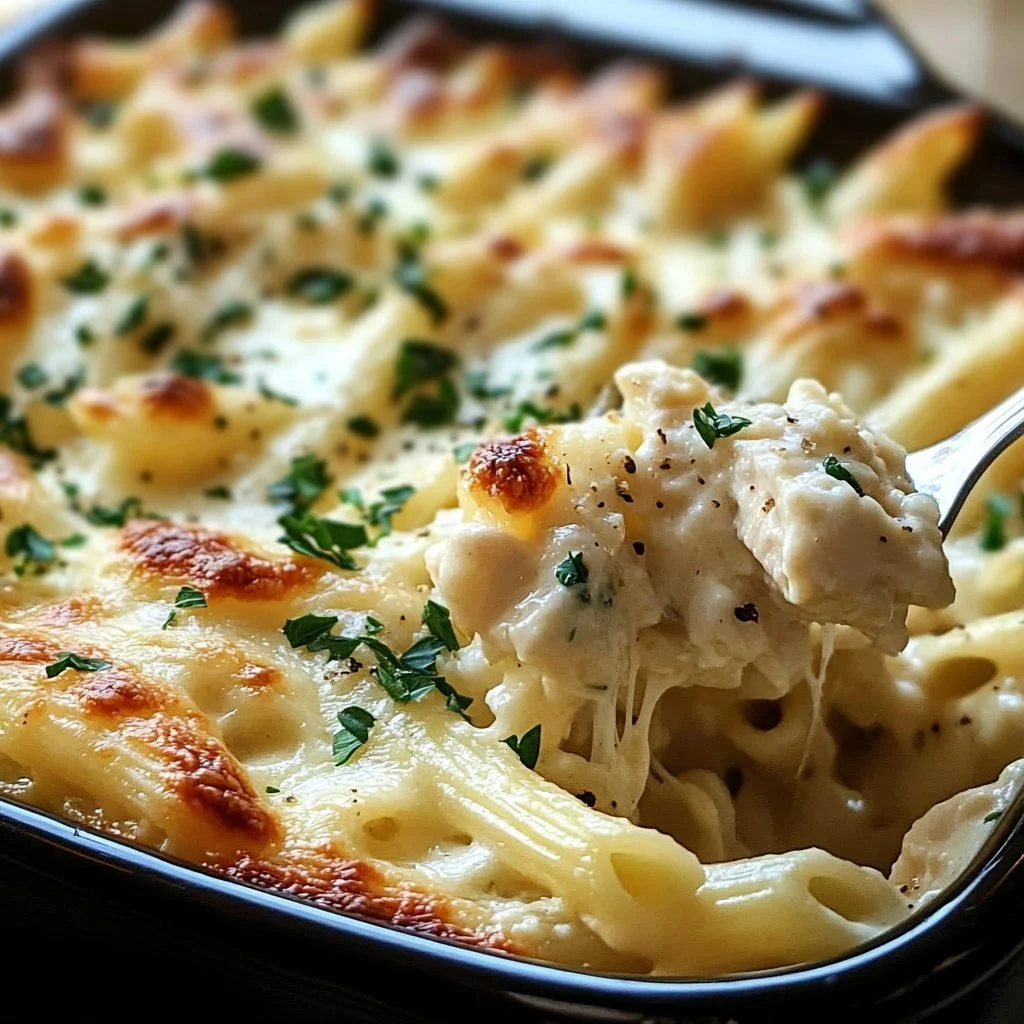
This Chicken Alfredo Pasta Bake is not only delicious, but it also saves you time. With its mix of tender pasta, juicy chicken, and rich Alfredo sauce, it layers flavors that everyone in the family will enjoy. You can prepare the bake ahead of time and pop it in the oven just before dinner. This means less stress for you and more time to laugh and connect around the table.
Process Overview
“This is where the magic happens—when the aroma fills the kitchen.”
Creating this dish is straightforward and gives you the opportunity to involve the whole family. Kids can help mix ingredients or sprinkle cheese on top. This recipe truly turns cooking into a fun family activity. Gather your ingredients, and let’s get started!
Ingredients
This recipe calls for:
-
8 ounces Penne pasta
This pasta shape holds the sauce well and adds a delightful texture. -
2 cups Cooked chicken, shredded
You can use rotisserie chicken for convenience or cook your own chicken breasts. -
2 cups Alfredo sauce
Homemade or store-bought, this sauce is the star of the dish, providing creaminess and flavor. -
1 cup Shredded mozzarella cheese
This cheese melts beautifully, creating a gooey topping. -
1/2 cup Grated Parmesan cheese
Adds a sharp, nutty flavor that complements the dish perfectly. -
1 teaspoon Garlic powder
For that extra kick of flavor. -
1 teaspoon Italian seasoning
A blend of herbs that enhances the overall taste. -
To taste Salt and pepper
Essential for seasoning and bringing out the flavors. -
1/4 cup Fresh parsley, chopped
Adds a pop of color and freshness to your dish.
Lily’s Tips:
- Use whole wheat penne for a healthier option.
- Store-bought sauces save time, but homemade sauce can be a fun weekend project!
- Shredding chicken while it’s warm makes for easier handling.
Directions
-
Preheat your oven to 350°F (175°C).
-
In a large pot, bring salted water to a boil. Add the penne pasta and cook according to package instructions until al dente, about 8-10 minutes. Drain and set aside.
Note: Al dente pasta has a nice bite and will absorb flavor from the sauce. -
Shred your cooked chicken if not already done. You can use leftover chicken or a store-bought rotisserie chicken.
Note: This step is quick if you have a food processor; just pulse until shredded. -
If making homemade Alfredo sauce, combine heavy cream, butter, garlic, and Parmesan cheese in a saucepan over medium heat. Stir until the cheese melts and the sauce thickens slightly.
Note: Homemade can be richer than store-bought—it’s worth it if you have the time! -
In a large mixing bowl, combine the cooked pasta, shredded chicken, Alfredo sauce, garlic powder, Italian seasoning, salt, and pepper. Mix well until all ingredients are evenly coated.
Note: Make sure everything is well combined for consistent flavors in every bite. -
Transfer the pasta mixture into a greased 9×13-inch baking dish. Spread evenly and sprinkle shredded mozzarella and grated Parmesan cheese on top.
Note: A quick spray of cooking oil helps with sticking. -
Bake in the preheated oven for 25-30 minutes, or until the cheese is bubbly and golden brown.
Note: This is where the anticipation builds! -
Let it cool for a few minutes before serving. Garnish with chopped parsley.
Note: Cooling slightly allows the dish to set, making it easier to serve.
Serving
To serve this Chicken Alfredo Pasta Bake family-style, place it on the table right from the oven. Allow everyone to take their portion, creating a warm, communal atmosphere. You can pair it with a simple green salad and some crusty bread to complete the meal. This dish is hearty enough on its own, but a slice of garlic bread can make it even more delightful.
Storage
Once you’ve enjoyed your delicious bake, store any leftovers in an airtight container in the fridge. It stays fresh for about three days. When you’re ready to reheat, place it back in the oven at 350°F (175°C) for 15-20 minutes. You can also microwave individual portions if you’re in a hurry. Just add a splash of water to keep it moist.
Kitchen Notes
- Use rotisserie chicken for quick prep. Shredding it takes just moments.
- Prep the pasta and chicken ahead of time. You can store them in the fridge until you’re ready to bake.
- Make extra Alfredo sauce. This can be used in other recipes throughout the week.
- Double the recipe. If you have a larger family or plan on a get-together, it freezes well for future meals.
- Mix in veggies. Add steamed broccoli or spinach to boost the nutrition or add color.
Variations
Here are some tweaks to consider for picky eaters or different diets:
- Add vegetables: Spinach, broccoli, or even peas can be delicious additions that add color and flavor.
- Gluten-free option: Substitute penne pasta with gluten-free pasta varieties, which work just as well.
- Dairy-free: Use a dairy-free Alfredo sauce and vegan cheese for a dairy-free alternative.
- Spicy: Incorporate diced jalapeños or crushed red pepper flakes for a kick.
- Different proteins: Swap out chicken for cooked shrimp or turkey.
FAQ
1. Can I make this dish ahead of time?
Yes, you can prepare it and store it in the fridge before baking. Just cover it with foil and bake when you’re ready.
2. How can I make this healthier?
Consider using whole grain pasta and reducing the amount of cheese. You can also add vegetables for extra nutrition.
3. Can I use a different type of cheese?
Absolutely! If you prefer cheddar or gouda, feel free to swap.
4. How do I know when it’s done baking?
It’s ready when the cheese is bubbly and golden brown.
5. Can I freeze leftovers?
Yes, this dish can be frozen. Make sure it’s cooled completely and stored in a freezer-safe container.
Conclusion
Cooking for your family doesn’t have to be stressful. This Chicken Alfredo Pasta Bake is an easy solution that creates a warm, inviting atmosphere around the dinner table. It brings everyone together with its rich, comforting flavors. Enjoy the moments you’ll share while making and eating this dish, and remember, great meals create lasting memories. Happy cooking!
19. Chicken Alfredo Pasta
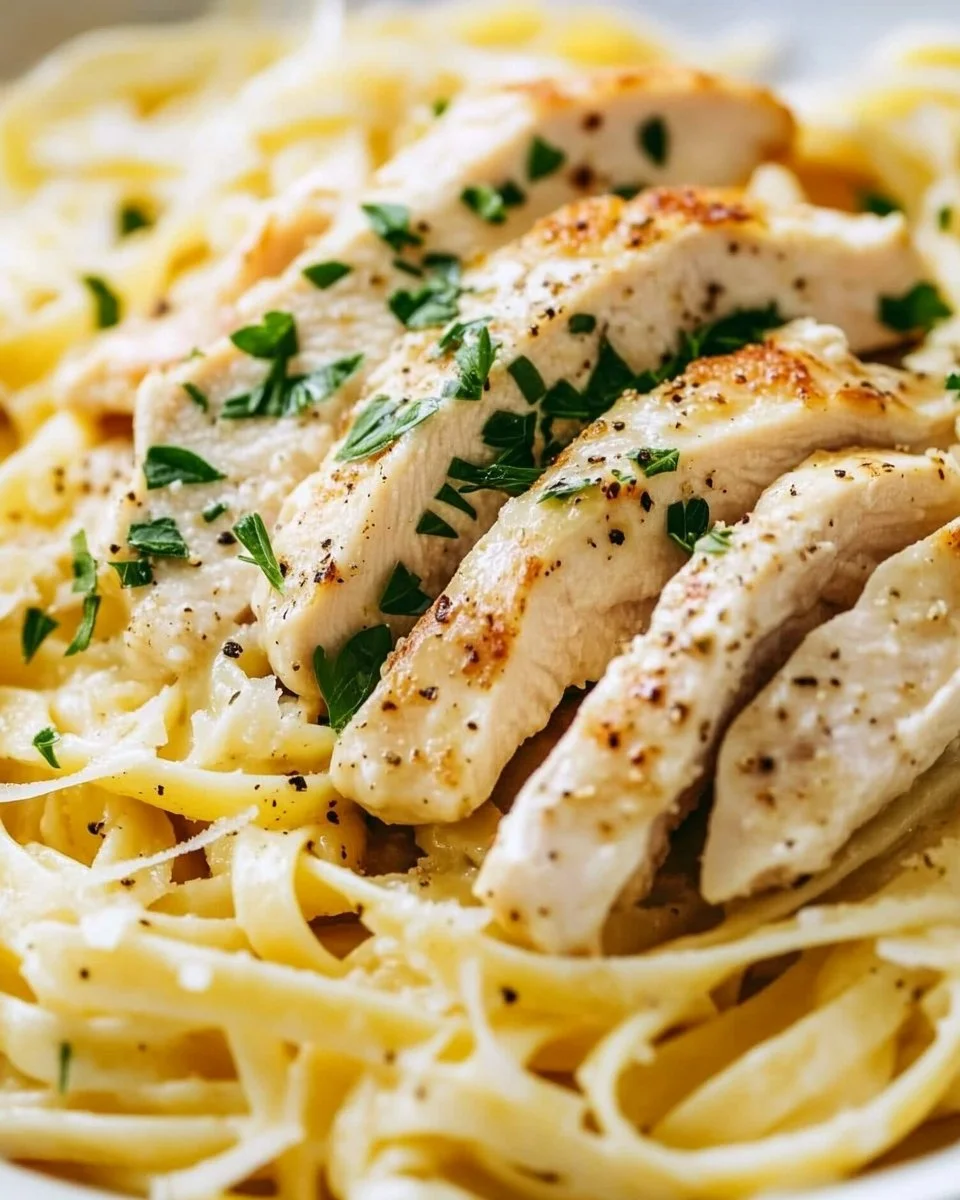
There’s something magical about the smell of dinner coming together in the kitchen. Picture the sound of sizzling chicken, the gentle bubbling of creamy sauce, and the aroma wafting through the house. Just before dinner time, your family gathers around, and their eyes light up with anticipation. Cooking is not just about the food; it’s about bringing loved ones together and creating cherished memories.
Why This Works
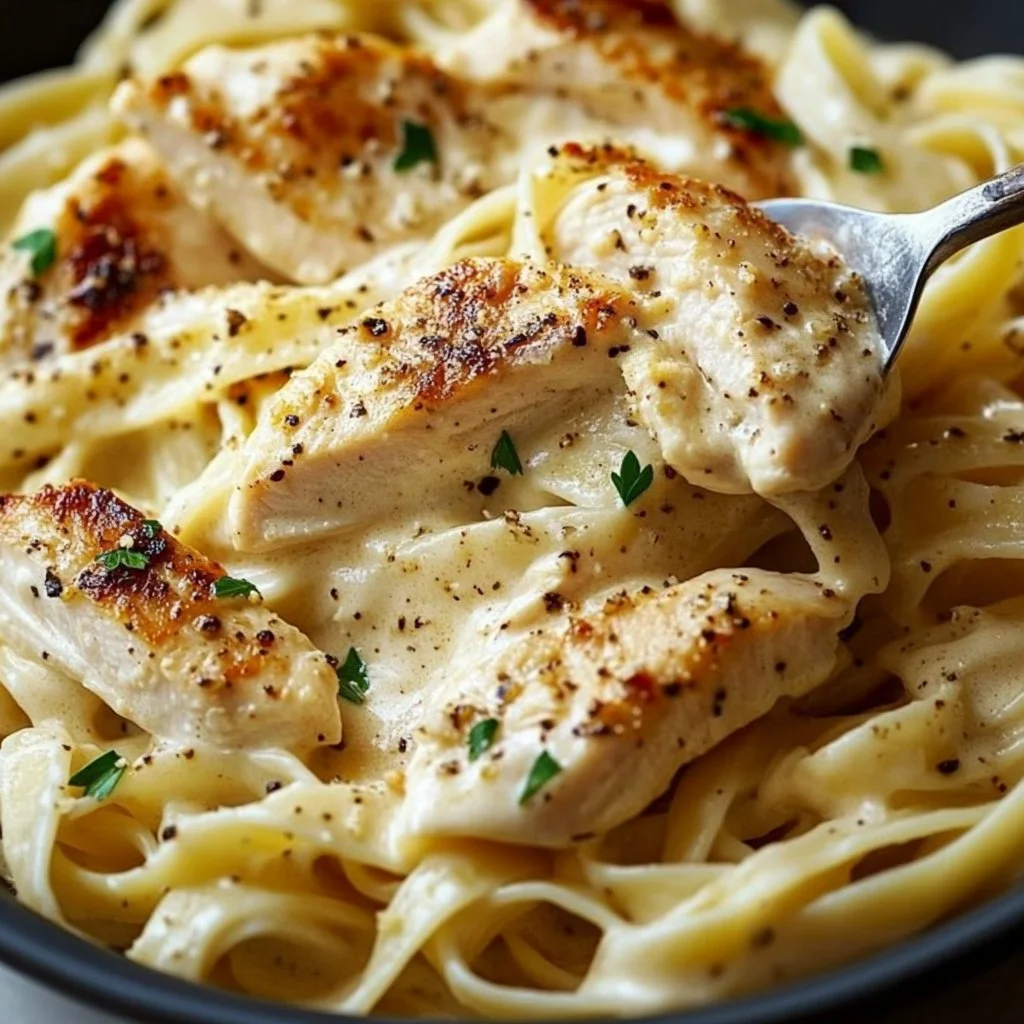
This Chicken Alfredo Pasta is a family favorite for many reasons. First, it’s quick and easy to prepare, making it perfect for busy weeknights. You can have a hearty meal on the table in under 30 minutes. Second, it’s a crowd-pleaser. Creamy, cheesy, and a little bit indulgent, it satisfies even the pickiest eaters in your home. Plus, cooking it in one skillet means less cleanup afterward—great for busy families.
Process Overview
“This is where the magic happens—when the aroma fills the kitchen.”
As we dive into this Chicken Alfredo Pasta recipe, let’s make sure the process feels seamless and enjoyable. Cooking should be a joyful experience, allowing you to bond with your family. With the right ingredients and a bit of enthusiasm, anyone can whip this up in no time.
Ingredients
- 12 oz fettuccine pasta
- 2 tablespoons olive oil
- 1 lb chicken breast, sliced
- 3 cloves garlic, minced
- 1 cup heavy cream
- 1 cup grated Parmesan cheese
- Salt and pepper to taste
- Parsley, for garnish
Lily’s Tips:
- Choose fettuccine because its flat shape holds the creamy sauce beautifully.
- Use extra virgin olive oil for a richer flavor.
- Don’t rush the chicken cooking process; a golden brown crust adds depth to your dish.
- Fresh garlic is a must; it makes a world of difference in flavor.
- Go for freshly grated Parmesan as it melts better and brings a creamier texture to your sauce.
Directions
- Cook the fettuccine pasta according to package instructions; drain and set aside.
Tip: Toss a pinch of salt in the boiling water for added flavor. - In a large skillet, heat olive oil over medium heat. Add the chicken slices, season with salt and pepper, and cook until golden brown and cooked through. Remove and set aside.
Tip: Make sure not to overcrowd the pan; this helps in browning the chicken evenly. - In the same skillet, add the minced garlic and sauté for about 1 minute until fragrant.
Tip: Keep an eye on the garlic, as it can burn quickly. - Pour in the heavy cream and bring to a simmer. Stir in the Parmesan cheese until melted and the sauce is smooth.
Tip: If the sauce is too thick, add a splash of pasta water to reach your desired consistency. - Add the cooked pasta and chicken back into the skillet, tossing to coat everything in the sauce.
Tip: Ensure every noodle gets a nice coating of that luxurious sauce. - Garnish with parsley and serve immediately.
Tip: A sprinkle of extra Parmesan on top enhances the presentation.
Serving
To serve Chicken Alfredo Pasta family-style, simply place the skillet in the center of the table. Pair it with a fresh salad and warm crusty bread for a complete meal. Encourage everyone to help themselves, creating a cozy atmosphere that makes everyone feel at home.
Storage
This Chicken Alfredo Pasta stores well in the refrigerator. Place leftovers in an airtight container and refrigerate for up to 3 days. When reheating, add a splash of cream or milk to the skillet to bring back the creaminess. Heat over low until warmed through, stirring occasionally.
Kitchen Notes
- Use pre-cooked rotisserie chicken for an even quicker meal.
- Consider adding steamed broccoli or peas for a pop of color and nutrition.
- Make sure you taste the sauce as you cook, adjusting salt and pepper to your preference.
- If you have leftover Alfredo sauce, it makes a great base for homemade pizza!
- Invest in good non-stick cookware for easy cleanup and even cooking.
Variations
If your family has different tastes or dietary restrictions, don’t worry. Here are some tweaks:
- For a vegetarian option, substitute the chicken with mushrooms or your favorite vegetables.
- Try whole wheat pasta for added fiber and nutrients.
- If you need a lower-calorie alternative, use half-and-half or a milk of your choice instead of heavy cream.
- For a zesty twist, add some lemon juice or zest for freshness.
- Experiment with different cheese such as Romano or mozzarella for a different flavor profile.
FAQ
-
Can I use a different type of pasta?
Yes! Any pasta shape you prefer will work, though fettuccine is traditional. -
How do I prevent the sauce from getting too thick?
Add a bit of pasta water or extra cream while reheating to reach your desired consistency. -
Can I make this dish ahead of time?
While it’s best enjoyed fresh, you can pre-cook the pasta and chicken, then combine everything right before serving. -
Is this recipe gluten-free?
You can use gluten-free pasta to make this dish suitable for gluten-sensitive individuals. -
Can I freeze the leftovers?
Little bits of heavy cream may separate when frozen, but you can freeze it for up to 2 months. Just make sure to reheat slowly.
As we wrap up, I hope this Chicken Alfredo Pasta recipe becomes a cherished staple in your home. Cooking for loved ones is about more than just flavors; it’s about gathering around the table and sharing experiences. Enjoy this delicious meal, and remember that the best moments are often found in the simplest of dishes.
20. Best Chicken Alfredo Recipe
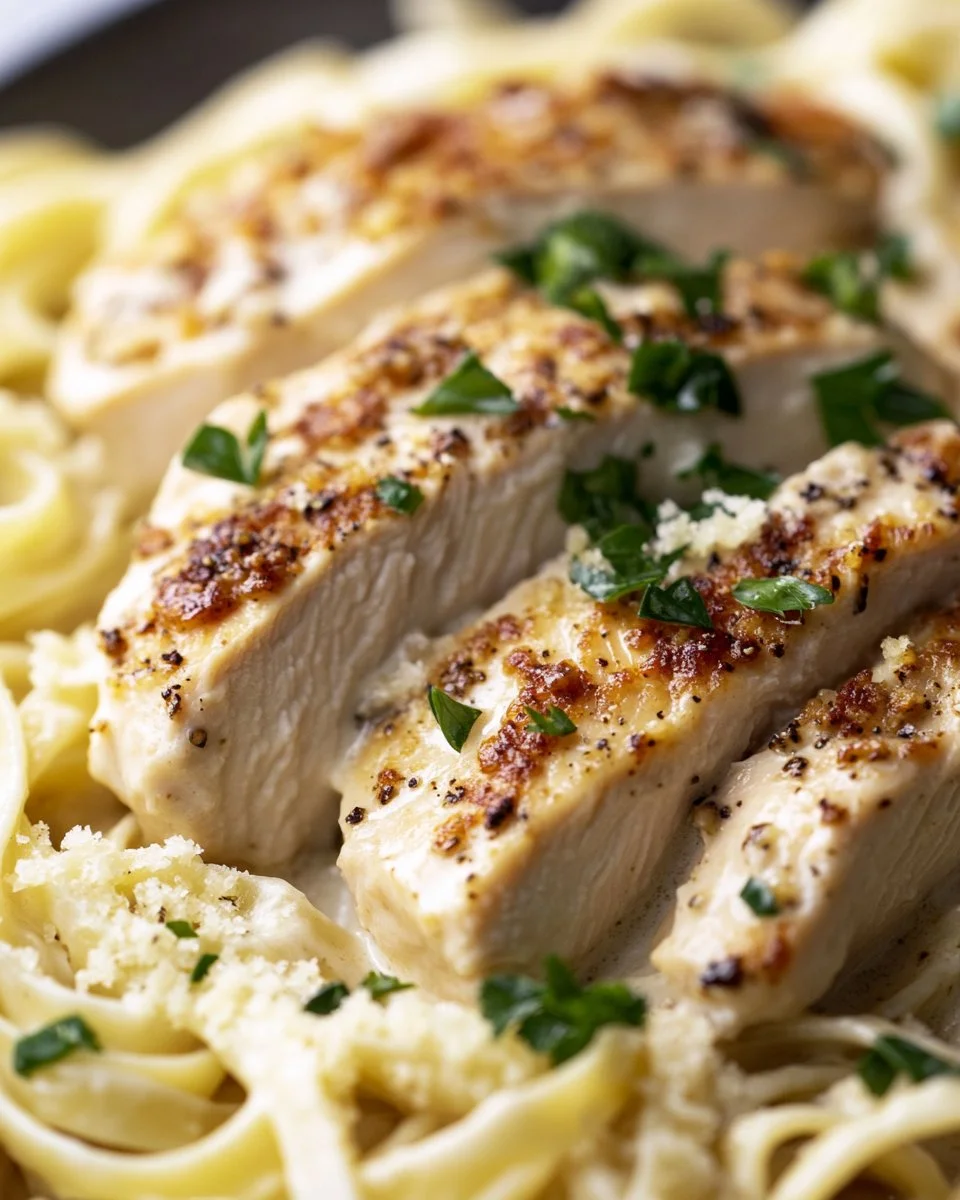
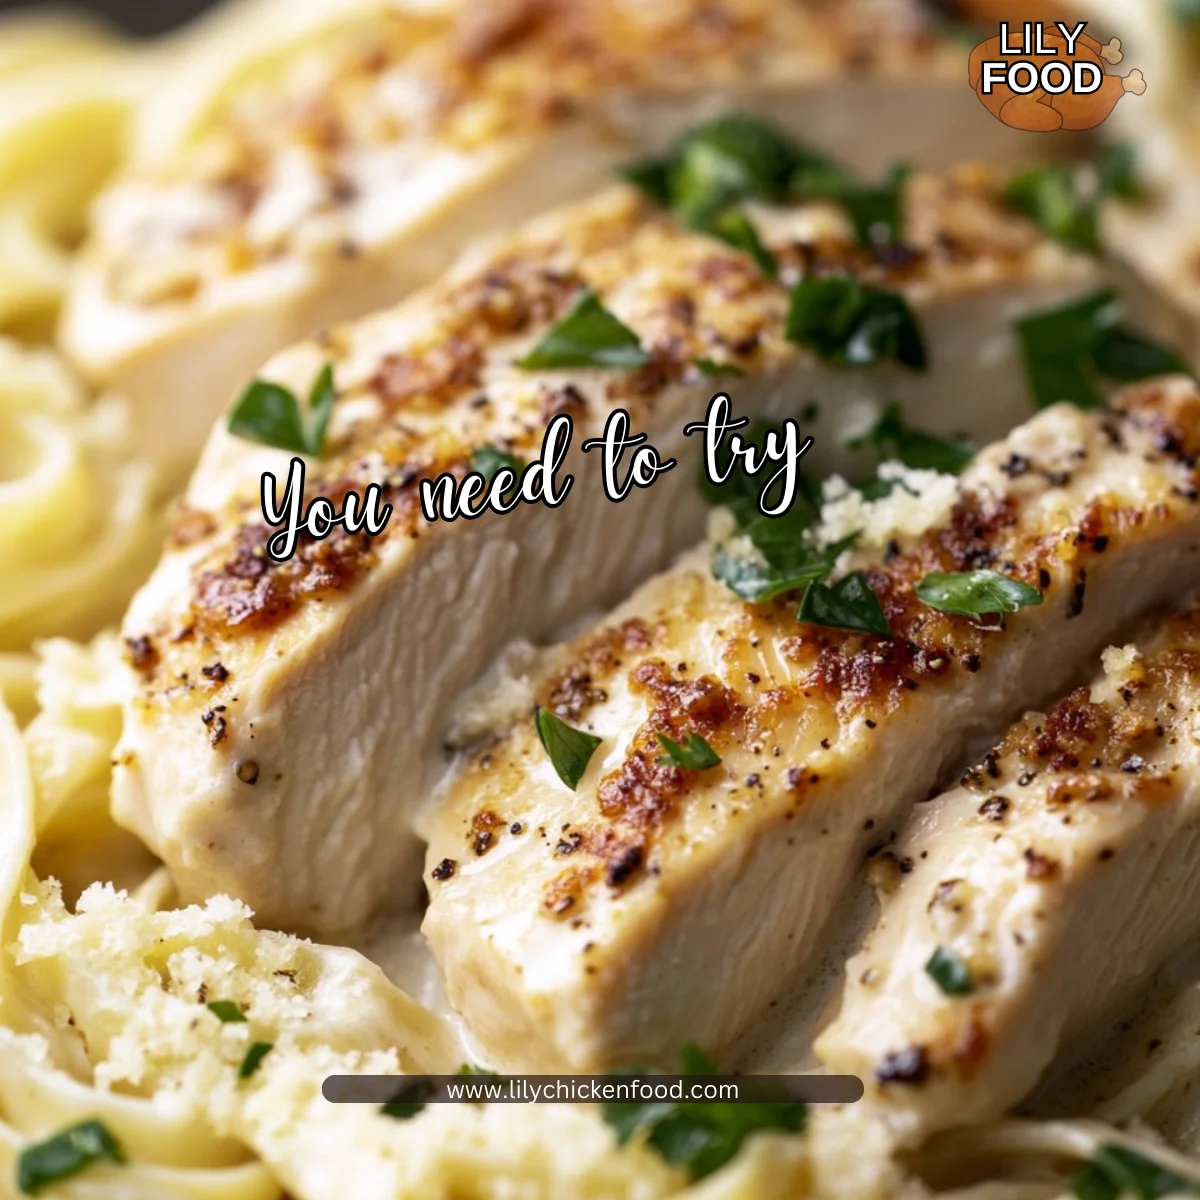
There’s something magical that happens in the kitchen when you’re preparing a homemade Chicken Alfredo. The warm aroma of garlic and butter fills the air and mingles perfectly with the rich scent of heavy cream and Parmesan cheese. You can hear the gentle bubbling of the sauce as it simmers, promising a comforting meal that will surely bring smiles to your family’s faces. The moment you sit down to share this creamy dish with your loved ones, you realize that cooking can be one of the most fulfilling and enjoyable experiences.
Why This Works
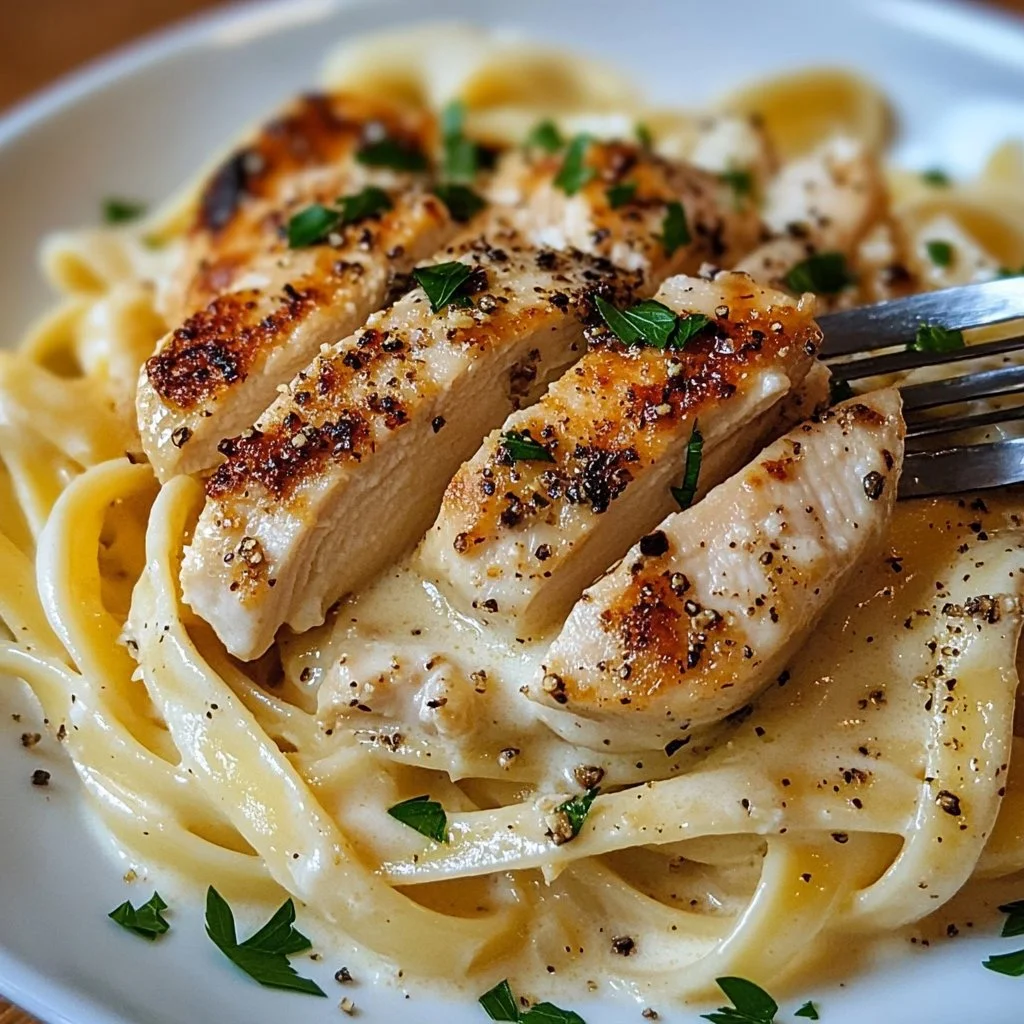
This Chicken Alfredo recipe is a win for busy families. It’s not only simple to prepare but also incredibly satisfying. Whipping up a comforting, creamy pasta dish in 30 minutes or less means you can spend more quality time around the dinner table. The flavors meld beautifully, and everyone—kids and adults alike—will look forward to this meal.
You can easily double the recipe for larger gatherings or simply save leftovers for lunch the next day. It’s a recipe that makes weeknight dinners a little more special while being completely manageable on a busy schedule.
Process Overview
“This is where the magic happens—when the aroma fills the kitchen.”
In this recipe, we start by seasoned chicken breasts, allowing them to brown perfectly in a hot skillet. While the chicken rests, we prepare the rich Alfredo sauce with garlic, cream, and Parmesan. The fettuccine pasta cooks separately, and when everything comes together, your kitchen transforms into a haven of warmth and delicious scents.
Ingredients
To make the best Chicken Alfredo, you will need:
- 2 boneless, skinless chicken breasts: Look for fresh chicken for the best flavor.
- 1 teaspoon salt: This enhances the chicken’s natural flavors.
- 1/2 teaspoon black pepper: Adds a subtle kick to the dish.
- 1 teaspoon garlic powder: A must for that classic Italian taste.
- 1 teaspoon Italian seasoning: A blend of herbs that makes everything taste authentically Italian.
- 2 tablespoons olive oil: Helps the chicken brown evenly.
- 3 tablespoons unsalted butter: For richness in the sauce.
- 3 cloves garlic, minced: Fresh garlic gives a punch of flavor.
- 1 1/2 cups heavy cream: The key ingredient for a luscious sauce.
- 1 cup grated Parmesan cheese: The final touch that brings it all together.
- 8 ounces fettuccine pasta: Classic pasta to soak up the Alfredo sauce.
- Fresh parsley for garnish: Brightens up the dish visually and adds freshness.
Tip from Lily: Always use freshly grated Parmesan, as pre-grated cheese can lead to a grainy sauce.
Directions
- Season the chicken breasts with salt, pepper, garlic powder, and Italian seasoning. This mix elevates the chicken’s base flavor.
- Heat olive oil in a skillet over medium-high heat. Cook the chicken until golden brown and cooked through, about 6-7 minutes per side. The sound of sizzling is music to your ears. Remove and let rest, then slice.
- In the same skillet, melt the butter. Add the minced garlic and sauté until fragrant. This is where your kitchen will start smelling heavenly.
- Add the heavy cream and bring it to a simmer. Stir occasionally to prevent sticking.
- Stir in the grated Parmesan cheese until smooth. This will create a rich, creamy sauce that will coat your pasta perfectly.
- Cook the fettuccine according to package instructions. Drain it and add it to the sauce. Toss gently to combine. The pasta will absorb all that delicious flavor.
- Toss in the sliced chicken and mix until well combined. This is where all the components come together.
- Serve hot, garnished with fresh parsley. A colorful garnish always impresses.
Serving
To serve this Chicken Alfredo family-style, transfer it to a large serving platter. This way, everyone can help themselves, making for a cozy, communal dining experience. Pair the dish with a simple green salad and some crusty bread to soak up any leftover sauce. Your family will love digging into this mouthwatering meal just as much as they enjoy spending time together.
Storage
After enjoying a comforting dinner, you might find yourself with some leftovers. Here’s how to keep it fresh:
- Refrigerate any leftovers within two hours. Store in an airtight container.
- Use within 3 days for the best flavor and freshness.
- Reheat gently on the stove over low heat. If the sauce thickens too much, add a splash of milk or chicken broth to loosen it up.
Kitchen Notes
Here are some shortcuts to make your cooking experience smoother:
- Use pre-cooked rotisserie chicken if you’re short on time. Just add it to the sauce for a quicker option.
- For a head start, cook the pasta ahead of time and toss it with olive oil to prevent sticking.
- If you don’t have fresh garlic, use garlic powder in a pinch.
- Make it a one-pan dish by cooking the pasta directly in the sauce. Just add extra water to the sauce.
- Keep grated cheese on hand for a quick garnish on top of any meal.
Variations
Not everyone has the same tastes or dietary preferences. Here are some tweaks you can make:
- For a lighter option, use half-and-half instead of heavy cream.
- Try using zucchini noodles for a low-carb alternative.
- Add broccoli or peas for some extra veggies in the dish. They’ll pair wonderfully with the creamy sauce.
- For spice lovers, add red pepper flakes to the sauce for a little heat.
- If you’re gluten-free, swap the fettuccine for gluten-free pasta.
FAQ
1. Can I use other types of pasta?
Yes, you can use whatever pasta you like. Penne or spaghetti would also work well in this dish.
2. How can I make it vegetarian?
Skip the chicken and add more vegetables like mushrooms, zucchini, or spinach. You can also use plant-based cream.
3. Can I freeze Chicken Alfredo?
Yes, but freezing can change the texture of the sauce. It’s best to freeze the chicken separately from the pasta if you choose to do so.
4. What can I serve with Chicken Alfredo?
A simple green salad and garlic bread make great accompaniments to balance the rich flavors of the pasta.
5. How can I ensure my sauce is creamy and not grainy?
Using freshly grated Parmesan and adding it off the heat can help prevent a grainy texture in your sauce.
As you close the chapter on this delightful Chicken Alfredo recipe, remember that cooking is about bringing joy to your loved ones. This dish, filled with creamy goodness and seasoned warmth, is sure to spark delicious family conversations around the table. So, roll up those sleeves, put on your favorite apron, and let’s get cooking!
21. Air Fryer Chicken Wings
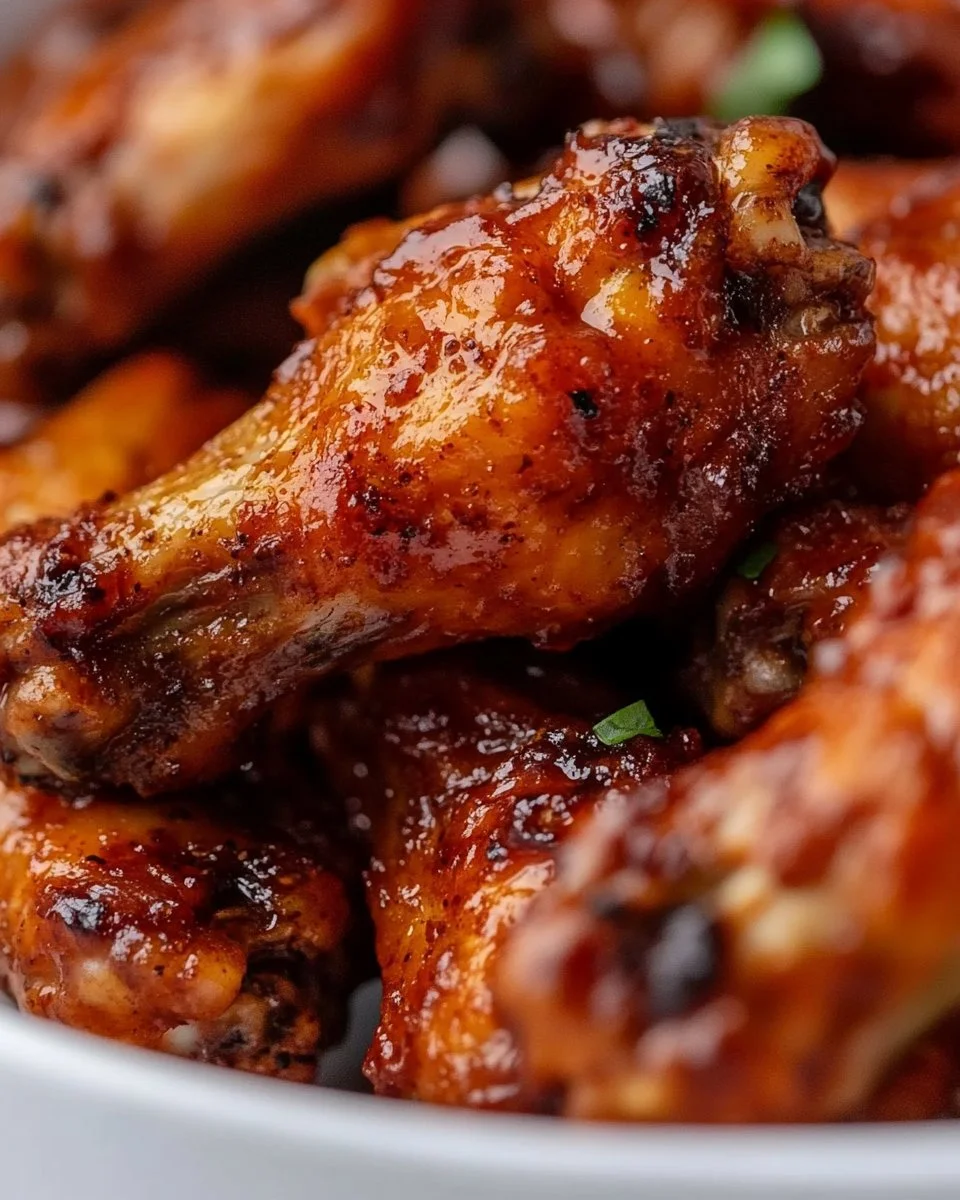
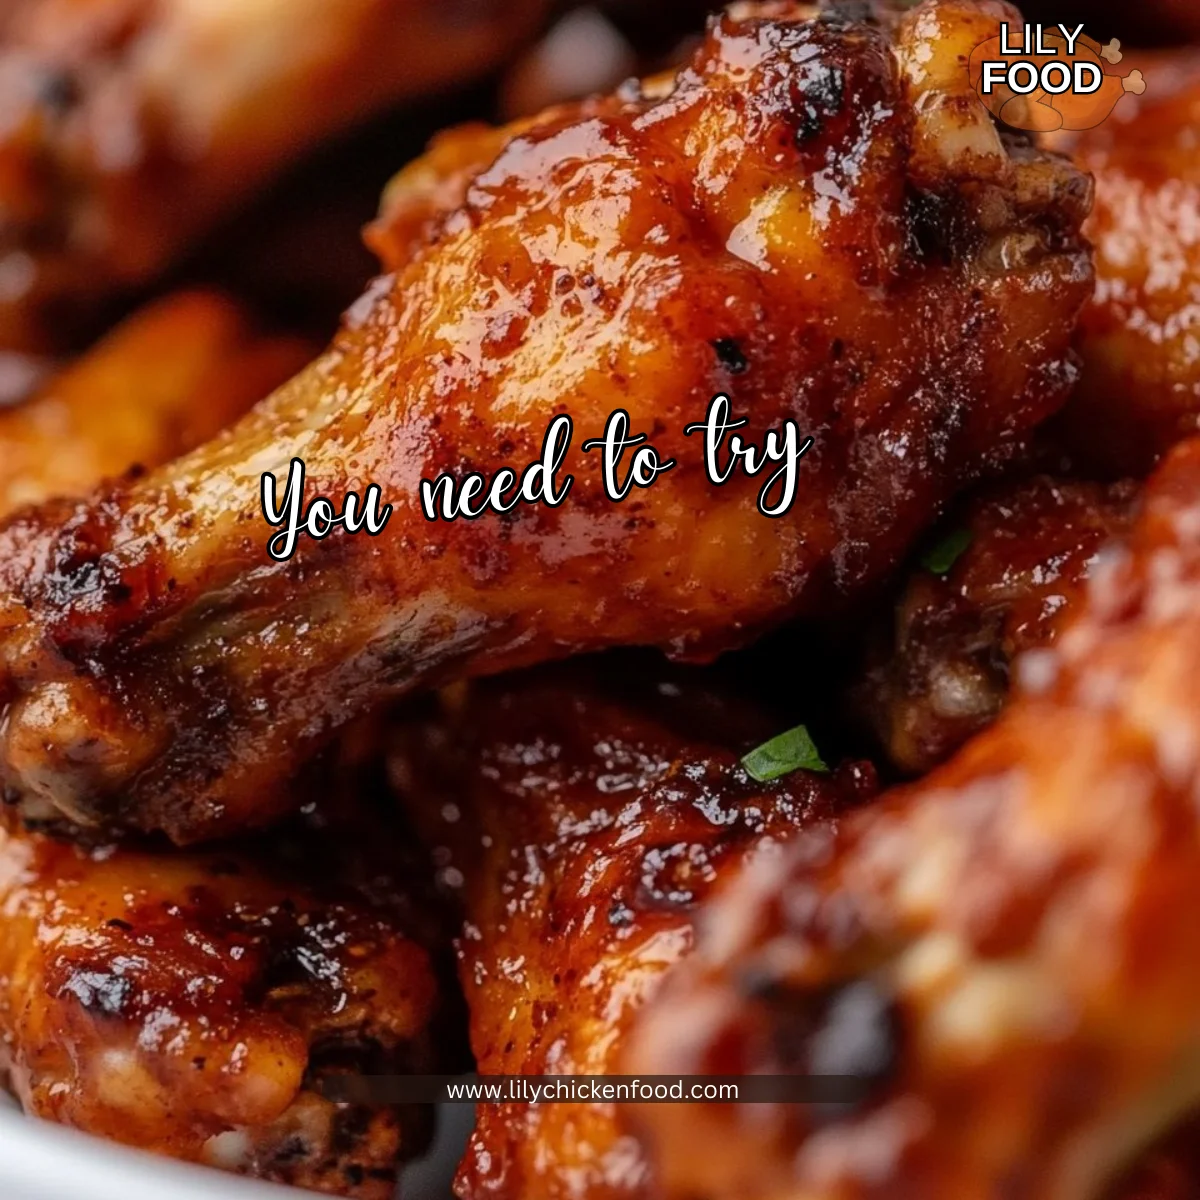
Air frying has become a game changer in many households, and for good reason. The enticing smell of chicken wings cooking in the air fryer fills the kitchen, making mouths water before they even reach the table. The sound of sizzling wings is enough to get everyone excited, promising a meal that’s not just delicious but also easy to prepare. Let’s dive into a recipe that your whole family will love: Air Fryer Chicken Wings.
Why This Works
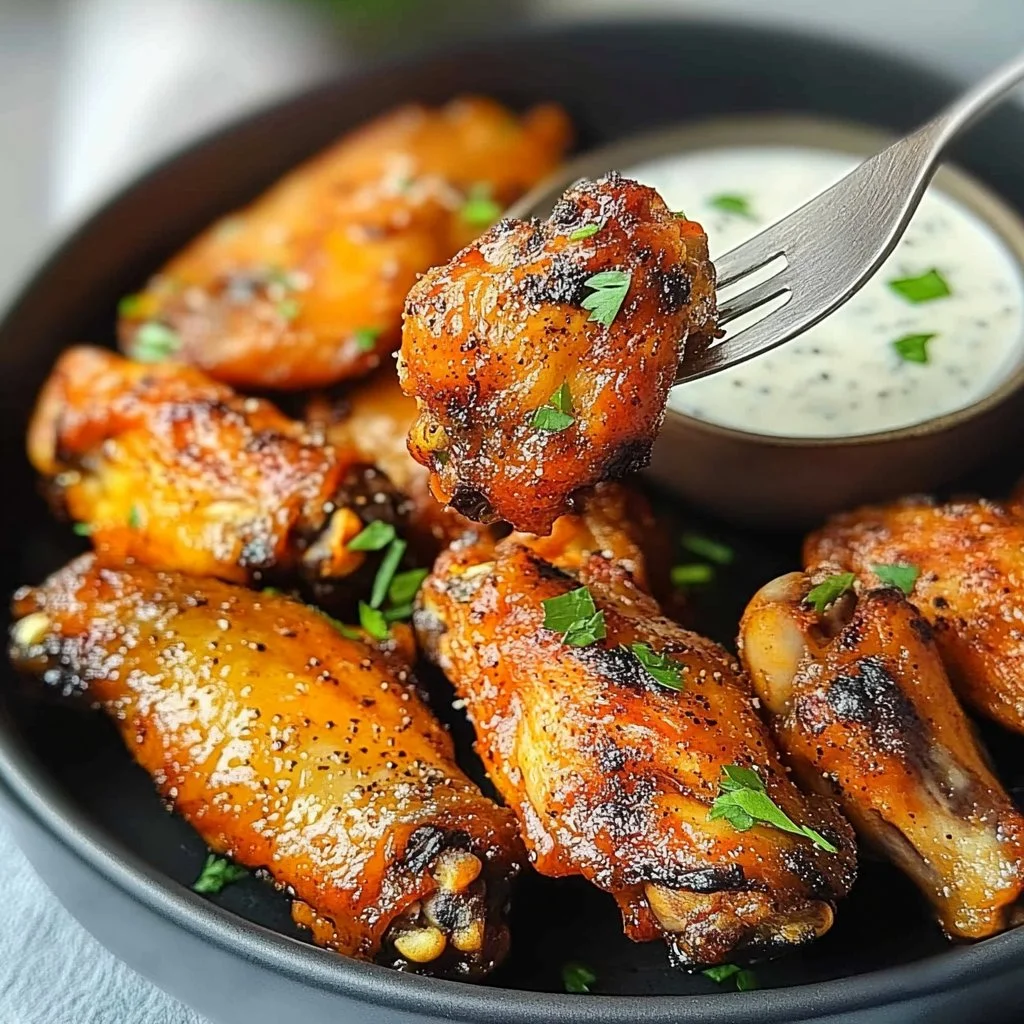
This recipe for air fryer chicken wings is perfect for busy families. The air fryer cooks the wings quickly while keeping them crispy without a lot of oil. This means you get healthy, satisfying chicken wings in less time than it takes to order takeout. You can spend more time enjoying your meal and less time in the kitchen.
Getting your kids involved in cooking is a great way to bond. They can help you toss the wings in the seasoning and sauce. Plus, the air fryer is much safer than frying in hot oil. With this recipe, you can whip up a family dinner that everyone will eagerly anticipate each week.
Process Overview
“This is where the magic happens—when the aroma fills the kitchen.”
Cooking chicken wings in the air fryer allows you to create a perfectly crispy exterior while sealing in the juicy flavor beneath. The process is straightforward, making it easy to prepare a crowd-pleasing dish. In just a few simple steps, you’ll have wings that will be the star of your family dinner.
Ingredients
- 2 pounds chicken wings
- 1 tablespoon baking powder
- 1 teaspoon salt
- 1 teaspoon black pepper
- Your favorite wing sauce (for tossing)
Let me share some personal tips for each of these ingredients.
-
Chicken Wings: Look for fresh wings that are plump. Frozen is fine too, but make sure to thaw them completely.
-
Baking Powder: This secret ingredient is key to achieving crispy skin. Don’t skip it; it works wonders.
-
Salt and Pepper: Salt enhances the flavor of the wings while pepper adds a bit of heat. Feel free to adjust to your taste.
-
Wing Sauce: Whether you prefer buffalo, barbecue, or teriyaki, choose a sauce that your family loves. You can also make your own sauce for a personal touch.
Directions
-
Preheat your air fryer to 400°F (200°C).
- Preheating ensures that your wings cook evenly and get that nice crispy exterior.
-
In a large bowl, combine the chicken wings with baking powder, salt, and pepper. Toss until the wings are well coated.
- Don’t be shy here; make sure each wing is evenly coated for the best flavor and texture.
-
Place the wings in a single layer in the air fryer basket.
- Working in batches is better than overcrowding to avoid steaming, which means less crispiness.
-
Cook for 25-30 minutes, shaking the basket halfway through to ensure even cooking.
- Set a timer to remind you to shake it; even cooking means delicious, crispy wings for everyone.
-
Once cooked, toss the wings in your favorite sauce or serve as is, lightly seasoned.
- If you’re serving a crowd, consider letting each person choose their sauce for a fun family experience.
Serving
Serving chicken wings family-style is the way to go. You could set up a fun wing bar with various sauces, sliced veggies, and ranch or blue cheese dressing on the side. Grab some plates, and let everyone mix and match flavors. Make it a casual meal where everyone can grab a wing and enjoy at their leisure. This makes for relaxed family time where everyone can talk and laugh over a great meal.
Storage
If you have leftovers (though I doubt you will), you can store your wings in an airtight container in the refrigerator for up to three days. To reheat, place them back in the air fryer at 350°F (175°C) for about 10 minutes for the best results. This will help them regain their crispiness and warmth, making them taste fresh again.
Kitchen Notes
- Use tongs for easy handling of the wings when transferring them to and from the air fryer.
- If you like extra crispy wings, increase the cooking time by a few minutes.
- Marinate the wings in your sauce for some hours before cooking for more intense flavor.
- Replace baking powder with cornstarch for a gluten-free option.
- Clean your air fryer after use to keep it in top condition.
Variations
This recipe is so versatile. Here are a few ideas to cater to different tastes or dietary needs:
- Classic Buffalo: Toss the wings in a classic buffalo sauce after cooking.
- BBQ Delight: Swap out the sauce for your favorite barbecue sauce for a sweeter twist.
- Teriyaki Flavor: For a sweet Asian flair, try tossing the wings in teriyaki sauce.
- Lemon Pepper: Mix lemon zest and black pepper for a zesty, non-sauce option.
- Vegetarian Alternative: Try air frying cauliflower wings using the same method and sauce.
FAQ
1. Can I make these wings ahead of time?
Yes, you can cook them ahead of time and reheat them in the air fryer before serving.
2. Are these wings gluten-free?
Yes, as long as your wing sauce is gluten-free, this recipe is gluten-free.
3. How do I ensure crispy wings?
Make sure to coat them evenly in baking powder and not overcrowd the air fryer basket.
4. Can I cook frozen wings in the air fryer?
Yes, you can. Just increase the cooking time by about 10 minutes.
5. What should I serve with chicken wings?
Great side options include celery sticks, carrot sticks, and a fresh salad or potato wedges.
In conclusion, air fryer chicken wings are a wonderful dish to bring family and friends together. With a simple recipe, you can create a meal that is easy to prepare and bursts with flavor. The kitchen fills with the mouthwatering aroma of wings, and the laughter around the table makes mealtime special. So gather your loved ones, and enjoy these delicious wings together. Happy cooking!
22. The Best Teriyaki Chicken Rice Bowl
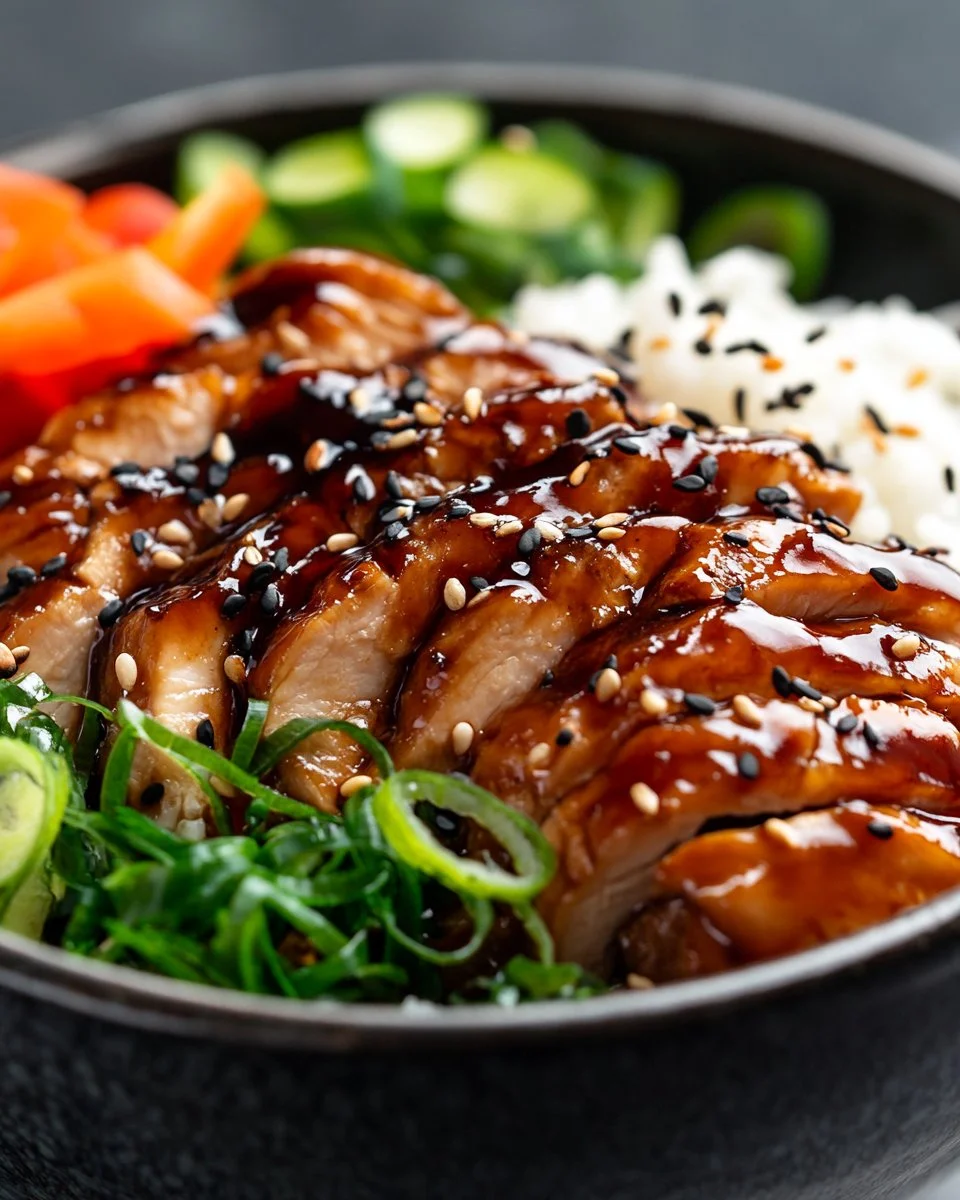
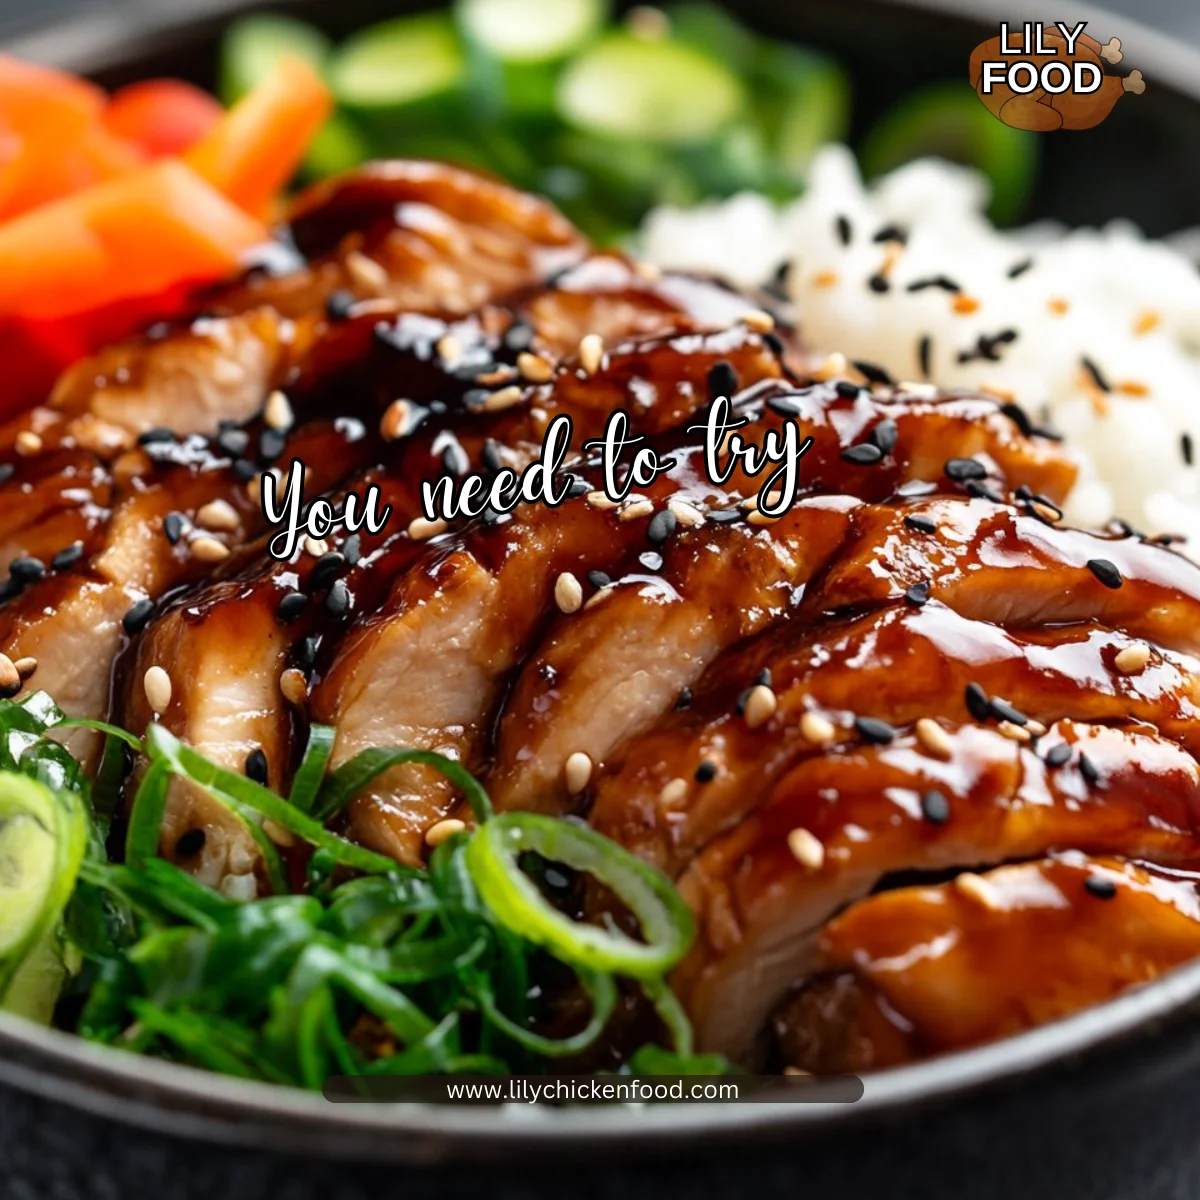
Nothing beats the comforting smell of teriyaki chicken simmering on the stove. The sweet and savory aroma fills the kitchen as the chicken sizzles and caramelizes. You can almost hear the rice bubbling away as it absorbs the flavors. This is truly a dish that warms not just the stomach but the heart.
Why this works
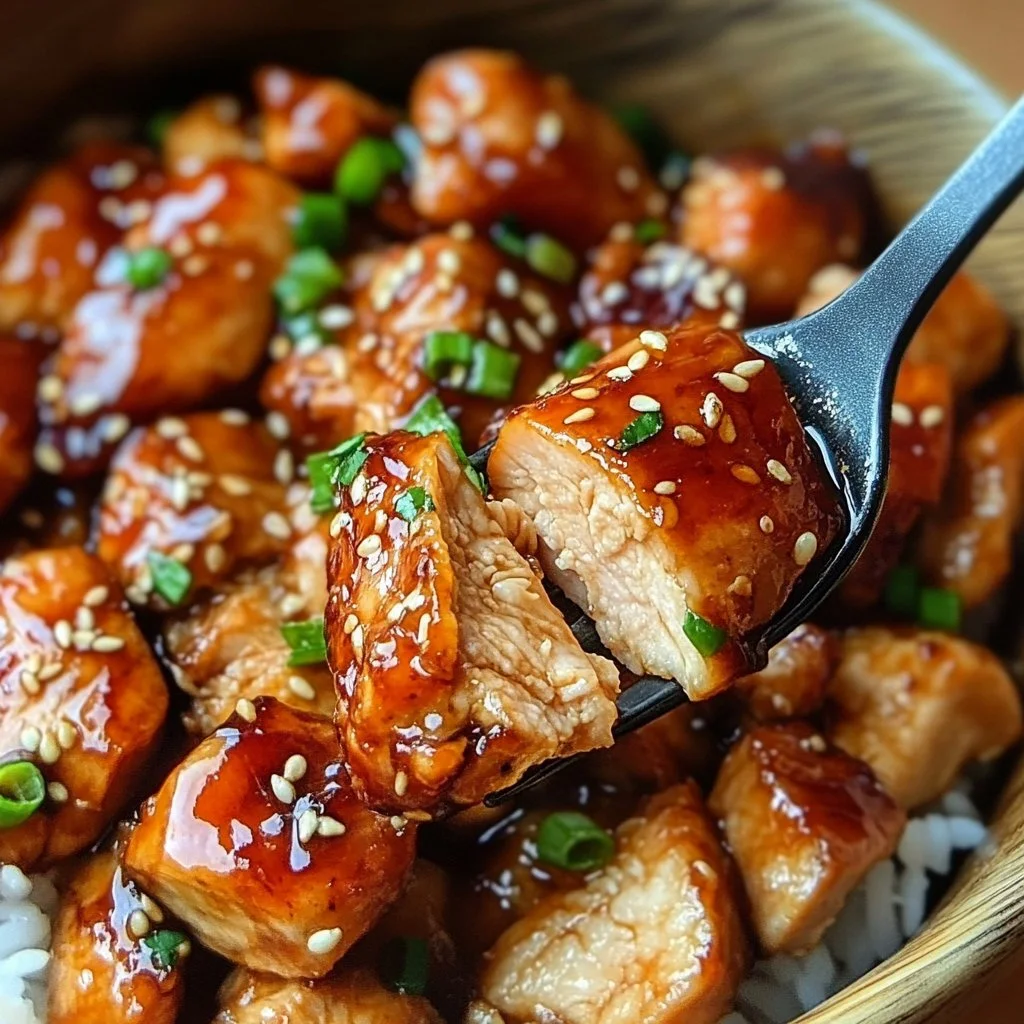
This Teriyaki Chicken Rice Bowl is not just a meal; it’s a family favorite made easy. With simple ingredients and quick prep, you can spend less time in the kitchen and more time enjoying dinner with your loved ones. The combination of juicy chicken, sticky rice, and vibrant vegetables makes this bowl a hit. Plus, it’s adaptable to personal tastes, making it perfect for everyone in the family.
Process Overview
“This is where the magic happens—when the aroma fills the kitchen.”
Preparing this dish is straightforward and efficient. In just 30 minutes, you can have this scrumptious meal on the table. The teriyaki sauce envelops the chicken, infusing it with flavor, while the rice acts as the perfect canvas.
Ingredients
- 1 pound boneless chicken thighs: Dark meat is juicier and more tender. Trim any visible fat for a better texture.
- 1 cup jasmine rice: This fragrant rice pairs wonderfully with teriyaki. Rinse it before cooking for better texture.
- 1/2 cup teriyaki sauce: You can use store-bought or homemade. Look for low-sodium options if you prefer.
- 1 tablespoon sesame oil: Adds a nutty flavor to the chicken. A little goes a long way.
- 1 cup broccoli florets: Fresh or frozen, they add a nice crunch and color. Steam them lightly to retain their brightness.
- 1 red bell pepper, sliced: Sweet and crunchy, it complements the dish well. Feel free to substitute with any bell pepper you prefer.
- 2 green onions, chopped: Sprinkle on top for a fresh, oniony bite.
- Sesame seeds for garnish: Optional, but they add a lovely visual touch.
Directions
-
Cook the rice: Rinse 1 cup of jasmine rice under cold water until the water runs clear. In a saucepan, combine the rinsed rice with 1.5 cups of water. Bring to a boil, then reduce to a simmer, cover, and cook for about 18 minutes. It’s okay if it’s bubbling; that means it’s cooking perfectly.
-
Prep the chicken: While the rice is cooking, chop 1 pound of boneless chicken thighs into bite-sized pieces. This helps them cook evenly.
-
Sauté the chicken: In a large skillet over medium-high heat, add 1 tablespoon of sesame oil. Once it’s hot, add the chicken pieces. Cook for 5-7 minutes, stirring occasionally, until they are browned and cooked through. The sizzle and color will bring a smile to your face.
-
Add the teriyaki sauce: Pour in 1/2 cup of teriyaki sauce over the chicken. Stir to coat and allow it to simmer for another 3-5 minutes. This is the moment when the magic happens; the chicken soaks in all those flavors.
-
Cook the veggies: Add 1 cup of broccoli florets and 1 sliced red bell pepper to the skillet. Stir often, cooking for an additional 3-4 minutes until the veggies are just tender. The vibrant colors will brighten your kitchen.
-
Fluff the rice: Once the rice is done, remove it from the heat and let it sit for a few minutes. Then, fluff it gently with a fork. It’s light and ready to absorb all those delicious juices.
-
Assemble the bowls: Spoon cooked rice into each bowl and top it generously with the teriyaki chicken and vegetables. Garnish with chopped green onions and a sprinkle of sesame seeds. Serve it warm.
Serving
Serve your Teriyaki Chicken Rice Bowl family-style. Let everyone build their own bowl to suit their taste. This is a fun way to engage the family at dinner, and everyone loves making their own creations. Just place everything on the table and enjoy the togetherness.
Storage
Store any leftovers in an airtight container in the fridge for up to 3 days. When reheating, use a microwave or a stovetop skillet. Sprinkle a little water to prevent the rice from drying out. Heat until warmed through, but be careful not to overdo it. Enjoying this meal again is just as delightful!
Kitchen Notes
- Keep marinated chicken in the fridge for quick cooking.
- Pre-cook your rice in batches to save time during the week.
- Use frozen veggies if you’re short on time. They steam beautifully in just a few minutes.
- Consider using a rice cooker for perfectly cooked rice every time.
- Make your teriyaki sauce ahead of time for extra convenience.
Variations
- For picky eaters: Substituting chicken with tofu or even shrimp can make this dish adaptable.
- Vegetarian: Use chickpeas instead of chicken and add more vegetables.
- Gluten-free: Make or buy gluten-free teriyaki sauce and use gluten-free soy sauce alternatives.
- Low-carb: Serve over cauli-rice instead of jasmine rice for a lighter option.
- Spicy twist: Add sriracha or chili flakes to the teriyaki sauce for some heat.
FAQ
1. Can I use frozen chicken?
Yes, just ensure it’s thawed properly before cooking for even results.
2. What if I don’t have jasmine rice?
You can substitute with long-grain or basmati rice; just adjust cooking times as needed.
3. Is teriyaki sauce spicy?
Teriyaki sauce is primarily sweet and savory, but it can be spicy if you add hot ingredients.
4. Can I make this ahead?
Absolutely! You can marinate the chicken or even cook the whole dish and store it for later.
5. What should I serve on the side?
A simple green salad or some steamed edamame complements this meal beautifully.
In closing, I hope this Teriyaki Chicken Rice Bowl becomes as beloved in your home as it is in mine. Sharing meals with your family fosters connection and joy. So gather around the table, savor each bite, and create memories that linger long after the last meal is shared. Cooking does not just nurture the body; it nourishes the soul. Enjoy!
23. 30-Minute Teriyaki Chicken Bowl Your Family Will Crave
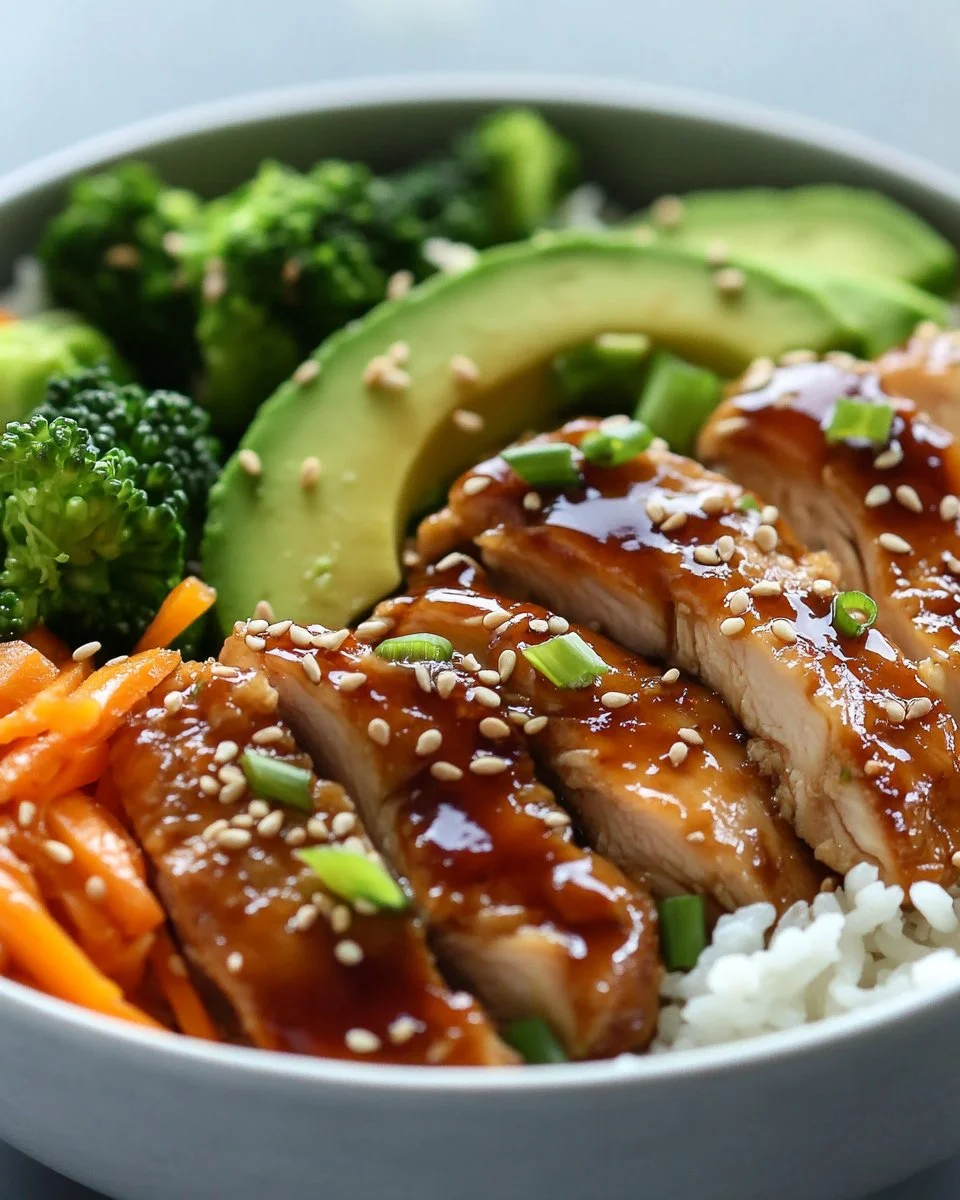
The tantalizing aroma of teriyaki chicken wafts through the air as it sizzles in the skillet. The sounds of bubbling sauce and crackling chicken fill the kitchen, creating a warm atmosphere that signals dinner is ready. As the colors of the vegetables pop and the rice sits perfectly fluffy, you know this meal will be a hit. Gather your family around the table, and prepare for a feast that not only satisfies hunger but also brings everyone together.
Why This Works
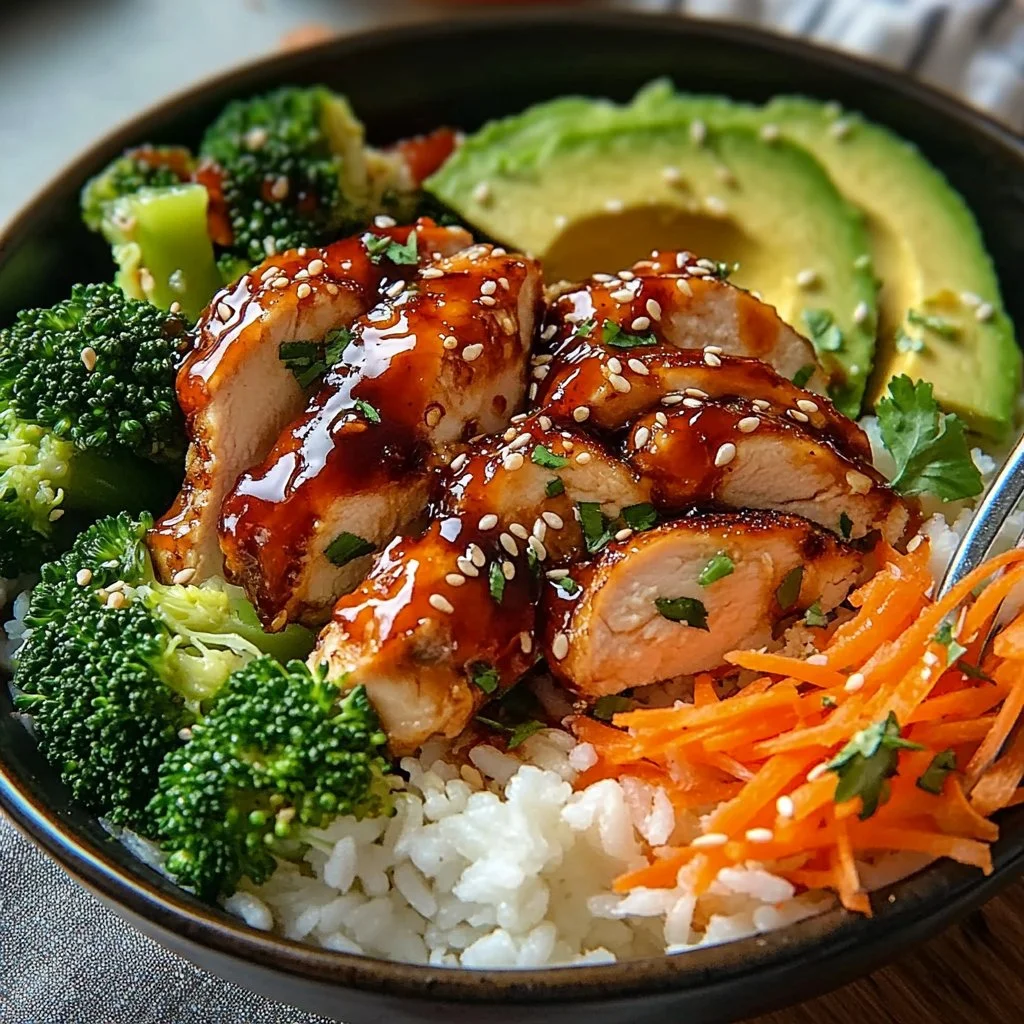
This 30-minute teriyaki chicken bowl is perfect for busy families. It combines fresh veggies, tender chicken, and a zesty sauce, making it a wholesome meal everyone will love. In just half an hour, you can create a dish that not only tastes great but also looks beautiful on the dinner table. The quick cooking time means you can enjoy family meals without spending all evening in the kitchen.
Process Overview
“This is where the magic happens—when the aroma fills the kitchen.”
This recipe is all about efficiency and flavor. You will quickly prep your ingredients, cook the chicken, and assemble the bowls. Each step builds on the last, making it simple to create a delightful meal in no time. Your family will be begging for seconds as the delicious flavors come together in a single bowl.
Ingredients
For this quick and delicious teriyaki chicken bowl, you’ll need:
- 1 ½ lb boneless, skinless chicken thighs: These cook quickly and stay tender and juicy.
- 1 cup teriyaki sauce: This is the star of the dish. Look for a sauce that has a good balance of sweetness and saltiness.
- 1 tablespoon vegetable oil: A neutral oil works best for sautéing.
- 2 cups cooked white rice: A great base for the bowl. Use leftover rice or cook it fresh.
- 2 cups broccoli florets, steamed: Broccoli adds color and crunch. You can use frozen or fresh.
- 1 cup shredded carrots: These add a touch of sweetness and are rich in vitamins.
- 1 ripe avocado, sliced: Avocado gives a creamy texture that complements the dish perfectly.
- 2 tablespoons mayonnaise: This adds a nice creaminess.
- 1 tablespoon sriracha: Adjust the amount to your spice level preference.
- 1 teaspoon sesame oil: Adds a lovely nutty flavor to the mayo.
- 1 tablespoon sesame seeds: For garnish and extra texture.
Tips:
- When shopping for chicken thighs, look for those with a good amount of marbling for the best flavor.
- If you want to speed up cooking, use leftover rice that’s been chilled in the fridge.
- Steaming broccoli can also be done in the microwave for convenience.
- Slicing the avocado just before serving ensures it stays bright green.
- Personalize the spicy mayo by adjusting the sriracha to fit your family’s heat tolerance.
Directions
- Heat vegetable oil in a skillet over medium-high heat. Listen for that comforting sizzle as the oil heats up.
- Add chicken thighs and cook for 4–5 minutes per side until fully cooked and slightly crispy. Enjoy the golden-brown color developing on the chicken.
- Pour teriyaki sauce over the chicken and simmer for 2–3 minutes until thick and glossy. This is when the flavors meld beautifully.
- Remove chicken from heat and slice into strips. Make sure to cut against the grain for tenderness.
- In a small bowl, mix mayonnaise, sriracha, and sesame oil to make a creamy and spicy mayo. Keep tasting until it’s just right for your family.
- Assemble bowls with cooked rice, broccoli, carrots, and avocado. Each bite will have layers of flavor.
- Top with sliced teriyaki chicken, drizzle with spicy mayo, and sprinkle with sesame seeds before serving. Don’t be afraid to make it pretty!
Serving
To serve this teriyaki chicken bowl family-style, set out each item in separate bowls. This allows everyone to customize their meal just the way they like it. You can let the kids go wild with their toppings or keep it simple for the adults. It becomes a fun interactive experience at the dinner table, making mealtime even more enjoyable.
Storage
If you have leftovers, store them in an airtight container in the fridge for up to three days. When reheating, I recommend using the microwave or a skillet over medium heat. Add a splash of water to keep the chicken moist while you warm it up. Just be careful not to overcook it again.
Kitchen Notes
- Meal Prep: Chop veggies ahead of time to save more time on busy weeknights.
- Cook Extra Rice: Make extra rice so you can easily whip up this dish again or use it for another meal.
- Marinate Chicken: If you have time, marinate the chicken in teriyaki sauce for 30 minutes before cooking to deepen the flavor.
- Use a Grill Pan: For added flavor, try grilling the chicken in a grill pan instead of a skillet.
- Frozen Vegetables: If you’re in a rush, frozen mixed vegetables can be a great substitute for fresh.
Variations
- Picky Eaters: If your family isn’t fond of broccoli, consider using snap peas or bell peppers. These still provide great color and crunch.
- Gluten-Free: Use a gluten-free teriyaki sauce to make the dish suitable for gluten-sensitive diets.
- Vegetarian Option: Substitute chicken with firm tofu. Follow the same cooking process, ensuring it’s nicely browned.
- Whole Grains: Swap white rice for brown rice or quinoa for a healthier option.
- Low-Carb: Serve the teriyaki chicken over a bed of cauliflower rice to keep it lighter.
FAQ
1. Can I use chicken breast instead of thighs?
Yes, but be aware that chicken breasts can dry out more easily. Adjust cooking time accordingly.
2. How can I make this dish spicier?
Add more sriracha to the sauce or even sprinkle some red pepper flakes on top for an extra kick.
3. Can I prepare this dish ahead of time?
You can prep the ingredients a day in advance, but it’s best to cook everything fresh for optimal flavor.
4. What can I substitute for teriyaki sauce?
You might try a homemade sauce using soy sauce, honey, ginger, and garlic for a similar flavor.
5. Is this dish suitable for freezing?
I don’t recommend freezing the assembled bowls since the avocado will not hold up well after freezing. However, cooked chicken and rice can be frozen separately.
As you gather your family around the table to enjoy this 30-minute teriyaki chicken bowl, remember it’s not just about the meal. It’s about sharing moments, laughter, and love. With this recipe, you’ll create lasting memories cooking together in the kitchen. So pull out your pots and pans, and get ready to make a meal your family will crave again and again. Happy cooking!